Front panel, Net3 remote video interface, N o t e – ETC Net3 Remote Video Interface (RVI) Setup Guide User Manual
Page 2
E T C S e t u p G u i d e
Net3 Remote Video Interface
Net3 Remote Video Interface Setup Guide
Page 2 of 4
Electronic Theatre Controls, Inc.
Step 2:
Connect any monitors to the proper ports on the back of the RVI.
Step 3:
Connect the USB mouse and keyboard to the USB connectors.
Step 4:
Attach a network ethernet cable to the Ethernet port. All communications to the
associated control console are made over this Ethernet connection.
• Connection to the console may be made either directly using a Cat5 or better null-
modem cable or through an Ethernet hub or Ethernet switch using standard Cat5 or
better patch cables.
Step 5:
When all connections are made, switch on the hard power switch
Step 6:
Press the soft power switch, on the front of the unit, to power up the RVI.
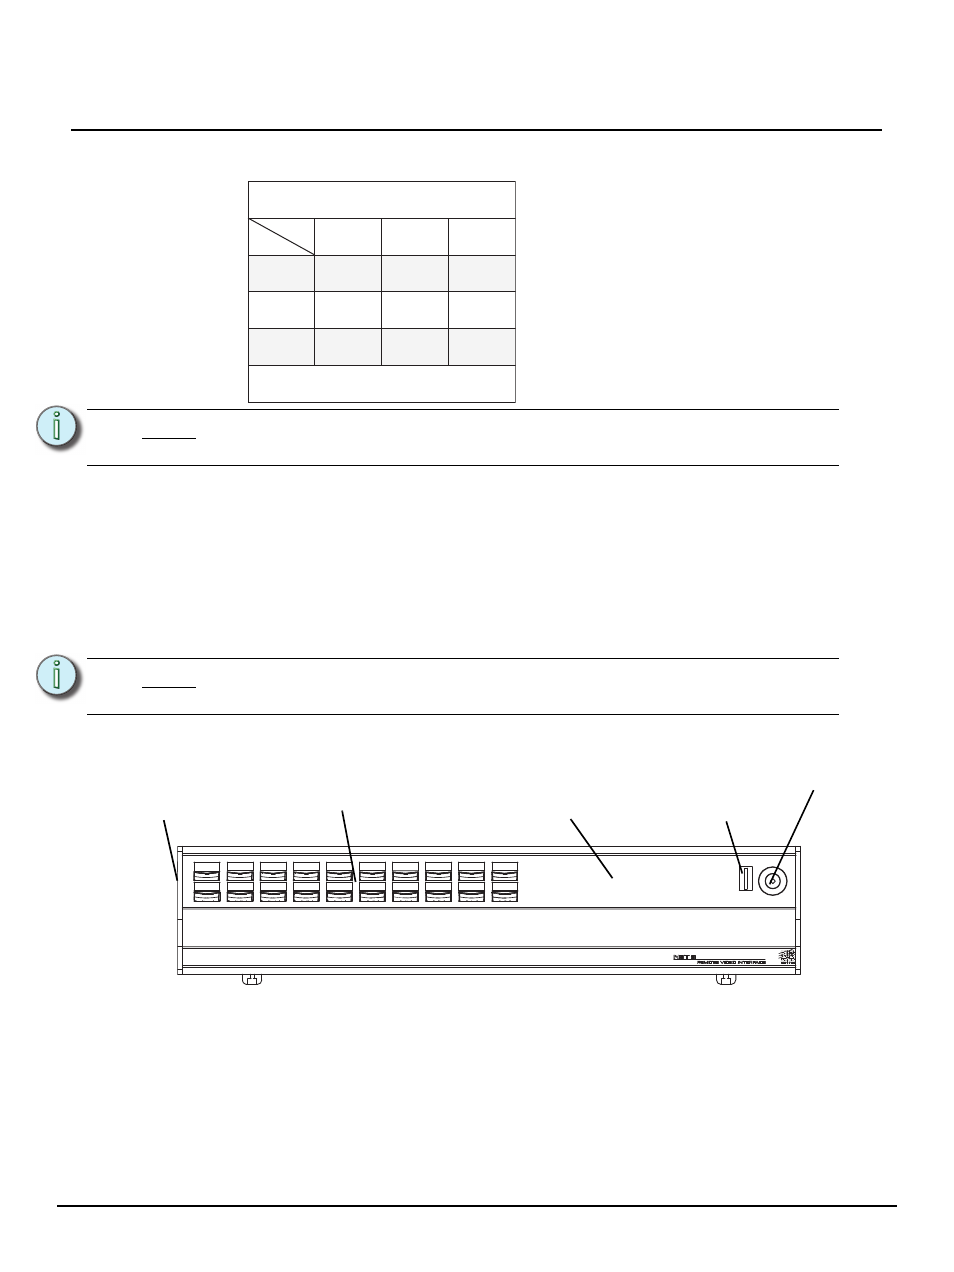
Front Panel
Step 1:
Press the soft power switch to activate the RVI (check rear panel to ensure power is
connected and hard power switch is on).
Step 2:
Backlit indicators identify the operating status (master, backup, client, and so on) of the
unit.
Step 3:
USB port is provided for easy show loading to or from a USB storage device.
Step 4:
20 buttons are configurable from the Eos Configuration Utility (ECU). They are set to a
default configuration. The label strips for these buttons are removable and reversible. Any
changes to the button configuration can be written on the opposite side in pencil.
N o t e :
The RVI requires monitors that are at least compatible with Windows 7 and have
a minimum resolution of 1280x1024.
N o t e :
If the unit does not power up, check the hard power switch, on the rear panel, to
ensure it is switched on.
Display Port
Display Port
DVI-I Port
DVI-D Port
DVI
VGA
Yes
No
Yes
with Adapter
Yes
Yes
No
No
Yes
with Adapter
Yes
with Active
Adapter
Net3 RVI supports up to 2 monitors using the
following combinations:
Multitouch monitors need to be Windows 7 or 8 Compatible.
Physical
Port
Signal
Type
Live
Blind
Tab
Escape
Select
Scroll Lock
M001
M002
M003
M004
Stop/Back
M005
M006
M007
M008
GO
Primary
Master
Backup
Sync
Client
Offline
Backlit
indicators
Soft Power
Switch
Removable
label strip
USB
20 command
keypad buttons