Setup and connections, Rerun portable faceplate configuration – Doug Fleenor Design RERUN-P User Manual
Page 4
Page 4 of 12
SETUP AND CONNECTIONS
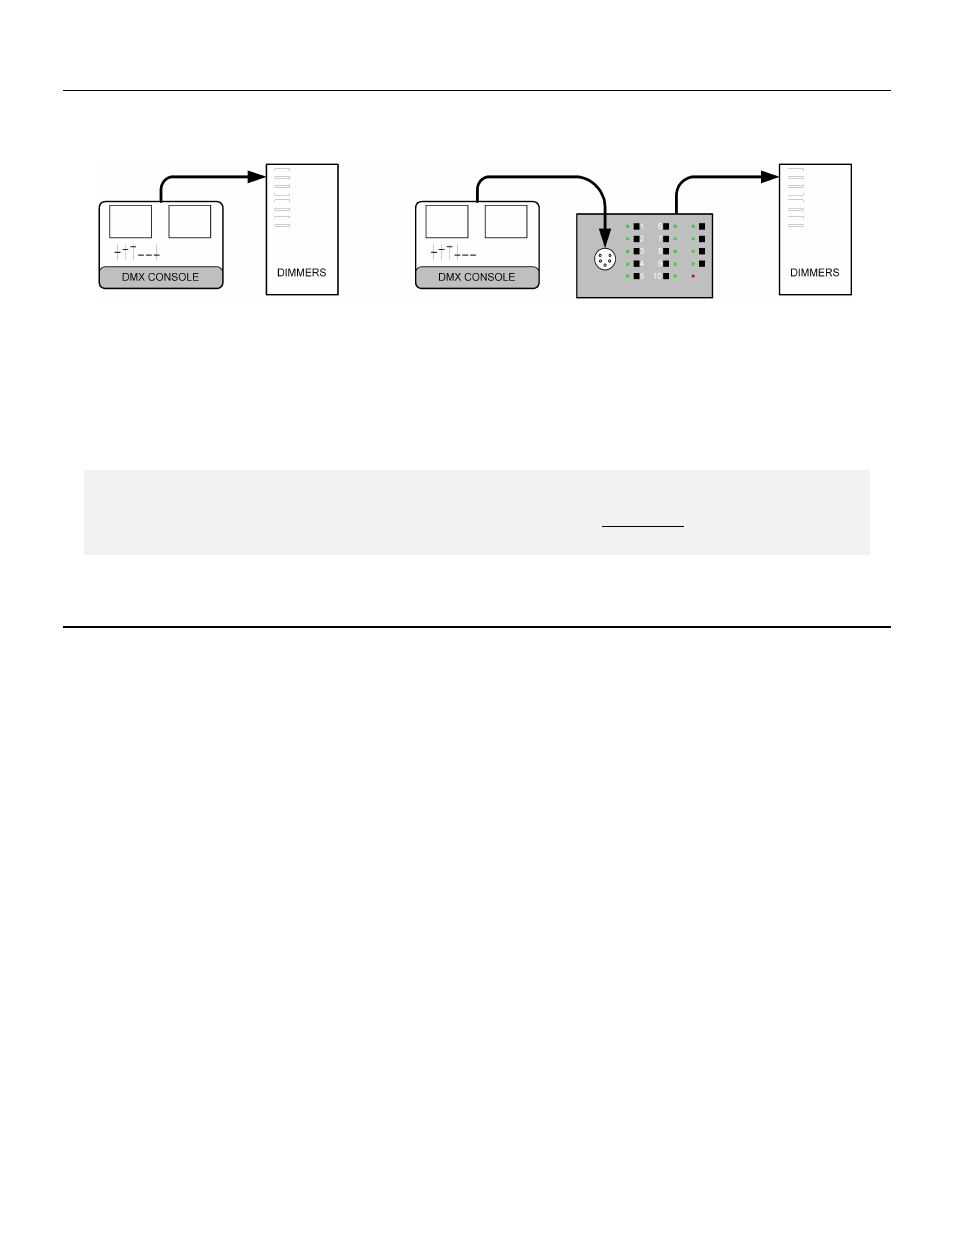
The Rerun Portable should be installed between the console and DMX512 receiving devices. Typically, it
should be within arms length of the console operator.
Remove the cable connected to the output of the console. Use a short DMX512 cable to connect the output of
the console to the DMX512 input of the Rerun Portable. Connect the cable that was originally connected to the
console to the DMX512 output connector of the Rerun Portable . This inserts the Rerun Portable into the
DMX512 signal path.
Plug the Rerun Portable power supply into mains power.
Note:
!
DMX512 from a console will not pass through if
the Rerun Architectural is not powered .
RERUN PORTABLE FACEPLATE CONFIGURATION
Each Rerun Portable has six jumpers, JP1 through JP6, that select different modes of operation. The factory
default is to have all jumpers installed.
JP1
Record Lockout - When removed, the [RECORD] button is disabled and show editing is disabled. When
installed, recording of shows is enabled.
JP2
Hold Last Look - When removed, upon the loss of signal the last valid input is held on the output. When
installed, upon the loss of signal the last active show is started.
JP3
Hardware Test - Rerun Portable enters a hardware test mode when this jumper is removed.
JP4
Leave installed. This jumper is only removed for factory use.
JP5
When installed, incoming DMX512 signals will override the Rerun Portable levels and all shows will be
locked out. When removed, incoming levels will be combined with those of the active show on the Rerun
Portable in a highest-takes-precedence (HTP) fashion.
JP6
CF Card initialize - When removed, the memory card is erased. Use with CAUTION!