Dascom 7206 Cutter Installation Guide User Manual
Page 6
– 6 –
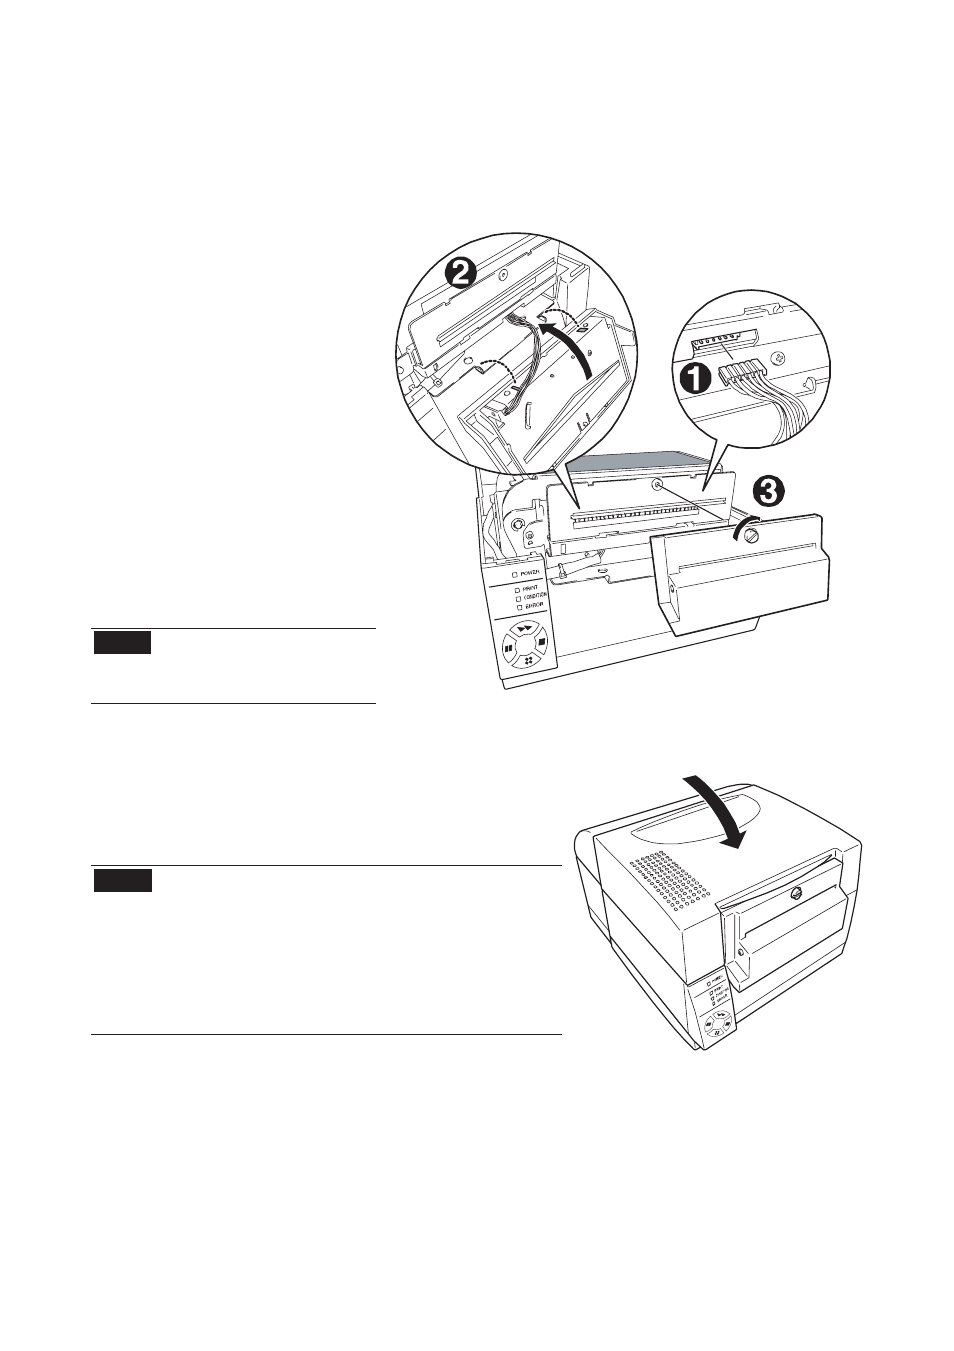
Installing the cutter unit
(9)
Plug the connector of the cutter-unit cable into the connector on the
cutter stand unit.
(10)
Align the indentations (2) at the bottom of the cutter unit with the
protrusions (2) on the
cutter stand unit, and
then fasten the slotted
head screw on the
cutter unit with a
flat-blade screwdriver.
Take care that the
cutter unit does not
pinch the cable.
(11)
After the cutter unit is
installed, reinstall the
motor cover and the
optional unit
connector cover on
the printer.
Note
Be very careful as
the motor may be
hot.
(12)
Close the top cover.
(13)
Connect the power cord and turn on the
power switch of the printer.
Note
Removing the cutter unit
To remove the cutter unit from the printer,
follow the installation steps in reverse order.
Hold the end of the cutter unit by your
hand in order that the cutter unit does not
fall from the printer when removing the
fastening screw.