Service – Danuser 2312 AugerBucket User Manual
Page 16
16
STEP 5: Slide the auger away from the motor until the collar clears the shaft.
STEP 6: Pull up and slide the auger toward the motor end of the bucket until the auger is
free of the discharge casing.
STEP 7: Place the auger on a secure work platform. Use a hammer and chisel to remove the
lock nuts from the flights to be replaced.
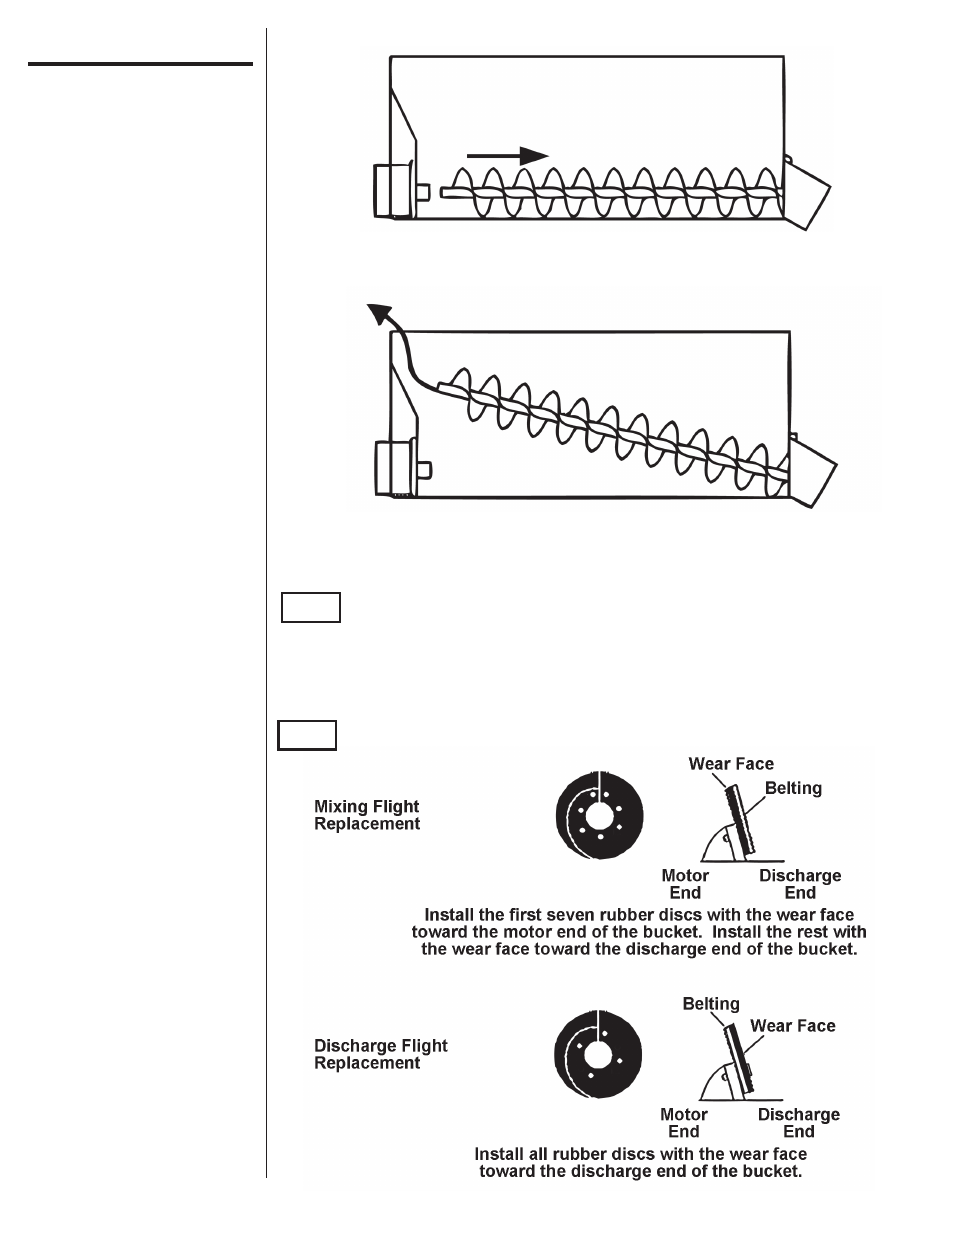
STEP 8: Using the supplied hardware, replace worn rubber flights per the instructions
below.
Service
(continued)
Mixing augers require seven sets of hardware per flight, and discharge augers
require four sets of hardware per flight.
NOTE
One disc has been cut down in size. This disc replaces the disc closest to the
motor end of the bucket.
NOTE
This manual is related to the following products: