Step 9: backfill sides, Step 10: install overflow (rainxchange, Systems) – Aquascape AquaBlox (29492) User Manual
Page 8
8
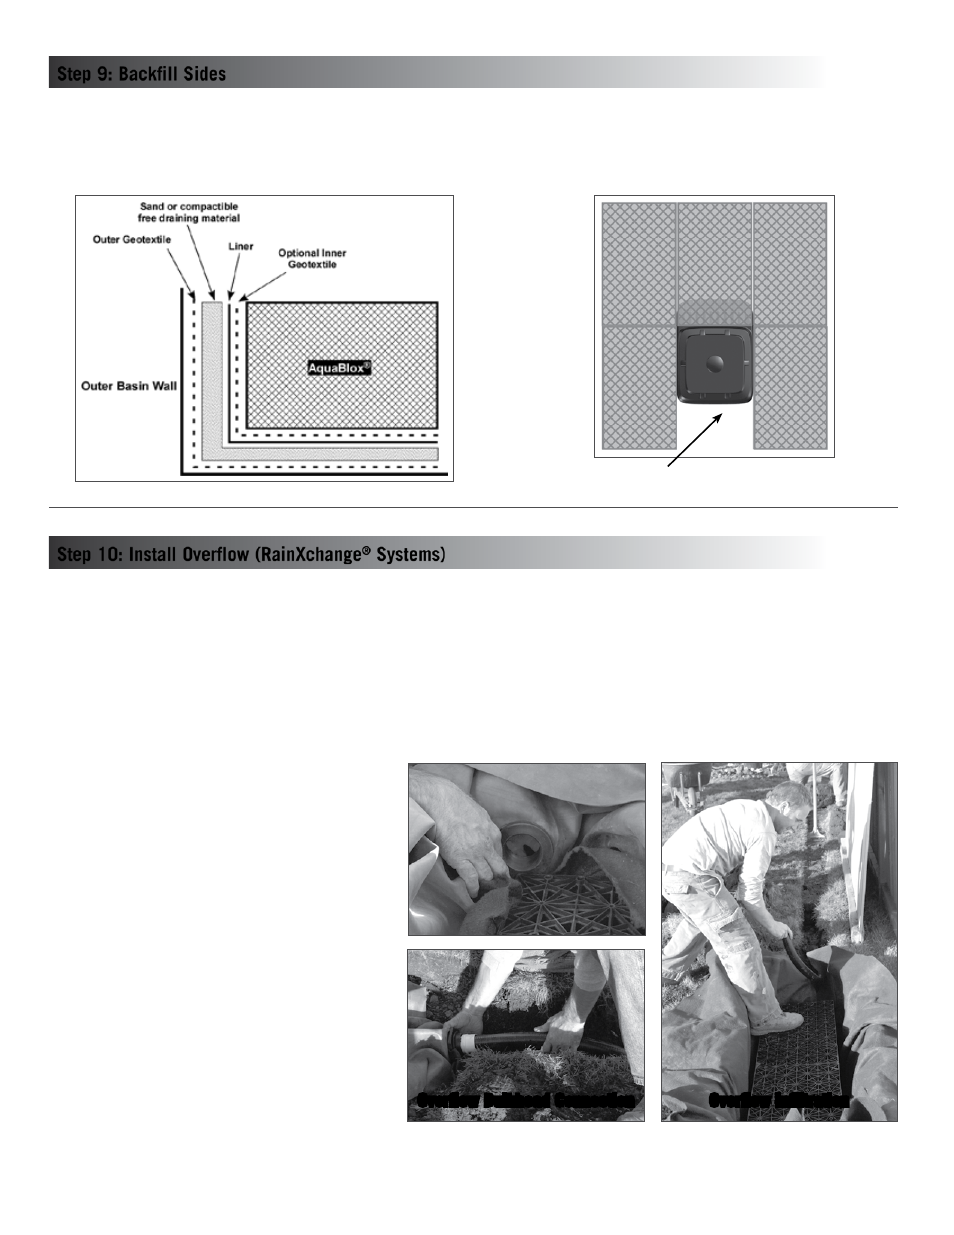
The excess excavation along the outside perimeter of the storage basin can be backfilled once all of the AquaBlox
®
are installed. Use sand or
compactible free draining material to backfill evenly on all sides to secure the AquaBlox
®
into position.
Note: Make sure to evenly distribute backfill
material around the perimeter of the basin, working your way up to final grade. This will prevent AquaBlox
®
from shifting while backfilling. When
backfilling be sure to add the material between outer layer of geotextile and liner. This will help with holding the AquaBlox
®
in place and drainage.
Backfill materials containing clay should not be used.
Step 9: Backfill Sides
Backfill gravel here
The RainXchange
®
Water Storage system requires an overflow to be installed in order to manage any excess water entering the basin. The overflow
should be located as high as possible in the storage basin in order to maximize the amount of water storage. The overflow is installed by cutting a hole
in the liner to the diameter of the male threads on the bulkhead adaptor included in the overflow kit. The bulkhead can be installed into the liner with
the rubber gasket located inside the storage basin and the plastic gasket located on the outside of the storage basin liner. A small bead of silicone can
be spread around the rubber gasket where it meets the liner to help ensure a water tight seal. Tighten down the large bulkhead nut being careful to not
over-tighten and crack the bulkhead. An adjustable overflow elbow is included with the overflow kit. Add Teflon tape or silicone around the threads of the
elbow and install into the bulkhead on the inside of the storage basin. This will allow fine adjustment of the overflow height. Add Teflon tape or silicone
around the threads of the PVC male pipe adaptor and install into the bulkhead on the outside of the storage basin. PVC pipe can then be primed and
glued into the overflow and run to the overflow location making sure to maintain a decrease in elevation of 1 inch for every 10 feet in run of overflow
pipe for proper water flow by gravity.
Overflow Bulkhead Connection
Overflow Infiltration
Step 10: Install Overflow (RainXchange
®
Systems)
Managing the overflow will be determined by the conditions
on the site. One easy method of managing the overflow is
to create an infiltration area using the AquaBlox
®
wrapped
in geotextile material. The quantity of AquaBlox
®
required
will be based on the site’s soil percolation characteristics.
See diagrams for example of overflow configuration using
AquaBlox
®
. There may be other options based on the site
characteristics, such as discharging the overflow to a
drainage location on the property or directly back into the
stormwater drain. Choose the best solution based on the
site’s characteristics.