Tank installation instructions, Waterfall vault/snorkel, And centipede – Aquascape AquaBlox (29492) User Manual
Page 4: Filters, Pondless, Waterfall vault snorkel, Vault and centipede
4
Tank Installation Instructions
Excavate a recessed area for the Pondless
®
Waterfall Vault/Snorkel
™
. This positions the vault at the lowest point in the storage basin allowing
maximum water availability for the pump system.
For RainXchange
®
Water Storage Kits please refer to diagram section for Snorkel
™
and Centipede
™
locations.
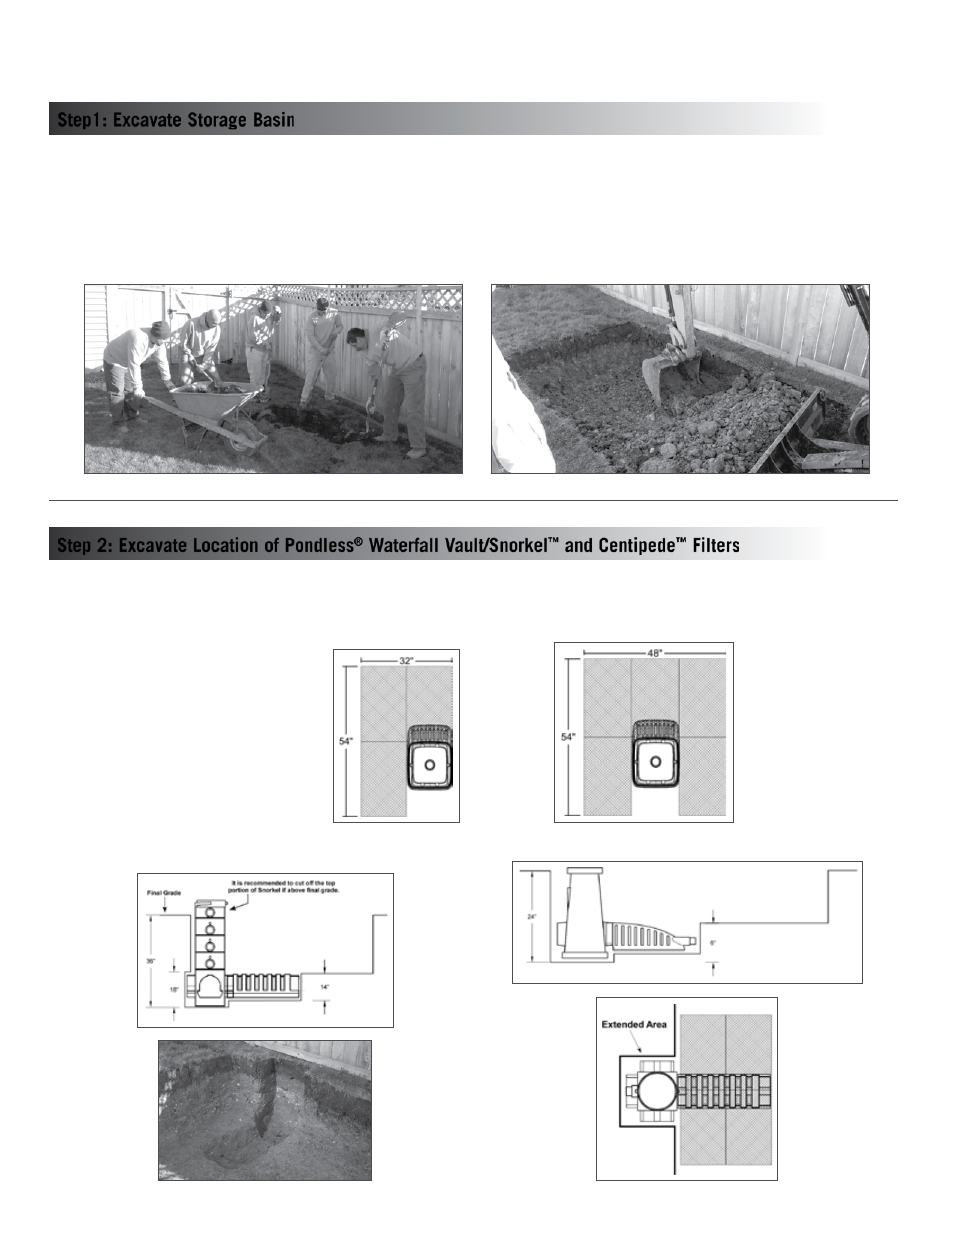
Step1: Excavate Storage Basin
Step 2: Excavate Location of Pondless
®
Waterfall Vault/Snorkel
™
and Centipede
™
Filters
Note: An additional 6" of excavation is
recommended per side.
Pondless
®
Waterfall Vault location
when using 3 AquaBlox
®
For maximum structural strength
on larger storage basins locate
Pondless
®
Waterfall Vault
between AquaBlox
®
It is recommended to lay out the position of the Pondless
®
Waterfall Vault/Snorkel
™
and AquaBlox
®
prior to excavation in order to determine actual
excavation dimensions. Please note an additional 6” of excavation is recommended per side of the basin to allow for: AquaBlox
®
dimensions, sufficient
backfill material and compaction required during backfilling. See the diagrams below for examples of Pondless
®
Waterfall storage basin configurations.
Larger storage basins can be constructed by increasing the quantity of Small AquaBlox
®
and/or using the optional Vault Extension in combination with
the Large AquaBlox
®
. Liner and geotextile dimensions will vary according to the quantity and size of AquaBlox
®
used.
Note: Check for presence of high water table in the excavation, which must be kept at levels a minimum of 3 feet below the bottom of the
AquaBlox
®
structure at all times.
Pondless
®
Waterfall Vault
Snorkel
™
Vault and Centipede
™