Led 120v dimmable panel, Ceiling – American Lighting K-1063 User Manual
Page 2
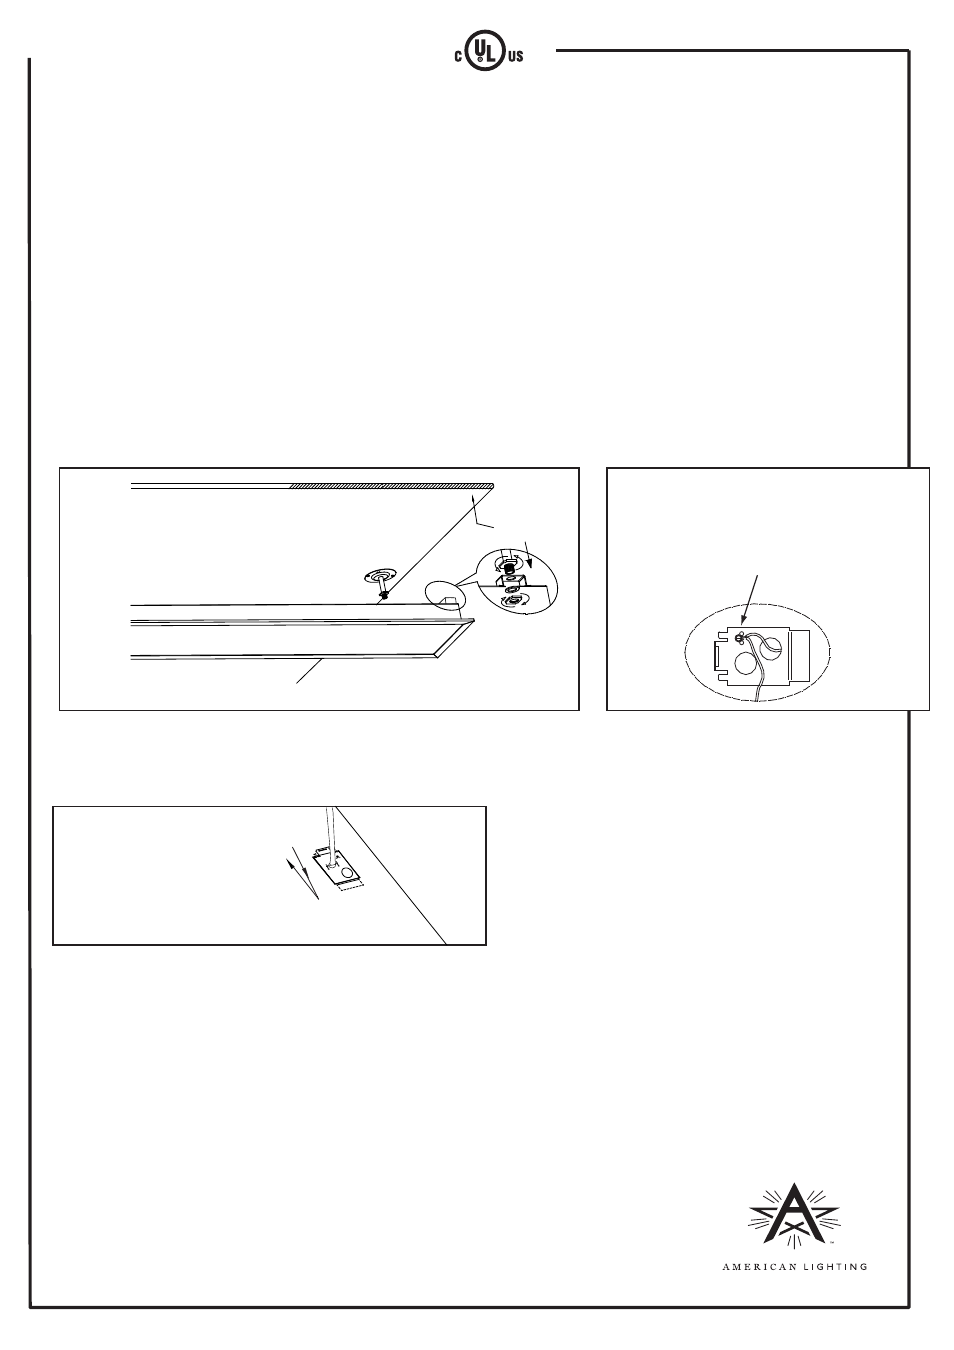
Figure 9
RV1311
www.americanlighting.com
Page 2 of 2
WARNING: These products may represent a possible shock or fire hazard if improperly installed or attached in
any way. Products should be installed in accordance with these instructions, and with current electrical codes
and/or the current National Electric Code (NEC).
Warning: To avoid electric shock, disconnect power prior to installation.
Caution: Injury to persons and damage to the fixture and/or mounting surface may result if the fixture is pulled
from the surface. To reduce the likelihood of such injury or damage, mount on a surface that is mechanically
sound.
LED 120V Dimmable Panel
Surface Mount Installation Instructions for K-1063 (SKU = PK-1X4-41-S)
Attach fixture to standoffs using washers
and nuts provided as shown at right.
11. Replace cover of wiring compartment. Be sure that the wires are not pinched or damaged by any part of the housing or cover.
See Figure 9.
Additional Safety Measures:
1. To avoid electrical shock, do not turn on fixture with missing or damaged lens.
2. There are no serviceable parts inside LED panel.
3. Suitable for indoor dry locations only.
4. This product is suitable for use in dimming circuits. For a list of recommended dimmers, visit www.americanlighting.com.
CONTINUED FROM REVERSE - Make sure power at source before proceeding!
NOTE:
Use minimum 18AWG solid copper wires. AC supply should be 120V protected by circuit breaker or fuse.
7. Attach fixture’s suspension mounting brackets to the standoffs using washers and nuts provided. See Figure 7.
8. With fixture now attached to ceiling for hands-free work, route supply wires connector through cable
connector/knockout assembly in wiring compartment cover and snap mating connectors together.
9. Tighten cable connector onto supply wires’ jacket to provide strain relief.
10. Attach green or bare ground wire from supply and fixture’s ground wire to underside of wiring compart-
ment cover using ground screw. See Figure 8.
Replace cover on wiring
compartment being careful
that no wires are pinched or
damaged in any way.
Ceiling
Figure 7
Figure 8
Connect ground
wires from fixture
and from supply
to underside of wiring
compartment
cover with ground screw.
Detail
(end view)