3” e-pro led recessed kit, Installation instructions for ep3 and ep3s series – American Lighting EP3S Series User Manual
Page 2
Align torsion clips with
housing and push
trim/light engine gentely
to ceiling until seated.
3” E-Pro LED Recessed Kit
Installation Instructions for EP3 and EP3S Series
Figure 6
WARNING: To avoid electric shock or injury to persons, disconnect power prior to
installation. Caution: Injury to persons and damage to the fixture and/or mounting
surface may result if the fixture is not properly installed. To reduce the likelihood of
such injury or damage, read and follow all instructions.
INSTALLING RECESSED HOUSING (continued):
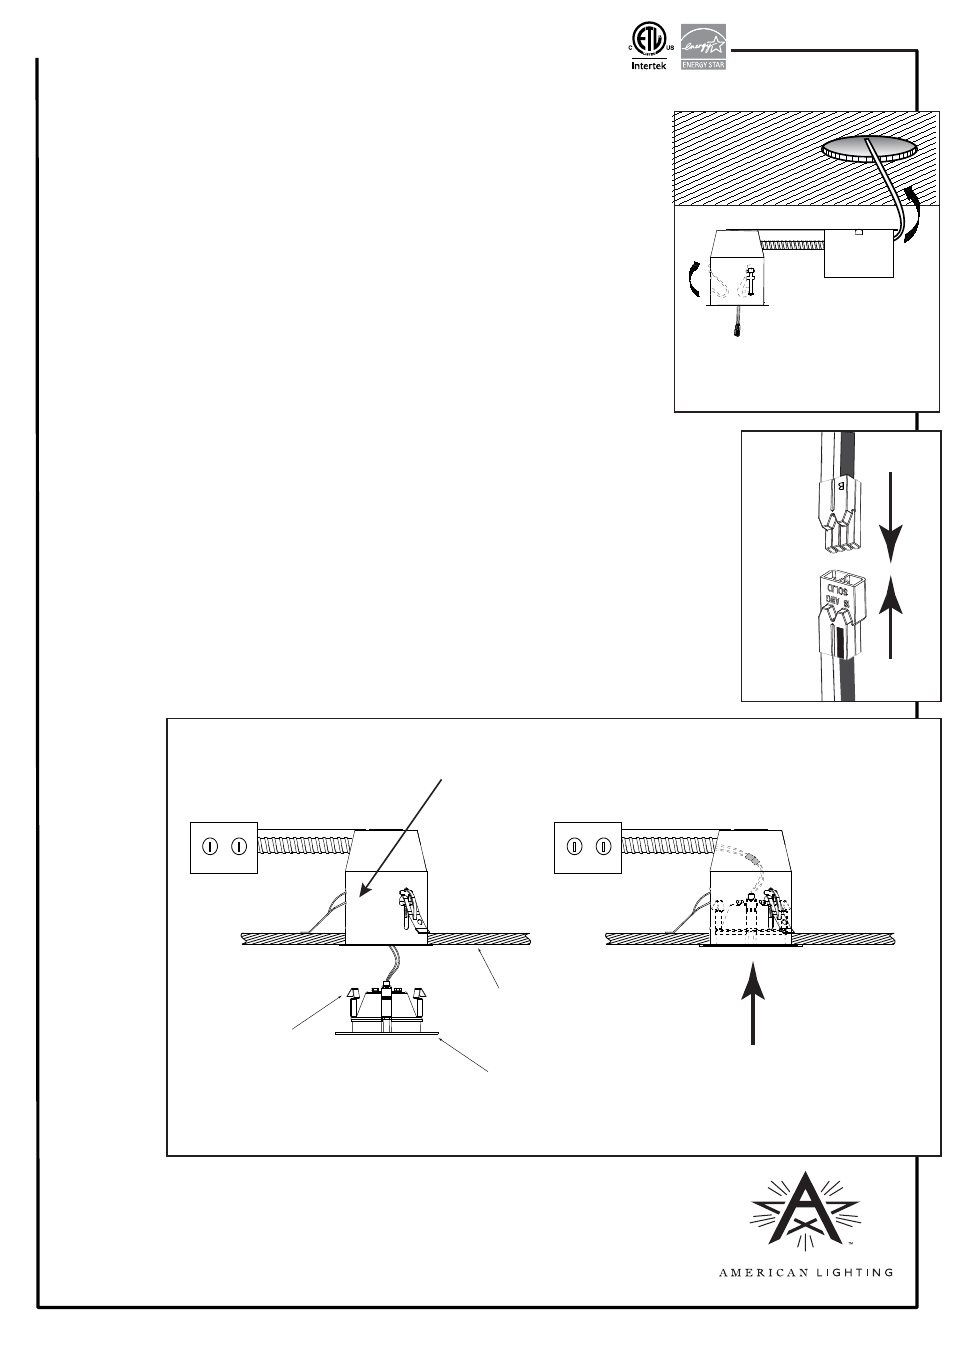
9. Push up on the three black remodel mounting clips, so they rotate to the inside of the
recessed housing. See Figure 4.
10. Route junction box/housing assembly up through ceiling cut-out. See Figure 4.
11. Align bottom of housing with ceiling plane. Reaching inside the remodel can, push
remodel mounting clips outward so they snap down and secure housing against sheet
rock/ceiling material as shown in Figure 6.
Figure 5
Ceiling
Torsion clips
Trim/light
engine
Figure 4
Rotate three
remodel clips
to inside of housing.
Then route
j-box/housing assembly
up through cut-out.
Make sure remodel housing is secured against ceiling material/ sheet rock by pressing the
three black remodel mounting clips until they snap into place before you install the
trim/light engine.
INSTALLING TRIM/LIGHT ENGINE:
To avoid electric shock or injury to persons, disconnect power prior to installation.
1. Insert power lead wire’s type “A” connector into mating type “B” connector. See Figure 5.
2. To anchor trim/light engine to recessed housing, align torsion clips with the interior wall of the
can and push trim/light engine gently to ceiling until seated. See Figure 6.
Additional Safety Measures:
1. To avoid electrical shock, do not turn on fixture with missing or damaged lens.
2. There are no serviceable parts inside LED module.
Align torsion clips with remodel housing’s interior
wall and push gently to ceiling until seated.
www.americanlighting.com
Page 2 of 2
RV1251