Omega lite configuration instrument – 2N Omega Lite - Configuration Tool manual v1.6 User Manual
Page 96
2N
®
- OMEGA Lite
Configuration instrument
User’s manual – configuration instrument
96
Establishing Connection
9.
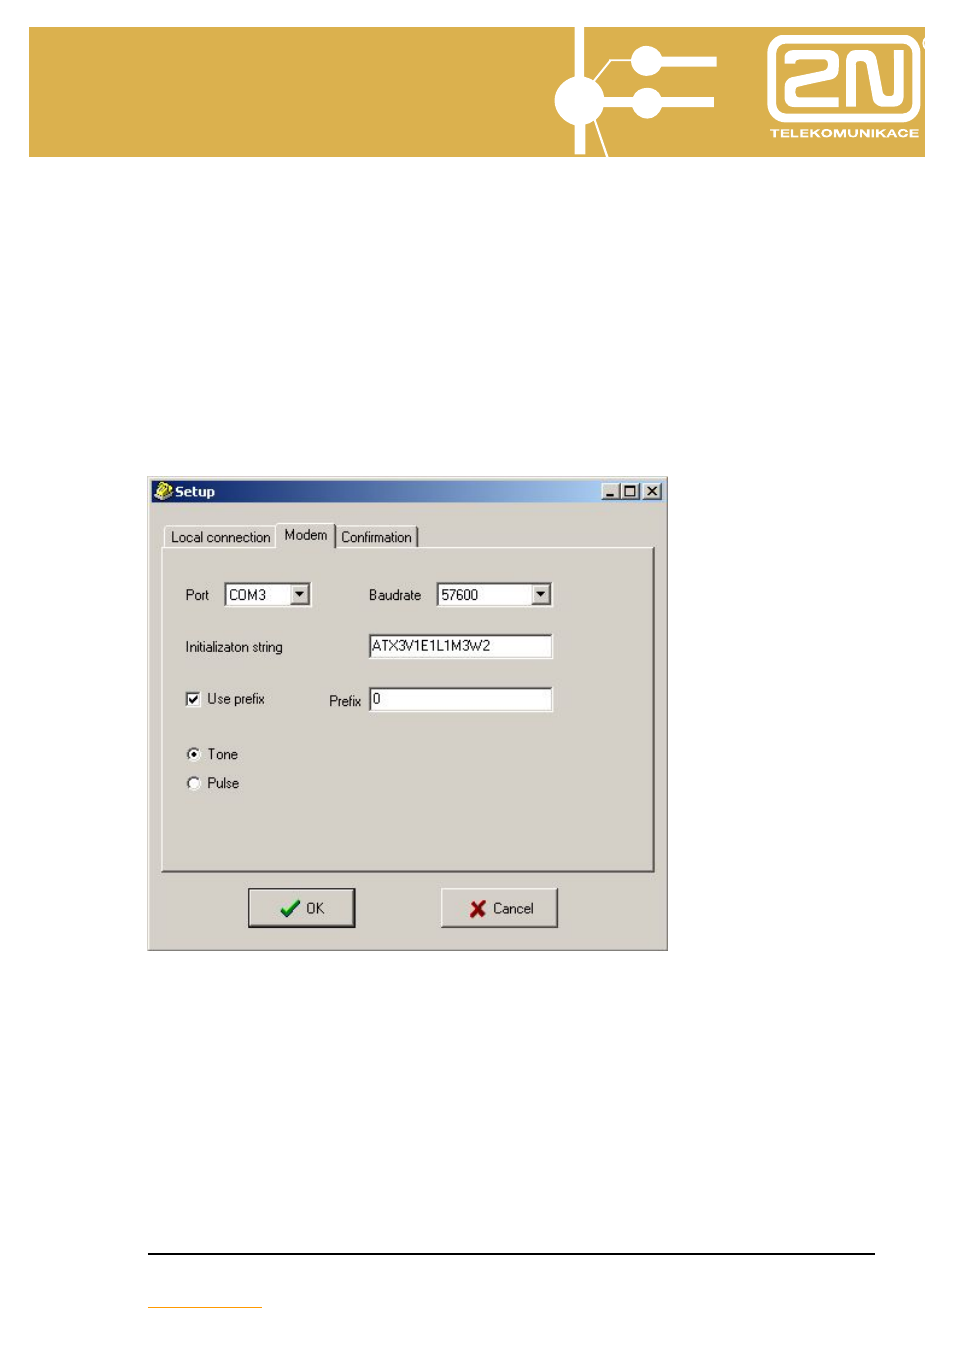
Run the OMEGA Lite Program SW.
10.
Press the bar button SET COMMUNICATION (‘tools’ symbol) and check and
set the modem parameters:
−
set the COM port connected to the modem;
−
select the communication rate (according to the modem capacities);
−
select the use of PREFIX (of the master PBX, set the modem connecting tone
transmission (^ or ’up arrow’ symbol (above digit 6) according to the modem
type);
−
select the CO dialling type;
−
confirm the settings by pressing OK.
11.
Press the bar button CONNECT TO PBX (three OMEGA LITE symbols in a
sequence).
12.
Click (using your mouse) on the YYMM-XXXXX.PBX file, which is used for
remote supervision.
13.
Press the CONNECT MODEM AUTO button.
14.
Select the technician responsible for remote supervision, confirm the access
password (or select a new technician by pressing the NEW button) and quit the
dialog window by clicking on OK.
15.
Click on the telephone number used for remote supervision (including DISA
number if DISA if used) and press the DIAL button (this dialog window is not
displayed if there is only one telephone number).