Access the scanned images through wifi (sd mode), 1 access the scanned image through wifi, Access the scanned image through wifi -1 – I.R.I.S. IRIScan Pro 3 Wi-Fi User Guide User Manual
Page 41
User Guide
5-1
5.
Access the scanned images
through Wifi (SD Mode)
Using the scanner’s Wifi connection (available only for the SD mode, you can wirelessly
connect to your private cloud to browse or download your scanned image files from the
scanner to your computer, Android or iOS devices.
Note:
The Scanner Wifi access point is for browsing, downloading, or deleting scanner files
only. It cannot be used for Internet browsing.
The scanner does not allow you to scan and connect to Wifi at the same time. If you
press the [Scan] button to start a scan in the Wifi mode, the Wifi mode will be off
temporarily. When the scan is finished, the scanner automatically connects to Wifi again.
5.1 Access the Scanned Image through Wifi
1.
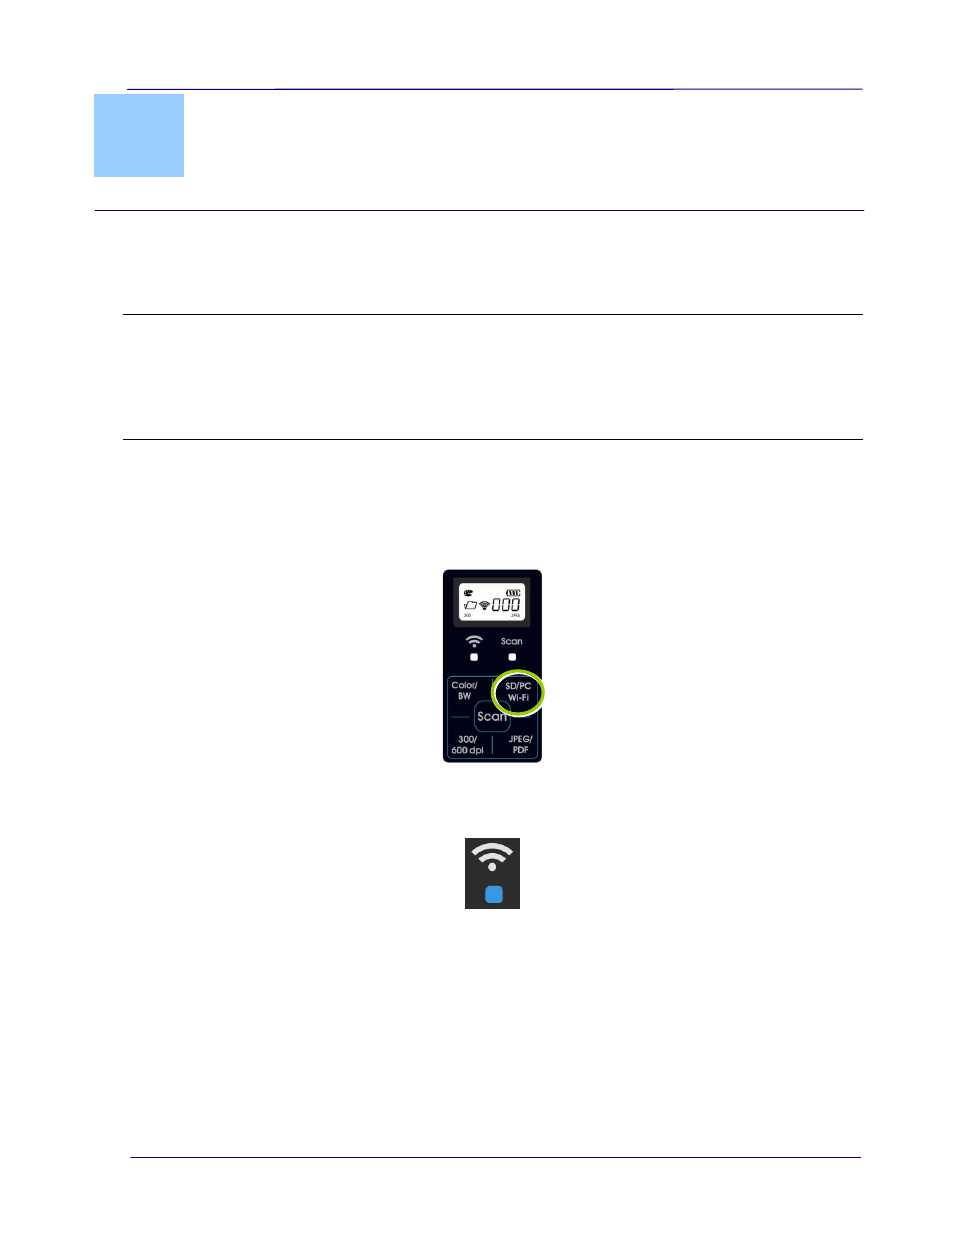
Turn Wifi mode on by pressing the SD/PC Wifi button for one second in SD mode until
the Wifi icon is shown in the LCD-display.
2.
Wait approximately 40 seconds while the data is indexed, the Wifi blue LED flashes.
When the blue LED turned solidly on, this indicates that Wifi status is ready.
3.
To connect your computer, iPhone, iPad or Android device to the scanner, use the
device’s Wifi settings to select the scanner’s network ID “I.R.I.S. -XXXX” [last four digits
of Access Point’s MAC address]”.
PC users: Go to the Wifi Network icon and select the network ID (I.R.I.S. -XXXX).
No password is required; wait for the connected status confirmation.
Mac users: Click the Wifi network icon on the menu bar and select the network ID
(I.R.I.S. -XXXX). No password is required; wait for the connected status confirmation.
Make sure you are connected to only one IP interface (either Wifi or Ethernet port).
The Client IP would be 10.10.100.x range.