Installation adjustments – Barco DATA 708 User Manual
Page 25
Installation Adjustments
7 - 5
5975987A BARCODATA 708 260597
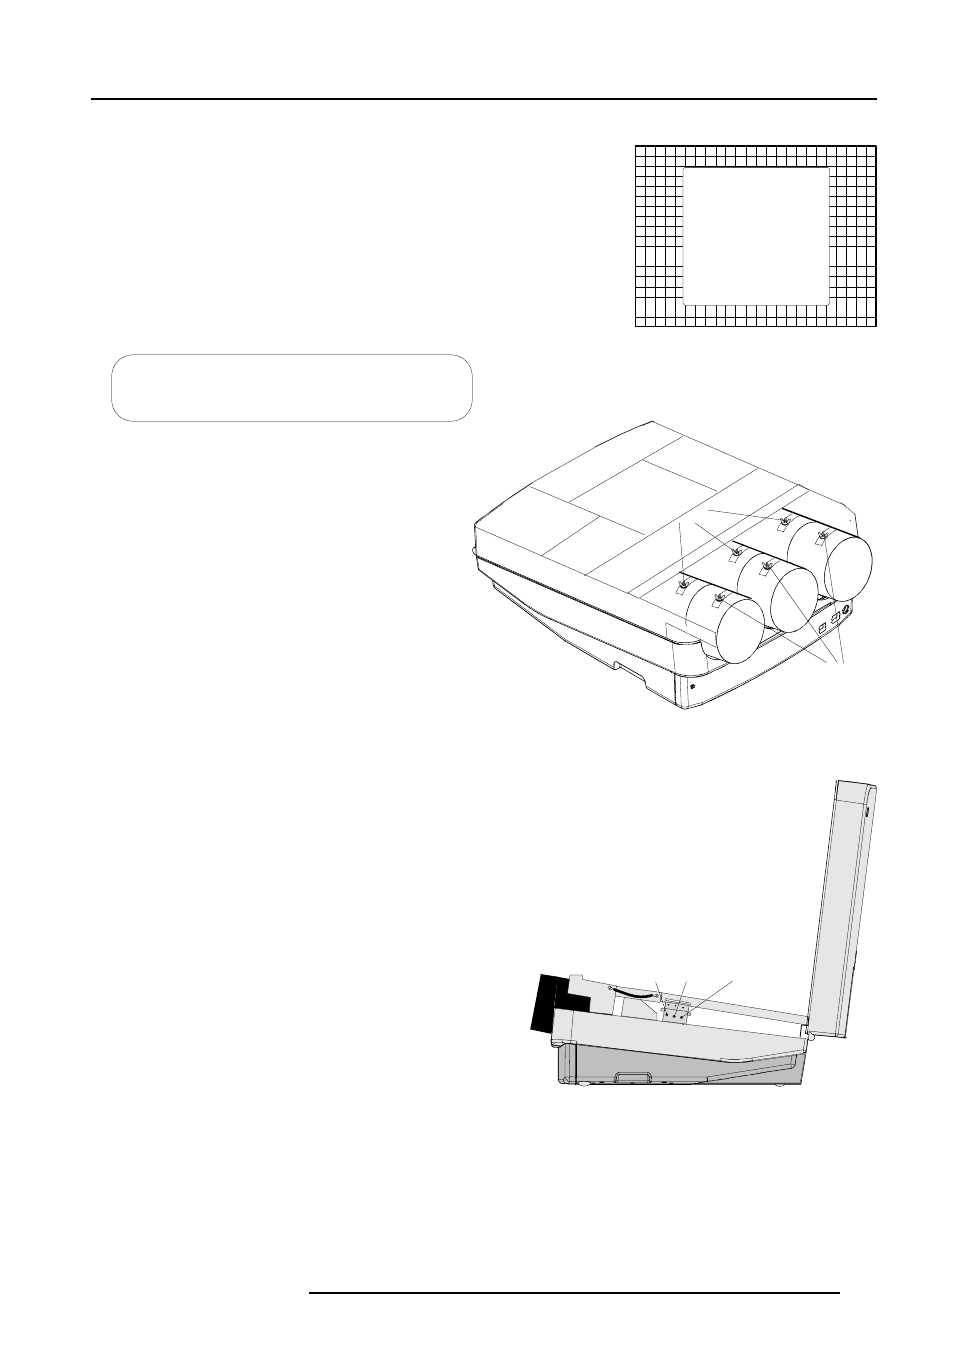
Optical lens focusing
OPTICAL LENS FOCUSING
1. LOOSEN THE NUT ON THE
REAR OF THE XXXX LENS,
ROTATE THE LENS BARREL
TO FOCUS THE CENTER
OF THE IMAGE,
THEN TIGHTEN THE NUT
2. LOOSEN THE NUT ON THE
FRONT OF THE XXXX LENS
AND ROTATE THE FRONT
SECTION OF THE LENS TO
FOCUS THE CORNERS OF THE
IMAGE, THEN TIGHTEN THE NUT.
The optical focusing procedure is performed separately for each
lens. The appropriate CRT will be switched on as the user proceeds
through the optical focusing adjustment sequence.
Each lens has two focus adjustment points, one at the rear of the lens
and one at the front. The center of the projected image is focused by
loosening the wing nut at the rear end of the lens and rotating the lens
barrel until the center of the image is clearly focused. The corners of
the projected image are focused by loosening the wing nut at the
front end of the lens and rotating the lens barrel until the corners of
the image are clearly focused. Repetition of these adjustments may
be necessary to optimize optical focusing.
Press
ENTER
key to continue.
ENTER
continues to Raster centering.
EXIT
returns to scheimpfug adjustment
ADJUST
returns to operational mode.
Corner
focusing
Center
focusing
XXXX = respectively red, green and blue.
Electrical focusing
The electrical focus for red, green and blue is factory preset. When
they have to be readjusted, follow the procedure as described below:
- Ensure the lenses are correctly focused.
- Open the top cover.
- Adjust separately the focus control for red, green and blue for the
sharpest image on the screen.
Electrical focus
Red Green
Blue