Installation adjustments, Scheimpfug adjustment – Barco DATA 708 User Manual
Page 24
Installation Adjustments
7 - 4
5975987A BARCODATA 708 260597
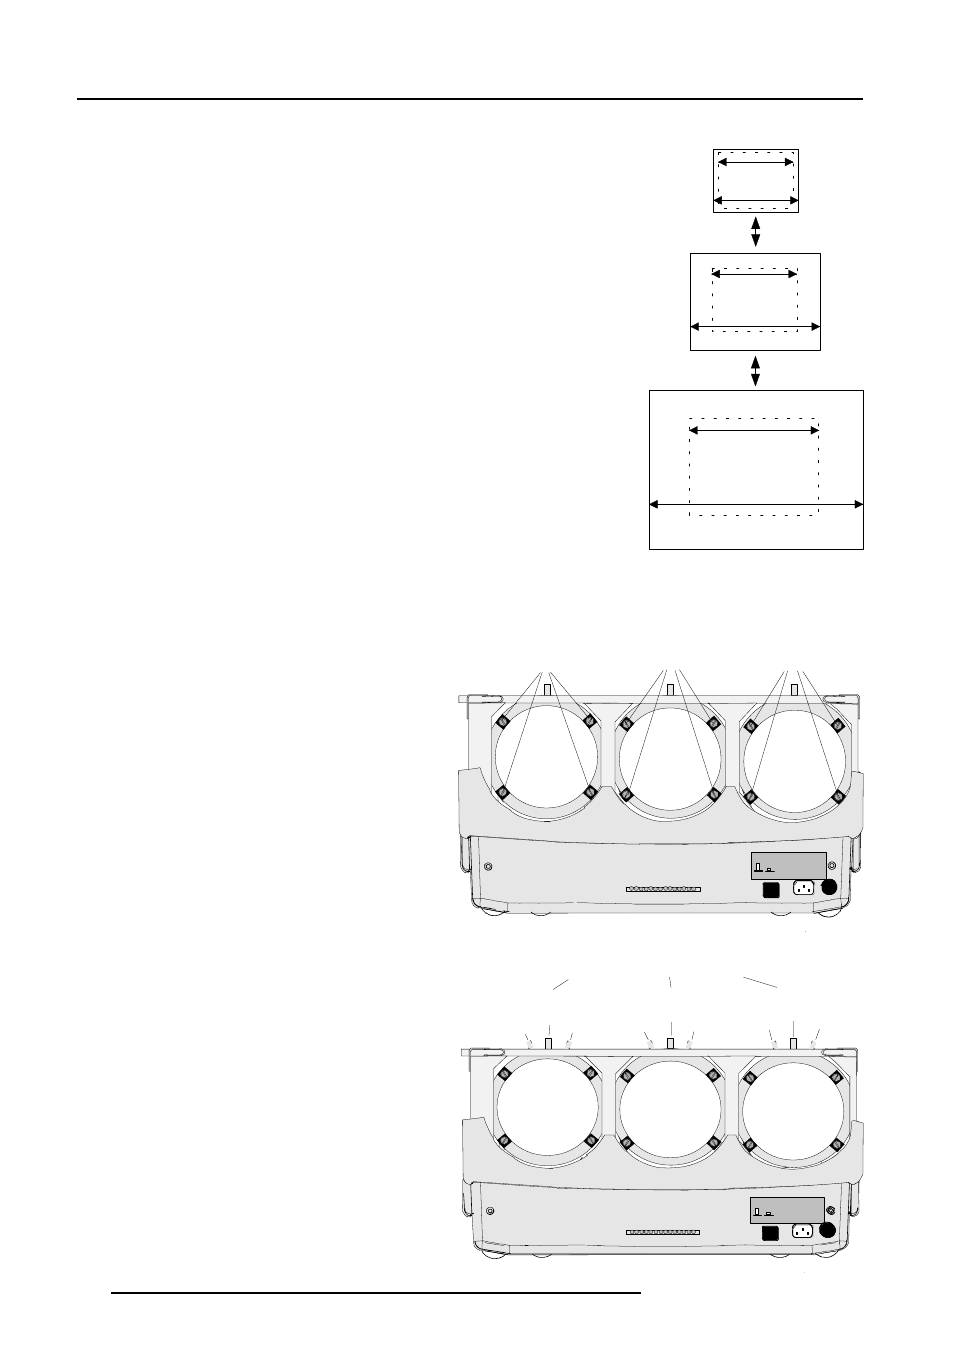
Scheimpfug adjustment
The scheimpfug correction can be adjusted separately for the three
tubes within 3 ranges:
range 1 : 1.4 m (55") to 1.9 m (75"), optimum screen width 1.4 m
(55")
range 2 : 1.9 m (75") to 3.2 m (126"), optimum screen width 2.4 m
(94")
range 3 : 3.2 m (126") to 6 m (236"), optimum screen width 4 m
(157")
A correct scheimpfug setting gives the possibility to focus the lenses
for a sharp image in all screen areas.
To change the setting from one range to another, some mechanical
actions have to done.
1.40m
1.90m
1.90m
3.20m
3.20m
6.00m
range 1
min. SW : 1.40 m (55")
max. SW : 1.90 m (75")
range 2
min. SW : 1.90 m (75")
max. SW : 3.20 m (126")
range 3
min. SW : 3.20 m (126")
max. SW : 6.00 m (236")
1. Open the top cover (see Gaining access to controls)
2. Loosen the lens bolts (do not remove them), and slide the lens to
the front until the scheimflug ring can move freely (nutdriver 8 mm or
screwdriver).
See installation instructions before
connecting to the supply
V NOM 120/230 Volt
I MAX 5/2.5 AMP
FREQ 60/50 Hz
OFF
ON
Lens bolts
Green lens
Lens bolts
Red lens
Lens bolts
Blue lens
See installation instructions before
connecting to the supply
V NOM 120/230 Volt
I MAX 5/2.5 AMP
FREQ 60/50 Hz
OFF
ON
range 2
range 3
range 1
Blue
range 2
range 3
range 1
Green
range 2
range 3
range 1
Red
Scheimpfug correction handle
3. Push the scheimpfug ring to its correct position (front view).
range 1 : to the right
range 2 : in the middle
range 3 : to the left
4. Push the lens back till it fits in the ring and secure the four bolts.