Emergency lowering, Parking brake release (figure 4), Fold down guardrails – Snorkel X Series-sn6013-15019 User Manual
Page 5: After use each day
5
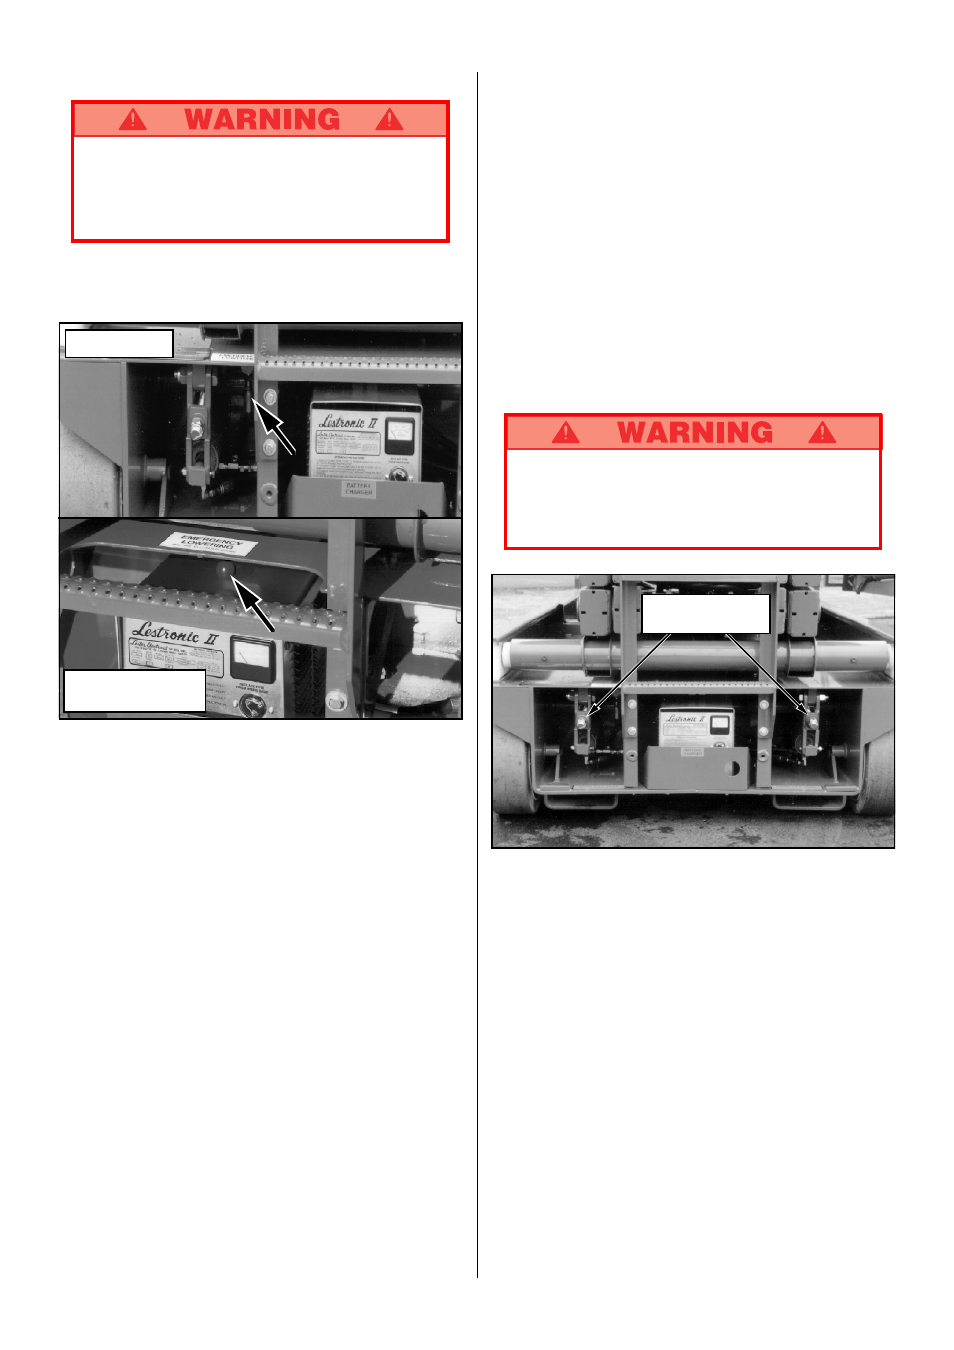
Emergency Lowering
If the platform should fail to lower, NEVER climb
down the elevating assembly.
Ask a person on the ground to open the Emergency
Lowering Valve located at the rear of the machine
(Figure 3).
1.
Open the Emergency Lowering Valve by pulling on the
handle.
2.
To close, release the handle.
Parking Brake Release (Figure 4)
Perform the following only when the machine will not operate
under its own power and it is necessary to move the machine or
when towing the machine up a grade or winching onto a trailer to
transport.
Note: X32N models have two identical brake adjustment
nuts located on both sides of the ladder.
The Brake Adjustment/Release Nut(s) is (are) located at the
rear of the machine to the right (and left) of the ladder.
1.
To release the brakes turn the nut(s) counterclockwise until the
brakes disengage from the tires.
2.
The machine will now roll when pushed or pulled.
3.
To reset the brakes, turn the nut(s) clockwise until the
brakes have fully engaged the tires. Test the brakes on a
22% slope before returning the machine to service.
Never operate work platform with the Parking
Brakes released. Serious injury or damage could
result.
Never tow faster than 1 ft./sec. (.3m/sec.).
Fold Down Guardrails
This procedure applies only to the X32N model for the
purpose of passing through a standard double doorway.
Guardrails must be returned to proper position before
operating the work platform.
Fold Down Procedure
1.
Unhook the controller from the side guardrail and place
on the platform.
2.
Unpin the front and rear upper rails from the side rails
and rotate inwards.
3.
Starting with the rollout deck rails and then the outer rails, lift up
on each guardrail and fold inward.
Erection Procedure
1.
Starting with the outer rails and then the rollout deck rails,
raise each guardrail and drop it down securing it in the
vertical position.
2.
Rotate the front and rear upper rails outward and secure
them to the opposite side rails using the retaining pins.
3.
Hang the controller on the side guardrail.
Figure 4: Parking Brake Release (X32N Shown)
Figure 3: Emergency Lowering Valve Handle
X32N Model
X20N, X20W, and
X26N Models
Parking Brake
Adjustment Nuts
After Use Each Day
1.
Ensure that the platform is fully lowered.
2.
Park the machine on level ground, preferably under
cover, secure against vandals, children or unauthorized
operation.
3.
Turn the Key Switches to OFF and remove the keys to
prevent unauthorized operation.