Smittybilt 76878 XRC Corner Guards User Manual
Installation instructions
WWW.SMITTYBILT.COM
For Technical Support/Warranty Information please call 310-762-9944
Smittybilt, 400 West Artesia Blvd, Compton, CA 90220
Installation Instructions
XRC Corner Guards
(Part # 76874) 97-06 Wranglers
(Part # 76876) 87-95 Wranglers
(Part #76878) 76-86 CJ7’s
Parts Included Qty
Drivers Side Corner 1
Passenger Side Corner 1
3/8"x3/4” Counter-Sunk Bolt 22
3/8” Flat Washer 24
3/8” Lock Nut 24
3/8” x 3 ½” Bolt 2
6 mm Allen Head Bolt 14
6 mm Flat Washer 14
6 mm Lock Nut 14
8 x 1.25 x 30mm Bolt 4
Note: Hardware varies depending on part number ordered/received.
Step 1: Remove your factory or aftermarket rear parts from the vehicle. (Save hardware, some will be
re-used.) This includes your fender flares, gas cap, gas cap plastic bezel, rear taillights
(You can reach the wire loom plug by reaching up through the underside of each rear corner)
license plate bracket, tire stop (YJ,CJ7 only), plastic tailgate hinge covers (late TJ’s only) etc.
(If your CJ has rear side turn signals, you will not be able to re-use them)
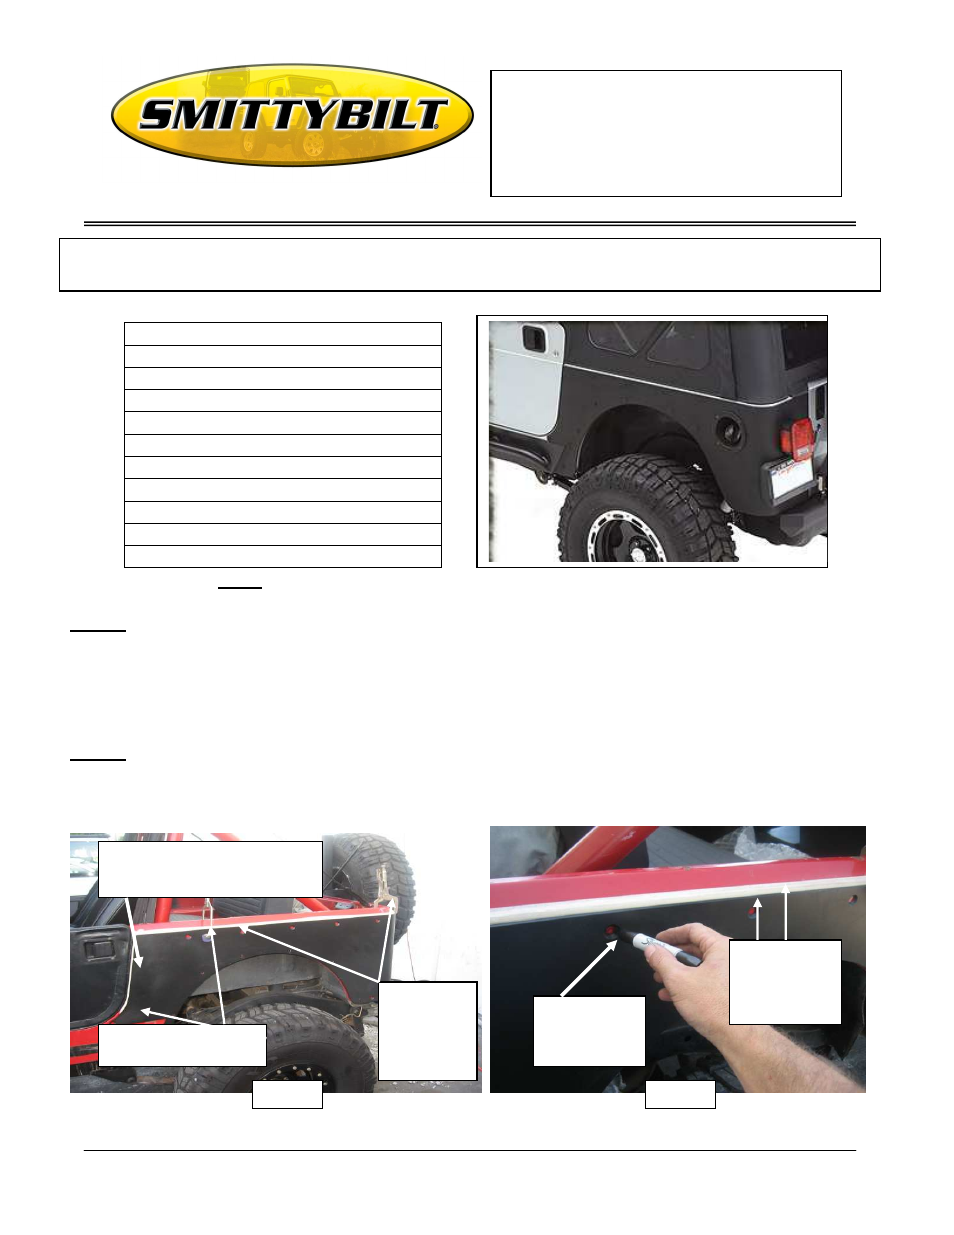
Step 2: Make sure vehicle is clean. Place masking tape along the top edge of the tub and down along the
the back of the door opening. (Fig A) Start by positioning the driver side corner on vehicle by lining
up the pre-drilled holes on the corner with the factory holes on the body. (Taillight, gas door, flare,
ect. holes.) Use some kind of clamp (Vice, or C-clamp) to hold corner on vehicle. (Fig A)
NOTE: Carefully read entire instructions thoroughly before attempting to install this part. Drilling is required for
installation. Use caution at all times. It is recommended to have assistance when installing these parts.
Place masking tape along
the edge of vehicle tub.
Hold guard
on vehicle
using some
kind of
quick clamp
FIG A
FIG B
Make sure top
edge of guard
runs parallel
with the body
Line up the front so it follows the
same line as the door opening
Use a marker
or scribe to
mark the holes.