Replacing the fan array – Apple Xserve Intel (Late 2006) Service Parts Kit User Manual
Page 9
9
Replacing the Fan Array
Be
sure
to
read
the
guidelines
in
“Working
Safely
Inside
the
Xserve”
on
page
5
before
you
start
this
procedure.
To remove the fan array:
1
Shut
down
the
Xserve,
unplug
it,
remove
it
from
the
rack,
and
wait
a
few
minutes
to
let
the
Xserve
internal
components
cool.
For
instructions,
see
page
6.
It’s
a
good
idea
to
use
the
enclosure
key
to
lock
the
enclosure
lock
on
the
front
panel
so
you
don’t
inadvertently
unlatch
a
drive
module
while
you’re
moving
the
Xserve.
2
When
the
Xserve
has
cooled
down,
unlock
the
enclosure,
loosen
the
thumbscrews
at
the
back,
and
remove
the
top
cover.
For
help,
see
page
7.
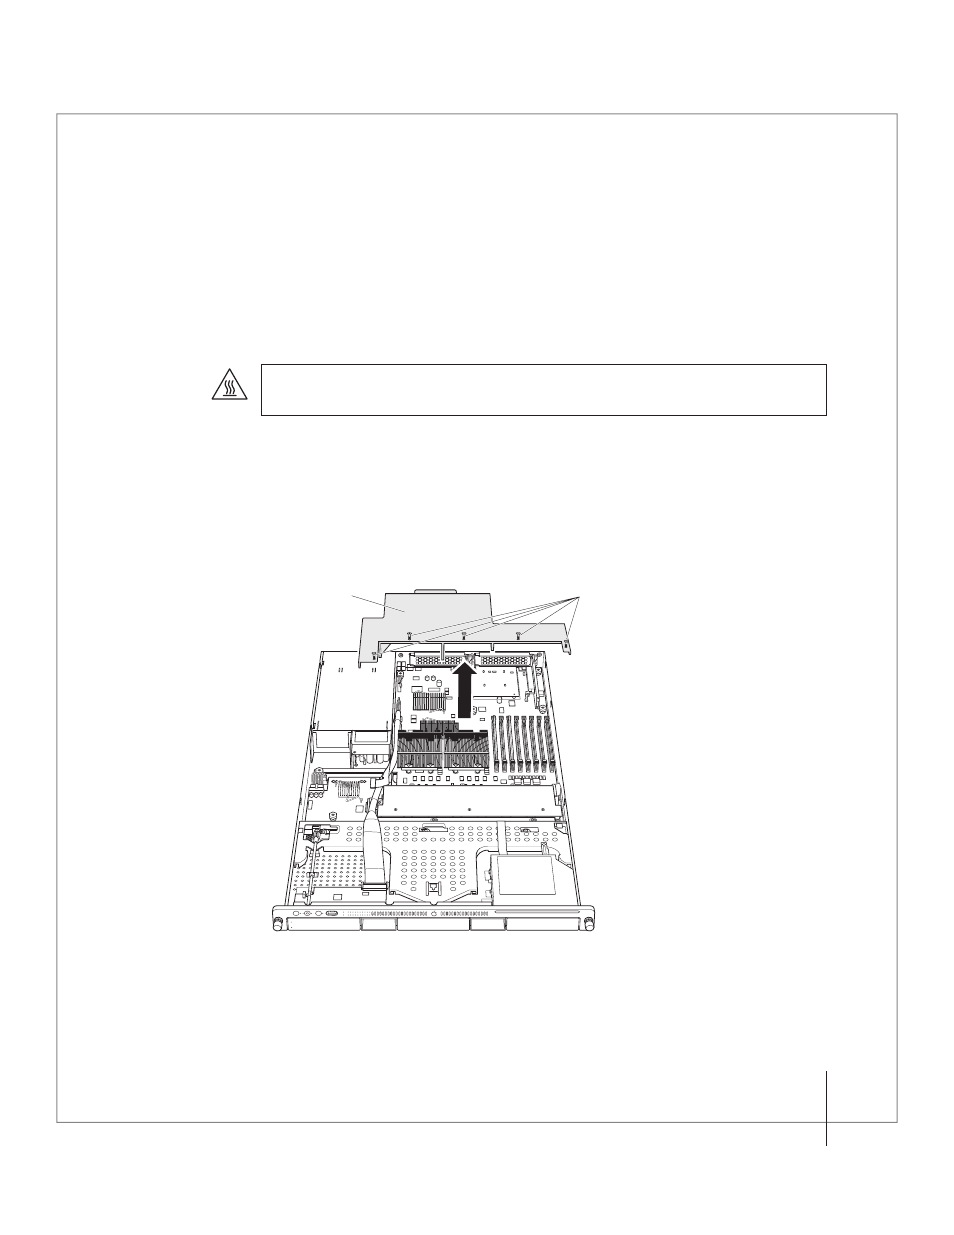
3
Using
a
small
Phillips
screwdriver,
loosen
but
don’t
completely
remove
the
five
screws
holding
the
plastic
airflow
duct
in
place
and
remove
the
duct.
Note:
The unfastened screws are held in the duct by small rubber washers. To avoid
losing or dropping the screws, don’t pull the screws out of the duct.
WARNING:
Wait a few minutes for the Xserve to cool down before you try to remove
the fan array. The array and components near it may be very hot.
Airflow duct
Captive screws