Step2, Installing the driver & software, Macintosh – Brother DCP-120C User Manual
Page 26
Installing the Driver & Software
24
STEP2
Maci
nt
osh
®
Net
w
or
k
Macintosh
®
10
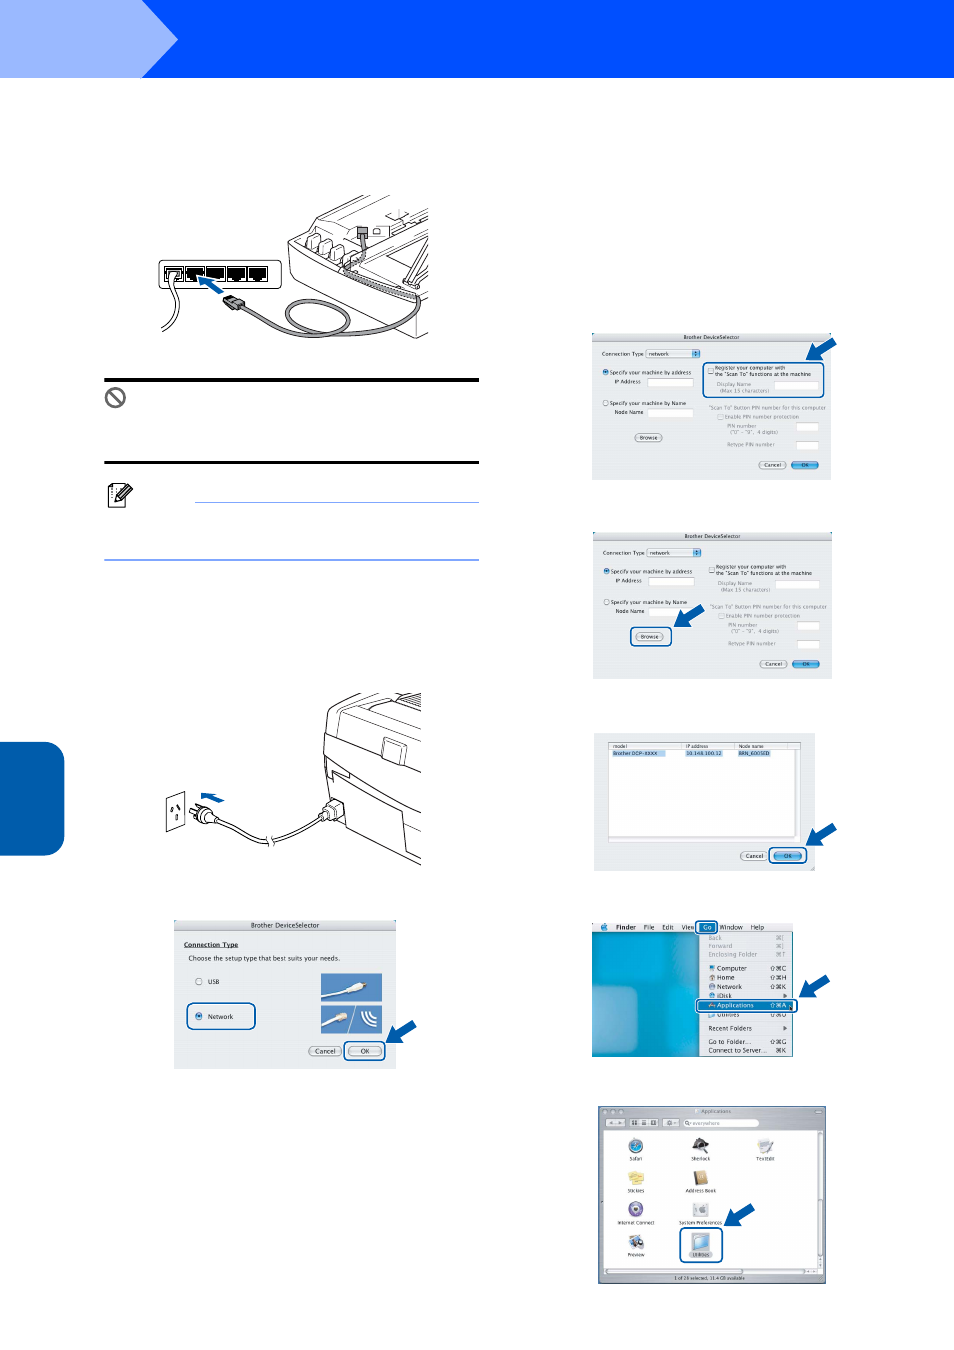
Carefully guide the network cable to the trench
as shown below, following the trench around
and toward the back of the machine.
Then, connect the cable to your network.
Improper Setup
Make sure that the cable does not restrict the
cover from closing, or an error may occur.
Note
In case of using both USB and LAN cables, route
both cables through the trench.
11
Lift the scanner cover to release the lock.
Gently push the scanner cover support down
and close the scanner cover.
12
Turn on the machine by plugging in the power
cord.
13
Choose Network and then click OK.
14
If you want to use the machine’s Scan key to scan
over the network you must check Register your
computer with the "Scan To" functions at the
machine box. You must also enter a name for
your Macintosh
®
in Display Name. The name
you enter will appear on the machine’s LCD when
you press the Scan key and choose a scan
option. You can enter any name up to 15
characters long. (For more information on
network scanning, see Chapter 11 of the
Software User's Guide on the CD-ROM.)
15
Click Browse.
16
Choose your model name, and then click OK.
17
Click Go, then Applications.
18
Double-click the Utilities folder.