6 installing the ink cartridges, Installing the ink cartridges, Step 1 – Brother DCP4020C User Manual
Page 6: Setting up the dcp, 6installing the ink cartridges
4
Setting Up the DCP
1
Make sure that the power is turned on.
The LCD shows:
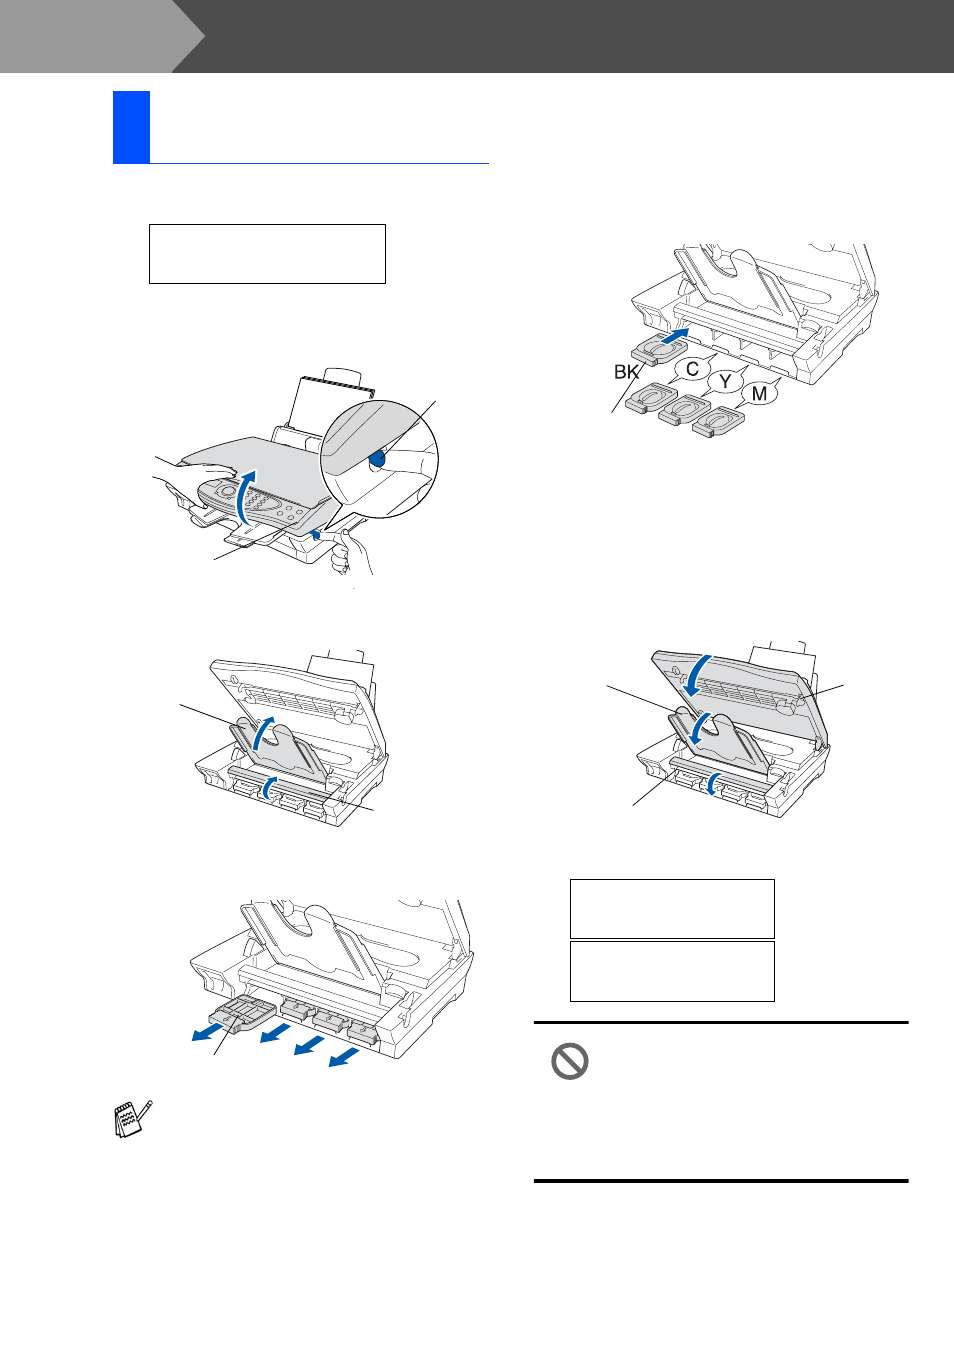
2
Pull the scanner cover release lever to open
the scanner cover and lift it to the opening
position.
3
Lift the output paper support and ink
cartridge cover.
4
Remove the yellow plastic protective
cartridges.
5
Insert the ink cartridges into the slot for each
colour until it clicks.
Do not peel a film off the cartridge.
6
Close the ink cartridge cover, the output
paper support and the scanner cover. When
the DCP is setup for the first time, the
machine will prepare the Brother unique ink
tube system for use for the first time. This
process will occur only once, the first time
ink cartridges are installed. The preparation
process will last up to four minutes.
The LCD shows:
• DO NOT remove ink cartridges if
you do not need to replace them.
If you do so, it may reduce the ink
quantity and the DCP will not
know the quantity of ink left in
the cartridge.
6
Installing the Ink
Cartridges
CHECK CARTRIDGE
Open cover, then...
Do not throw away the yellow plastic
protective cartridges. You will need them in
the future to transport the machine.
Scanner Cover
Scanner Cover
Release Lever
Ink Cartridge Cover
Output Paper
Support
Protective Cartridge
PREPARING SYSTEM
APPROX 4 MINUTES
PREPARING SYSTEM
PLEASE WAIT
Ink Cartridge
Output Paper
Support
Scanner
Cover
Ink Cartridge
Cover
Step 1