Bunn Chilled LCC-2 User Manual
Page 6
6
INITIAL SET-UP
NOTE: The LCC-2 LP weighs approximately 70 lbs. (32 kg). If necessary, use more than one person when lifting
or moving the dispenser.
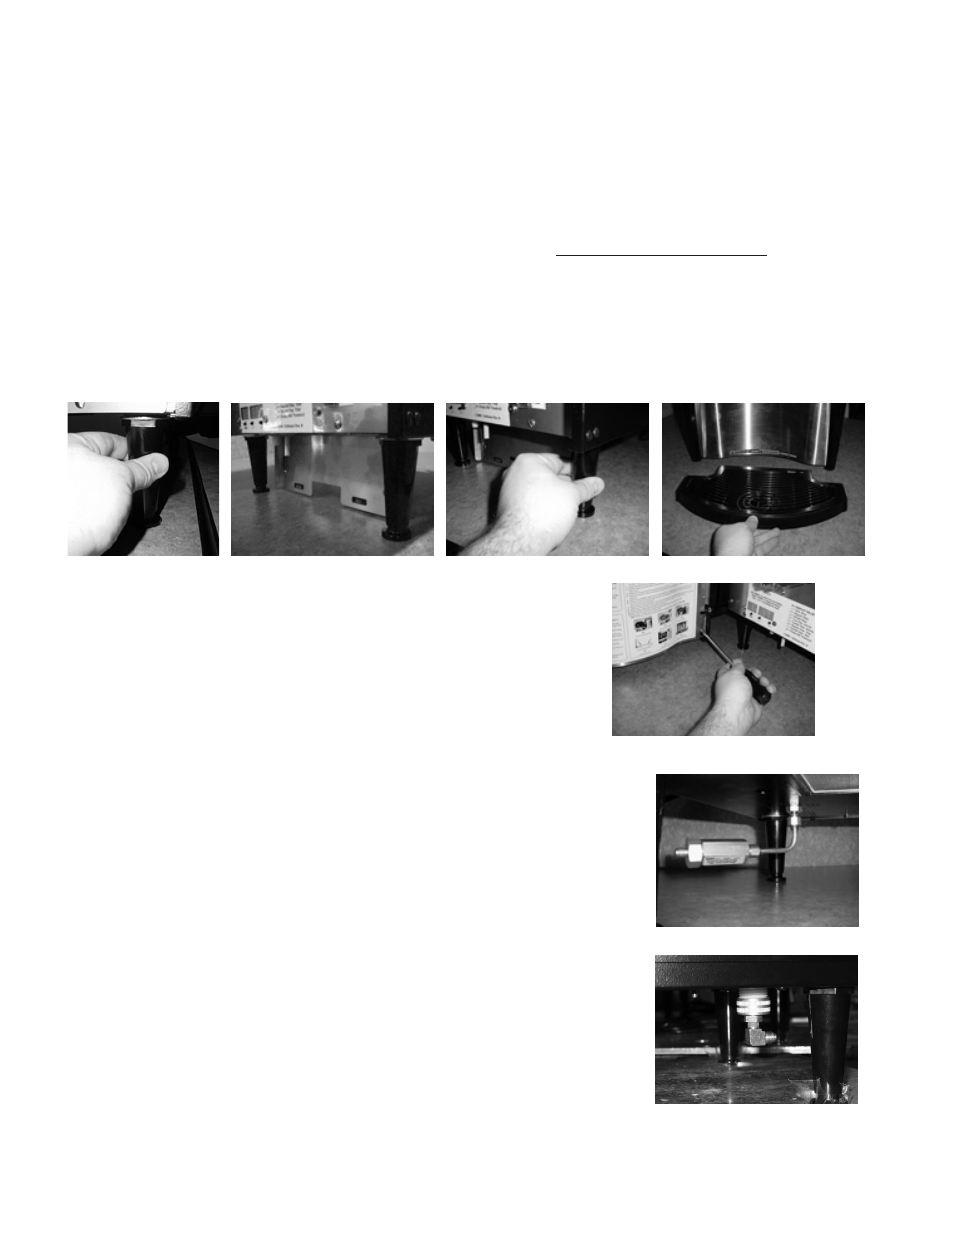
1. Cut the plastic bands and remove the top box.
2. Locate and remove the parts box from top of packaging and set aside.
3. Remove foam packing.
4. Set dispenser on the counter where it is to be used. CAUTION: DO NOT LIFT ON THE DOOR.
5. Open the parts box remove the drip tray, brackets and splash guard.
6. Install the drip tray assembly.
a. Loosen the front two legs several turns.
b. Slide the drip tray brackets between the large washers and the base plate.
c. Retighten the two front legs securing the bracket.
d. Install the drip tray.
PLUMBING HOOK-UP (Early Models)
7. Install the splash guard panel.
a. Insert the top tabs into the slots on the door panel.
b. Align the key hole slots over the two lower screws, then slide the
splash guard down.
c. Tighten the two lower screws.
8. Level the dispenser using the adjustable feet on the legs.
1. Securely attach the short piece of tubing and the water strainer assembly
to the inlet fitting on the bottom of the dispenser.
2. Flush the water line to remove any debris or foreign material, and
securely attach it to the flare fitting on the water strainer assembly.
3. Turn on the water supply and check for leaks.
39288 070109
PLUMBING HOOK-UP (Late Models)
1. Remove the flare elbow fitting from the parts box. Remove the shipping cap
from the inlet valve on the bottom of the dispenser and attach the elbow
fitting securely to the valve.
2. Flush the water line to remove any debris or foreign material, and securely
attach it to the inlet fitting.
3. Turn on the water supply and check for leaks.