Scan to image, To access scan to image configurations screen, Scanner settings – Brother DCP8020 User Manual
Page 154: Target application, Scan to image -14
9 - 14 USING THE BROTHER CONTROL CENTER (FOR WINDOWS
®
95/98/98SE/ME/2000 PROFESSIONAL AND WINDOWS NT
®
WS 4.0)
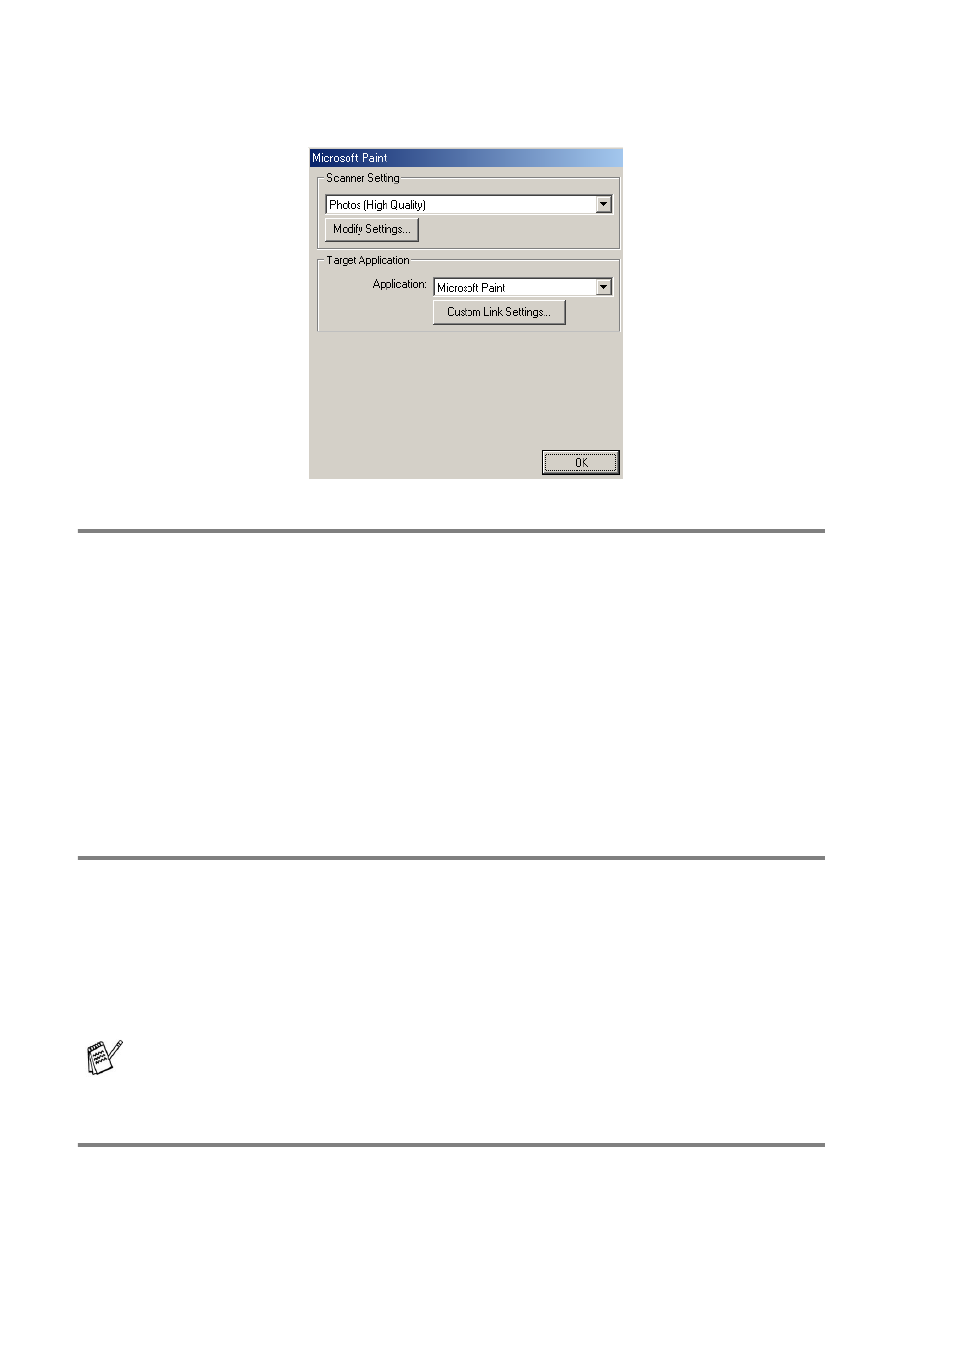
Scan to Image
To access Scan to Image Configurations screen
1
Place the original face up in the ADF. The Brother Control
Center screen will pop up.
2
Right-click the graphic application button and click on
Configuration. Click the Modify Settings button to view the
configuration screen of the Control Center.
3
To save your settings, click OK.
—OR—
To go back to the default settings, click the Restore Defaults
button.
Scanner Settings
From the pull-down list, select the scanning mode that is appropriate
for the type of file: Faxing, Filing and Copying; Text for OCR;
Photos; Photos (High Quality); Photos (Quick Scan); Custom;
Draft Copy or Fine Copy.
To change any of the settings for this mode, click Modify Settings.
Target Application
Application—From the pull-down list, select the application you want
to add to this Pop-Up screen.
Click the Custom Link Settings button to set up links for your
user-defined application.
Faxing is only possible if you have a fax modem attached to your
computer.