Performing auto eq 147, Customising preferences, Performing auto eq – Pioneer AVIC-F950BT User Manual
Page 147
! If an error occurs during measurement, a
message appears and measurement is
cancelled. Check the following before mea-
suring the vehicle
’s acoustics.
— Front speakers (left/right)
— Rear speakers (left/right)
— Noise
— Microphone for acoustical measure-
ment (sold separately)
— Low battery
Performing Auto EQ
p Auto EQ changes the audio settings as fol-
lows:
! “Auto EQ” on the “EQ Menu” screen is
set to
“On”.
= For details, refer to Using the auto-ad-
! The fader/balance settings return to the
centre position.
= For details, refer to Using balance ad-
! The equaliser curve switches to “Flat”.
= For details, refer to Using the equali-
! The front and rear speakers will automa-
tically be adjusted to a high pass filter
setting.
p Previous settings for Auto EQ will be over-
written.
p For AVIC-F50BT users
Do not press the h button to open or close
the panel when you are using the micro-
phone.
1
Stop the vehicle in a quiet place, close
all the doors, windows and sun roof, and
then turn the engine off.
If the engine is left running, engine noise may
prevent correct Auto EQ.
p If driving restrictions are detected during
measurement, measurement is cancelled.
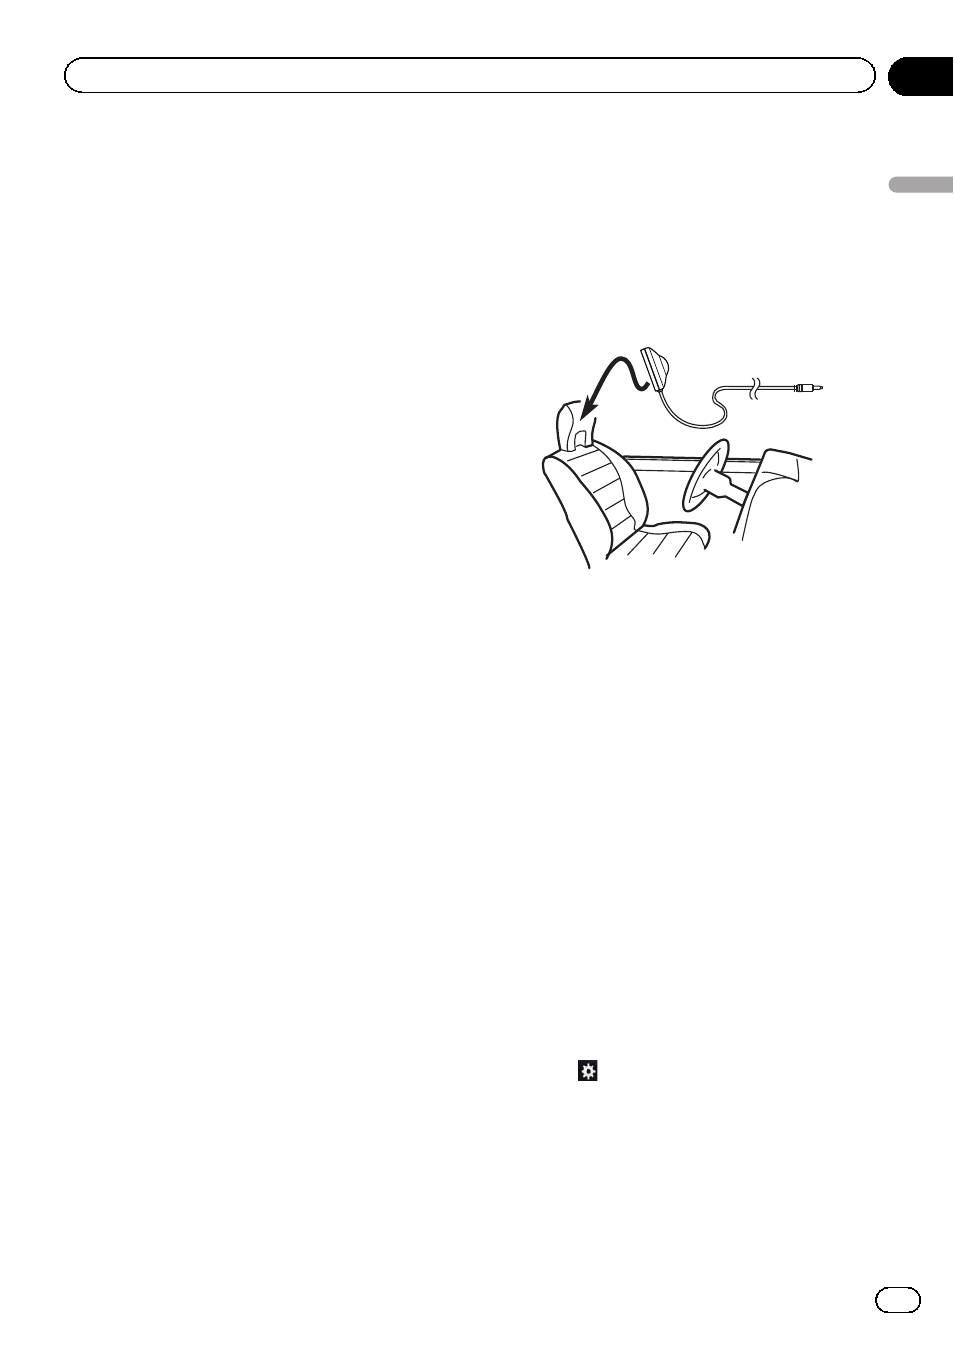
2
Fix the microphone for acoustical mea-
surement (sold separately) in the centre of
the headrest of the driver
’s seat, facing for-
ward.
The Auto EQ may differ depending on where
you place the microphone. If desired, place
the microphone on the front passenger seat
and perform Auto EQ.
3
Disconnect the iPhone or smartphone
device.
4
Turn on the ignition switch (ACC ON).
If the vehicle
’s air conditioner or heater is
turned on, turn it off. Noise from the fan in the
air conditioner or heater may prevent correct
Auto EQ.
5
Switch the AV source to
“Off”.
= For details of the operations, refer to Dis-
playing the AV operation screen on page 71.
6
Set the video setting for the rear dis-
play to
“Mirror AV”.
= For details of the operations, refer to Select-
ing the video for rear display on page 151.
7
Press the HOME button to display the
“Top Menu” screen.
8
Touch
.
The
“Edit/Settings” screen appears.
9
Touch [AV Settings].
The
“AV Settings” menu appears.
10 Touch [Auto EQ Measurement].
The
“Auto EQ Measurement” screen ap-
pears.
Engb
147
Chapter
26
Customising
pr
eferences
Customising preferences