Setting the time difference 136, Changing the preinstalled splash, Screen – Pioneer AVIC-F950BT User Manual
Page 136: Changing to the splash screen stored, On the sd memory card, Setting the time difference, 26 customising preferences, Changing the preinstalled splash screen
7
Touch
on the
“Language settings”
screen.
A message confirming whether to restart the
navigation system appears.
8
Touch [Yes].
The navigation system restarts.
# If you press the MODE, MAP, or HOME but-
ton, the setting procedure is cancelled.
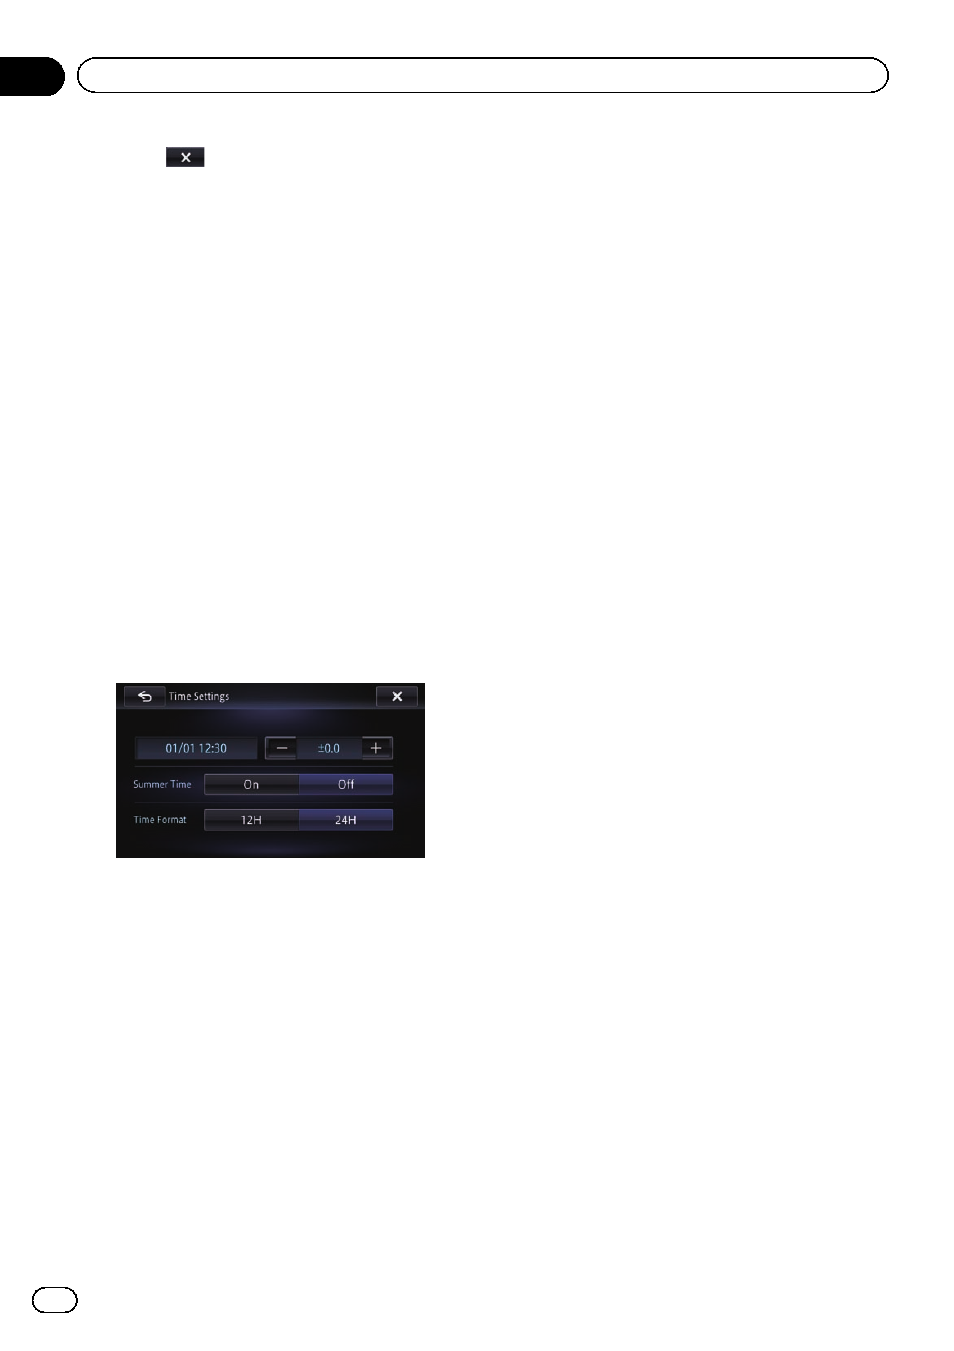
Setting the time difference
Adjusts the system
’s clock. Set the time differ-
ence (
+,
–) from the time originally set in your
navigation system.
1
Display the
“System Settings” screen.
= For details, refer to Displaying the screen for
2
Touch [Time Settings].
The
“Time Settings” screen appears.
3
To set the time difference, touch [+] or
[
–], [On] or [Off], or [12H] or [24H].
On this screen, you can operate the following
items.
! +, –
Adjusts time for the summer time.
! Summer Time
Turns the summer time on or off.
Off (default):
Changes the summer time setting to off.
On:
Changes the summer time setting to on.
! Time Format
24H (default):
Changes the display to 24-hour format.
12H:
Changes the display to 12-hour format with
am/pm.
Changing the preinstalled
splash screen
You can change the splash screen to other
images preinstalled in the navigation system.
1
Display the
“System Settings” screen.
= For details, refer to Displaying the screen for
2
Touch [Splash Screen].
The
“Select Splash Screen” screen appears.
3
Touch the image to use as the splash
screen from the list.
The image is displayed on the screen.
# If you touch [Show image], you can confirm a
selected image via full screen preview. Touch the
screen to return to the
“Select Splash Screen”.
4
Touch [OK].
The image is set as the splash screen, and the
map screen returns.
Changing to the splash screen
stored on the SD memory card
You can change the splash screen to other
images imported from the SD memory card.
p Splash screen images must be used within
the following formats.
! BMP or JPEG files
! Allowable data size is 6 MB or smaller
p The best image size is 800 pixels x 480 pix-
els.
p Proper compatibility with allowable files is
not guaranteed.
p Imported original images will be stored in
the built-in memory, but the ability to save
these images cannot be guaranteed com-
pletely. If your original image data is de-
leted, insert the SD memory card again
and re-import the original image.
p The maximum number of images, includ-
ing those in the built-in memory, that can
be imported and displayed on the list is 10.
1
Create a folder named
“Pictures” in the
top-most directory of the SD memory card.
2
Store the picture files in the
“Pictures”
folder.
Engb
136
Chapter
26
Customising preferences