Basic operations – Olympus DS-3500 User Manual
Page 7
7
EN
C
S
D
A
DE
ES
F
R
NL
P
L
RU
S
V
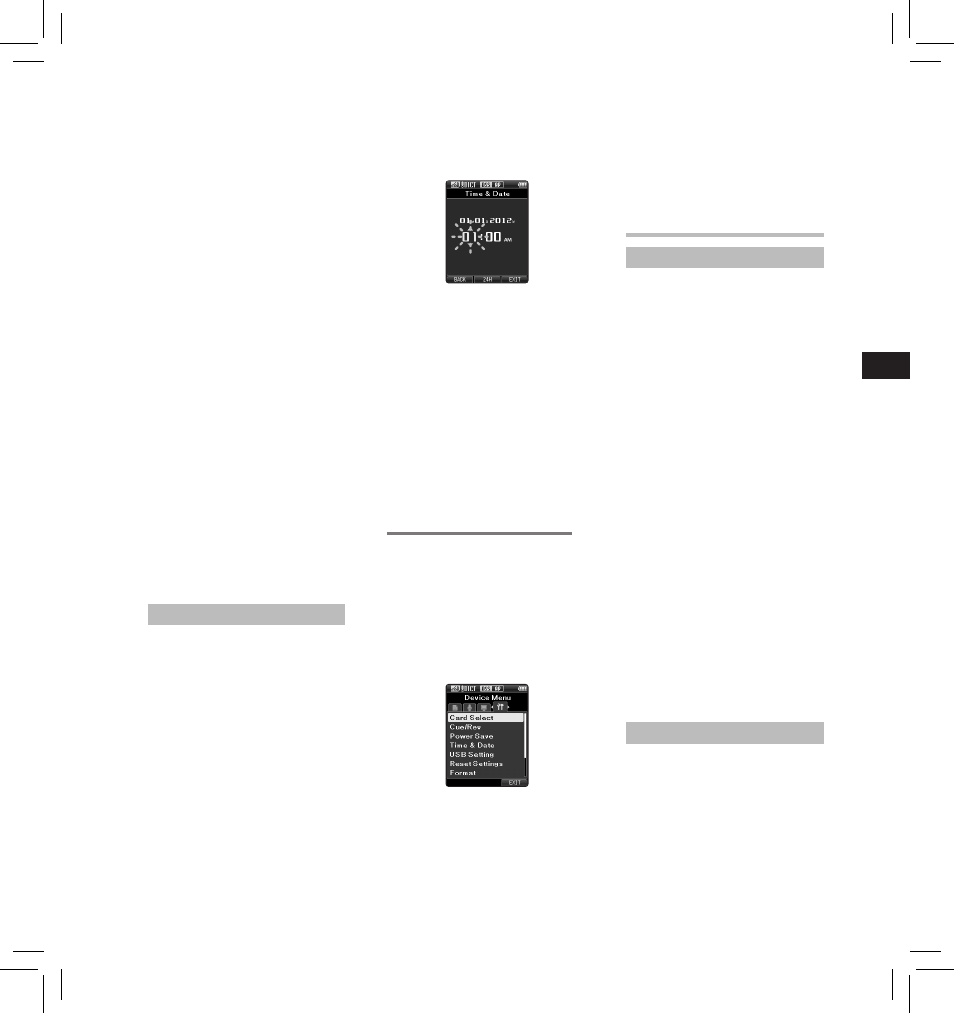
Setting time and date [Time & Date]
If you set the time and date
beforehand, the information when
the file is recorded is automatically
stored for each file. Setting the time
and date beforehand enables easier
file management.
When you use the recorder for the
first time after purchasing it, or
when the battery has been inserted
without the device being used for
a long time, the [ Set Time & Date ]
will appear.
• For further details, a complete
advanced version of the manual *
(PDF format) is available for
download at the OLYMPUS website.
* Available in English, French or
German.
Ejecting a SD card:
Push the SD card inward to unlock it
and let it come out of the slot.
• Hold the card straight and pull it
out.
Notes
• Inserting the card the wrong way
or at an angle could damage the
contact area or cause the card to
jam.
• If the card is not inserted all the
way into the slot, data may not be
written properly.
• When an unformatted card is
inserted into the card slot, the
recorder will automatically display
the format menu options.
• Use only cards formatted with the
recorder.
• Never remove the card while the
recorder is operating, as this may
damage the data.
• After pushing the card inward to
eject it, releasing your finger too
quickly may cause the card to be
ejected unexpectedly.
• This recorder uses a microSD card as
internal memory. The microSD card
has been preloaded.
• The recorder may not properly
recognize the card even when that
card is compatible with it.
• The processing performance
reduces in a card when you repeat
writing and deleting. In this case,
format the card.
1 Press the
9 or 0 button to
select the item to set.
Select the item from the “ hour ”,
“ minute ”, “ year ”, “ month ” and “ day ”
with a flashing point.
Basic operations
Recording
By default, the recorder has five
folders, [
A ], [ B ], [ C ], [ D ], [ E ]
and you can select a folder by
pressing the F1 ( FOLDER ) button.
These five folders can be selectively
used to distinguish the kind of
recording. Up to 200 messages can be
recorded per folder.
Also, by default, the Recording Mode
is [ DSS Pro QP ].
Record function*
Before starting recording over a
previously recorded file, the RECORD
function can be set to the following:
• Append: Attaches the new
recording to the end of the
previously recorded file.
• Overwrite (default): Overwrites
and deletes part of the previously
recorded file starting from the
chosen position.
• Insert: The recorded file will be
inserted in the middle of the
previously recorded file, starting
from the chosen recording position.
The original file will be kept.
By default, the RECORD function
is configured to record using the
overwrite option.
Recording will start from the current
position of the existing file.
* This function will not be available if
an MP3 file has been selected.
New recording
Create a new file to record in.
1 Press the NEW button to create a
new file.
• It is possible to select the Work
Type from the work type list
uploaded using the ODMS
software.
3 Press the + or − button to select
[ Time & Date ].
2 Press the + or − button to set.
You can select between 12 and
24 hour display by pressing the
F2 ( 24H ) button while setting the
hour and minute.
• You can select the order of the
“ Month ”, “ Day ” and “ Year ” by
pressing the F2 ( D/M/Y ) button
while setting them.
3 Press the OK/MENU button to
complete the setting.
Note:
• You can set the time and date from
your PC using ODMS and DSS Player
software.
Changing the time and date:
If the current time and date is not
correct, set it using the procedure
below.
1 While the recorder is in stop mode,
press the OK/MENU button.
2 Press the
9 or 0 button to
select [ Device Menu ] tab.
• You can change the menu display
by moving the settings tab cursor.
4 Press the OK/MENU button.
• The following steps are the
same as Step 1 through Step
3 of “ Setting time and date
[Time & Date] ”.
5 Press the F3 ( EXIT ) button to close
the menu screen.