Advanced operations – Olympus DS-3500 User Manual
Page 10
10
EN
C
S
D
A
DE
ES
F
R
NL
P
L
RU
S
V
Verbal Comment
Verbal comments are useful to
append vocal instructions while
recording.
It is possible to search and playback
Verbal comments using the ODMS
and DSS Player software. Verbal
comments are also useful to give
instructions to transcriptionists.
• Verbal comments can be set on DS2
files only.
Setting a Verbal Comment
1 While the recorder is in recording
mode, press and hold the F1
( VERBAL ) button.
• Data recorded while pressing
the F1 ( VERBAL ) button will be
recorded as Verbal Comment.
Advanced operations
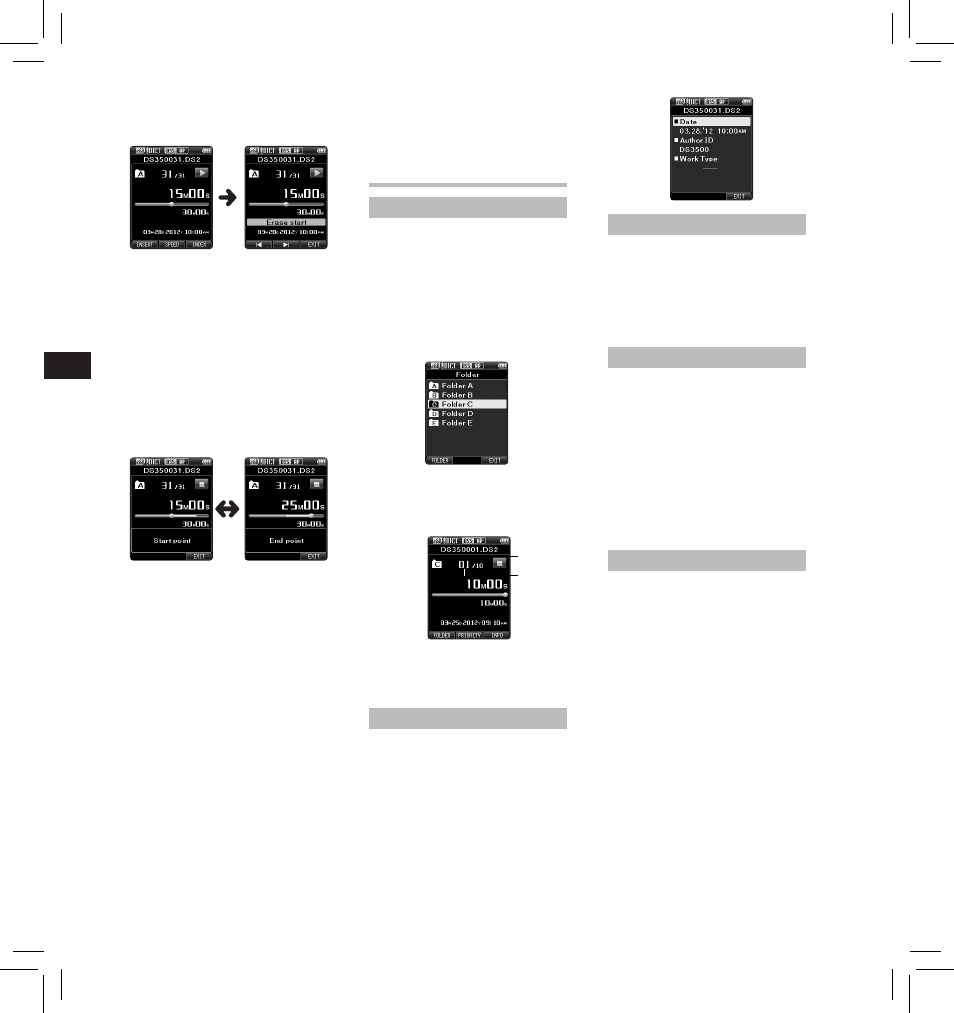
Selecting folders and files
Changing folders:
1 While the recorder is in stop mode,
press the F1 ( FOLDER ) button.
• The folder list screen will be
displayed.
2 Press the + , – or F1 ( FOLDER )
button to select the folder, then
press the OK/MENU button.
b
a
Selecting a file:
1 While the file is being displayed,
press the
9 , 0 button.
a Total number of recorded files in
the folder
b Current file number
Displaying file information
The recorder can display a variety of
information related to the current
file.
1 Select the file containing the
information to display.
2 Press the F3 ( INFO ) button.
• The following information will
be displayed:
[ Date ] [ Author ID ] [ Work Type ]
Device lock function
Access to the recorder can be
restricted by using the Device Lock
function. Password authentication
can be safer for your data in case the
recorder is lost.
The password can be set by using the
ODMS software.
Setting the Author ID and Work Type
Every file recorded on the recorder
will include the Author ID and Work
Type as part of its header information.
To create multiple Author IDs and
Work Types on the recorder, use the
bundled ODMS software to create
and upload a data list (list of Author
IDs and Work Types) to the recorder.
For more details, refer to the online
help for ODMS software.
By default the Author ID is set to
“DS3500”.
3 In the position you want to end
partial erase, press the ERASE
button again.
• The erase starting point (time)
set in step 2 and the ending
point (time) set in this step will
be displayed alternatively for 8
seconds.
• If you let the playback continue
until the end of the file, or in
case of a Verbal comment before
it, that will be considered the
ending point of the partial erase.
4 Press the ERASE button to confirm
the erasure.
• The display changes to [ Partial
erasing ! ] and erasing will start.
• When [ Partial erase completed. ]
appears on the display, partial
erase is complete.
Notes
• If the ERASE button is not
pressed within 8 seconds after the
[ Start point ] and [ End point ] are
alternately displayed, the recorder
will revert to stop status.
• An erased file cannot be restored.
• The erasing process may take up to
10 seconds. Do not interrupt this
process or data may be damaged.
• Files cannot be partially erased in
the following cases.
- MP3 file is selected.
- Files are locked.
Playback will continue until the
end of the file or until the partial
erase ending point is confirmed.
- Partial erasing is not possible
on parts of files with a Verbal
comment on them.
- Files are inside a locked SD card.