Defining a raid array – Asus P5AD2-E Deluxe User Manual
Page 139
A S U S P 5 A D 2 - E D e l u x e
A S U S P 5 A D 2 - E D e l u x e
A S U S P 5 A D 2 - E D e l u x e
A S U S P 5 A D 2 - E D e l u x e
A S U S P 5 A D 2 - E D e l u x e
5 - 2 5
5 - 2 5
5 - 2 5
5 - 2 5
5 - 2 5
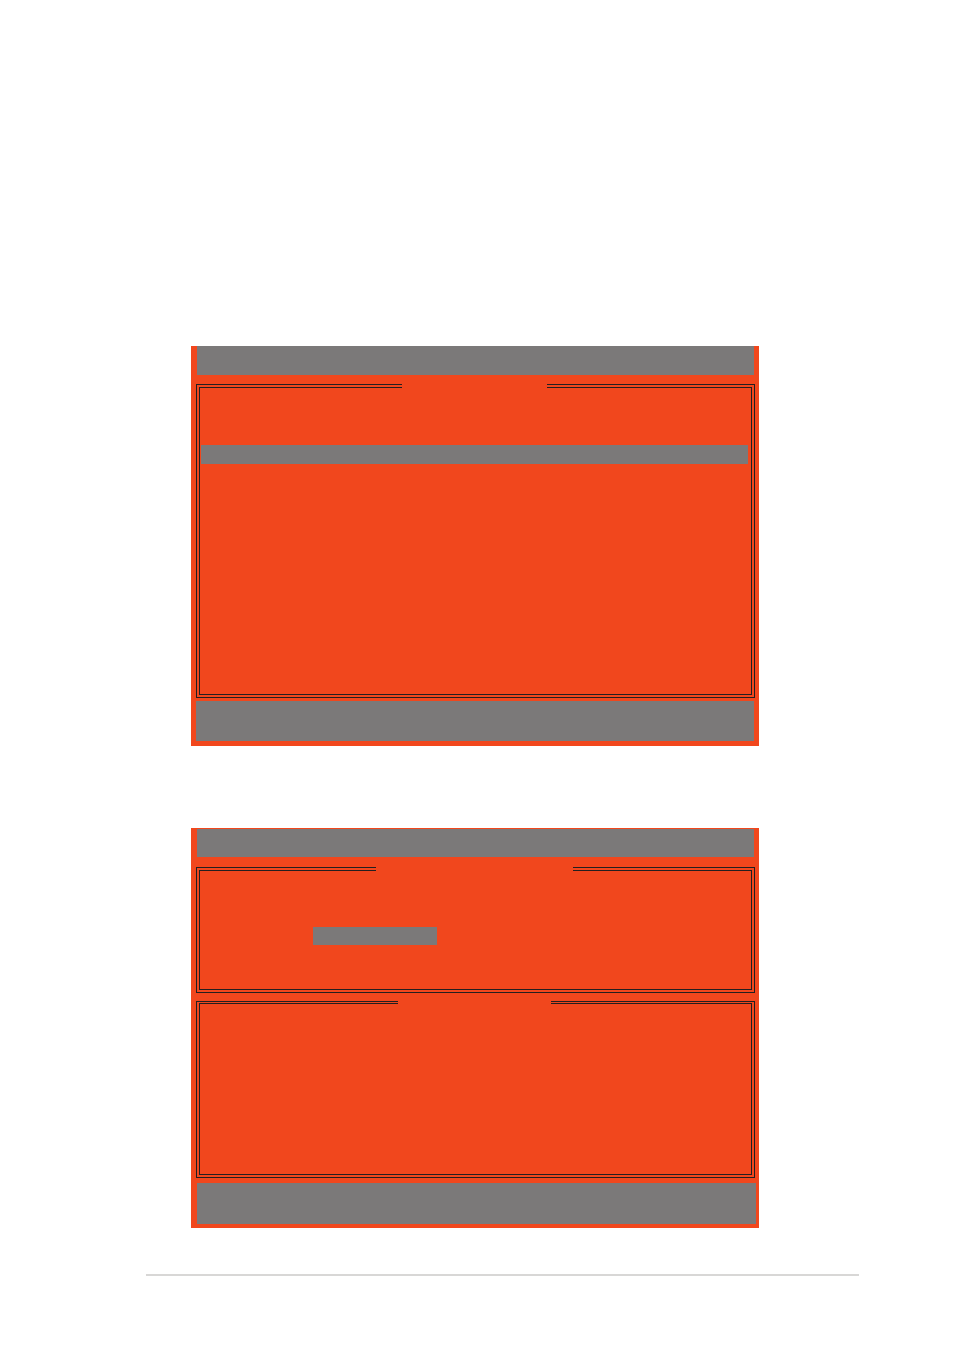
IT8212 Setup Utility (C)Copyright 2002-2004 ITE, Inc.
[ Define RAID Menu ]
Array No Array Mode Drive No Size(MB) Status
Array 0 ----
---- ----- -----
Array 1 ----
---- ----- -----
Array 2 ----
---- ----- -----
Array 3 ----
---- ----- -----
∗∗∗∗∗
: Capacity (GB)
♦
♦
♦
♦
♦
: Bootable Array
[
↑↑↑↑↑
] Up
[
↓↓↓↓↓
] Down [Space] Boot Array
[Enter] Select [ESC] Exit
Defining a RAID array
Defining a RAID array
Defining a RAID array
Defining a RAID array
Defining a RAID array
This option allows you to define the RAID set(s).
To define a RAID set(s):
1.
Press <2> from utility main menu. The following screen appears.
2.
Press the up/down arrow keys or the space bar to select a RAID set
you want to define, then press
IT8212 Setup Utility (C)Copyright 2002-2004 ITE, Inc.
[ Define RAID Sub-Menu ]
∗∗∗∗∗
: Capacity (GB)
[
↑↑↑↑↑
] Up
[
↓↓↓↓↓
] Down [Space] Change Option [Ctrl-Y] Save [ESC] Exit
Channel
ID Drive Name
Size(MB)
Assignment
Pri/D0 XXXXXXXXXXXXXX
XXXXXX
Y
Pri/D1 XXXXXXXXXXXXXX
XXXXXX
Y
Sec/D0 XXXXXXXXXXXXXX
XXXXXX
Y
Sec/D1 XXXXXXXXXXXXXX
XXXXXX
Y
[ Drive Assignments]
Array No Array Mode Drive No Status
Array 0
Stripe
4 Functional
Block Size: 64KB
3.
Press the up/down arrow keys to move through the RAID set values.
4.
Press the Space bar to adjust the RAID set values.