Replacing a fan assembly, Replacing, Assembly – Lenovo THINKSTATION D10 User Manual
Page 43: Removing
Replacing
a
fan
assembly
Attention
Do
not
open
your
computer
or
attempt
any
repair
before
reading
the
“Important
safety
information”
in
the
Safety
and
Warranty
Guide
that
was
included
with
your
computer.
To
obtain
a
copy
of
the
Safety
and
Warranty
Guide,
go
to
the
Support
Web
site
at
http://www.lenovo.com/support.
This
section
provides
instructions
on
how
to
replace
the
fan
assembly.
These
removal
instructions
apply
to
the
both
the
front
fan
and
the
rear
fan.
The
front
fan
is,
located
on
the
inside
of
the
front
panel
of
the
computer
behind
the
front
bezel.
The
rear
fan
is
located
on
the
inside
of
the
rear
panel
of
the
computer.
1.
Open
the
computer
cover.
See
2.
Note
the
routing
of
the
fan-assembly
wiring.
See
Disconnect
the
fan-assembly-wiring
connector
from
the
system
board.
3.
Remove
the
fan
from
the
fan
bracket
(some
models).
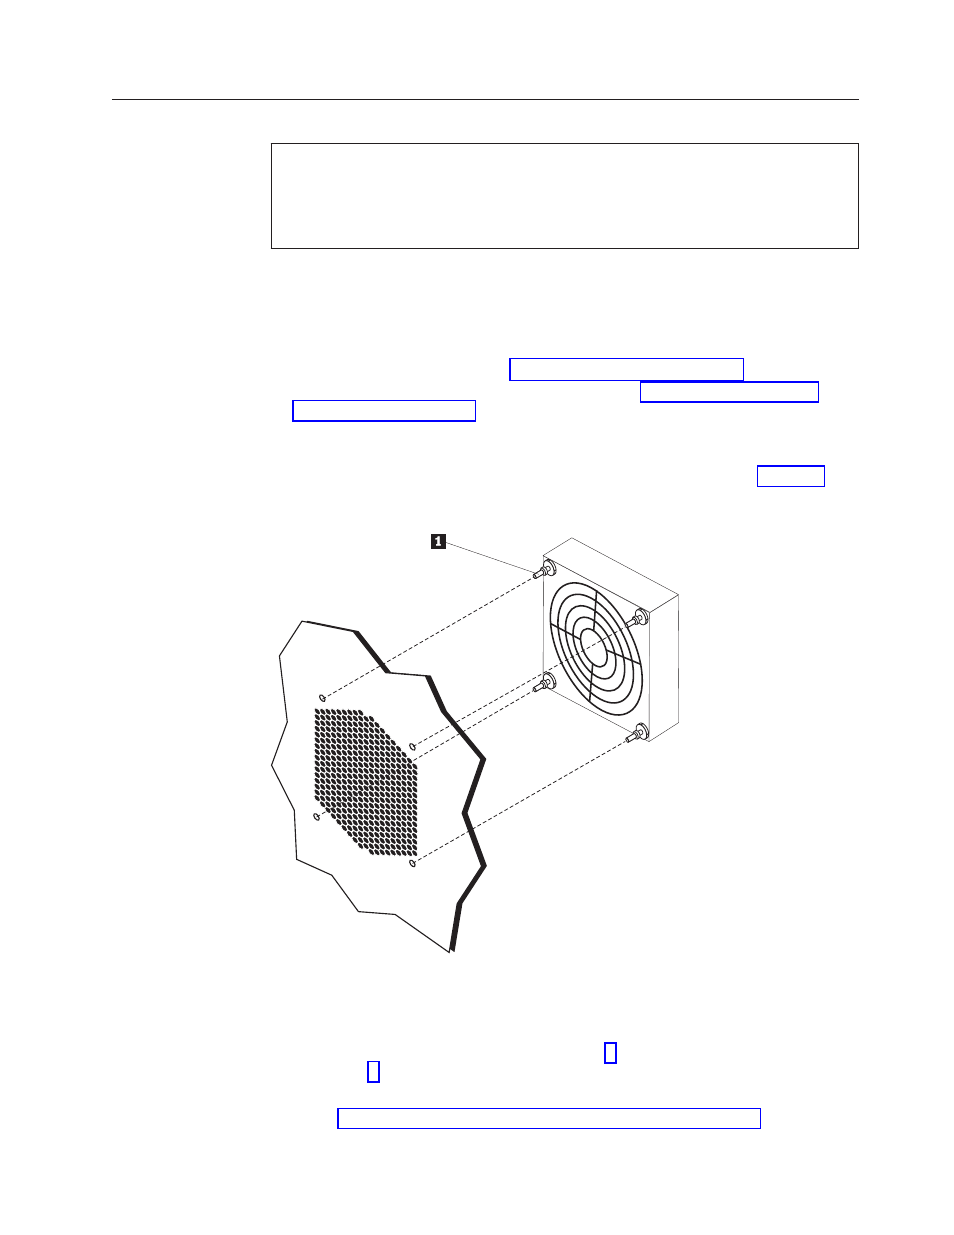
4.
Remove
the
fan
assembly
by
releasing
the
fan
grommets
1 .
See
Then
remove
the
fan
and
wiring.
5.
Install
the
new
fan
assembly
using
the
grommets
1 ,
route
the
wiring,
and
then
connect
the
fan-wiring
connector
to
the
system
board.
6.
If
you
are
installing
the
front
fan
go
to
step
If
you
are
replacing
the
rear
fan,
go
to
step
7.
Reinstall
the
front
bezel.
8.
Go
to
Figure
27.
Removing
the
fan
assembly
Chapter
3.
Installing
options
and
replacing
hardware
35