Replacing, Diskette, Drive – Lenovo THINKSTATION S10 User Manual
Page 42: Optional, Card, Reader, Removing
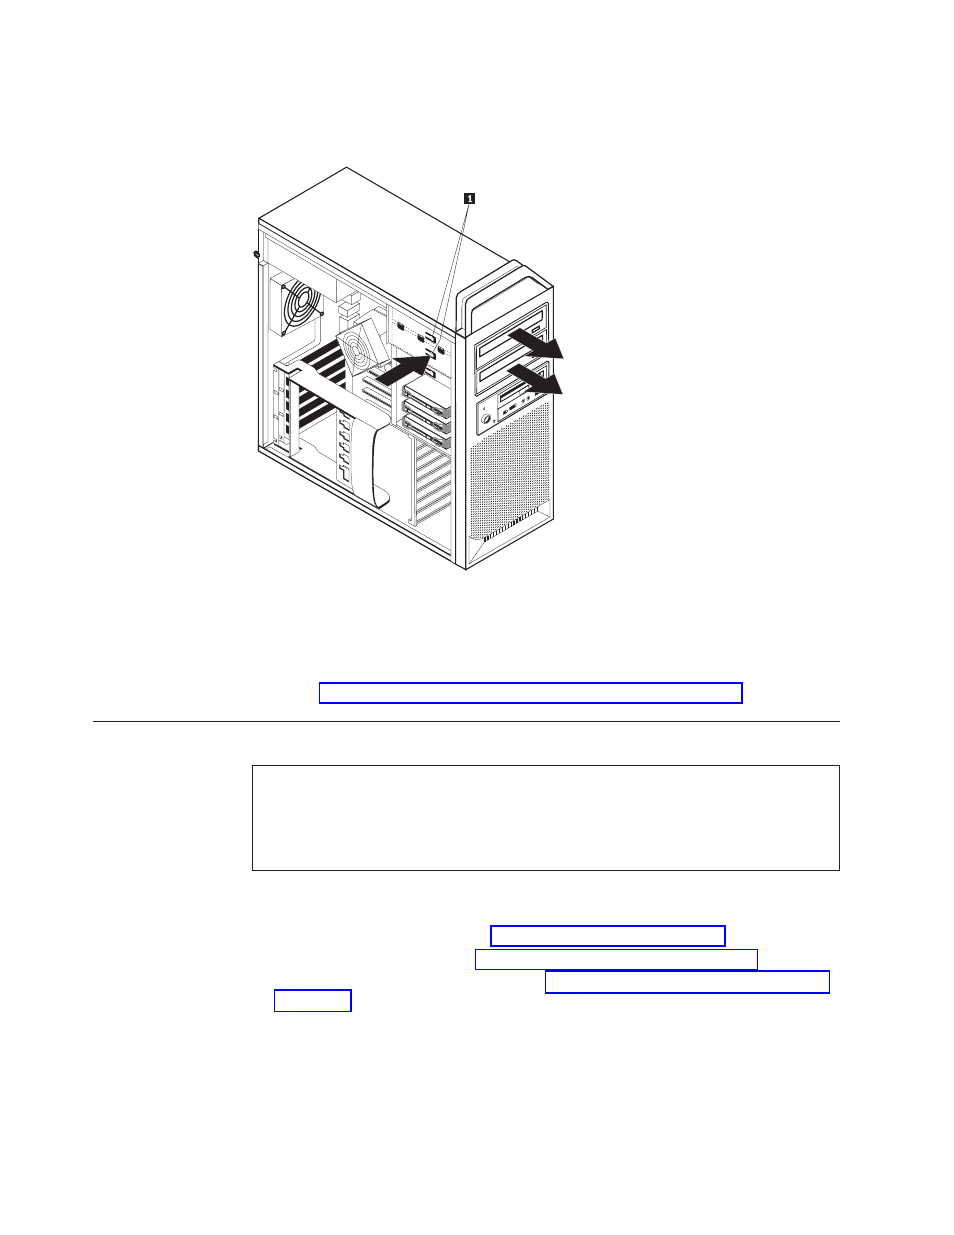
5.
Press
the
drive
latch
1
(for
the
drive
you
want
to
remove)
and
slide
the
optical-drive
from
the
chassis.
6.
Install
the
new
optical-drive
from
the
front
of
the
drive-bay
assembly.
Slide
the
optical-drive
toward
the
rear
of
the
chassis
to
lock
the
drive
into
position.
7.
Connect
the
flat
cable
to
the
new
optical-drive.
8.
Go
to
Replacing
the
diskette
drive
or
optional
card
reader
Attention
Do
not
open
your
computer
or
attempt
any
repair
before
reading
the
“Important
safety
information”
in
the
Safety
and
Warranty
Guide
that
was
included
with
your
computer.
To
obtain
a
copy
of
the
Safety
and
Warranty
Guide,
go
to
the
Support
Web
site
at:
http://www.lenovo.com/support/
This
section
provides
instructions
on
how
to
replace
the
diskette
drive.
1.
Open
the
computer
cover.
See
2.
Remove
the
front
bezel.
See
3.
Locate
the
drive
cable
connectors.
See
4.
Note
the
location
of
the
drive
cables.
Disconnect
the
drive
cables
from
the
system
board.
Figure
21.
Removing
the
diskette
drive
or
optional
card
reader
drive
34
ThinkStation
Hardware
Installation
and
Replacement
Guide