2 connecting the pt-120 xga line receiver, Connecting the pt-120 xga line receiver, Figure 6: connecting the pt-110xl to a pt-120 – Kramer Electronics PT-120 User Manual
Page 15
12
PT-110xl, WP-110, PT-120, TP-120 - PT-120 XGA Line Receiver
5.2
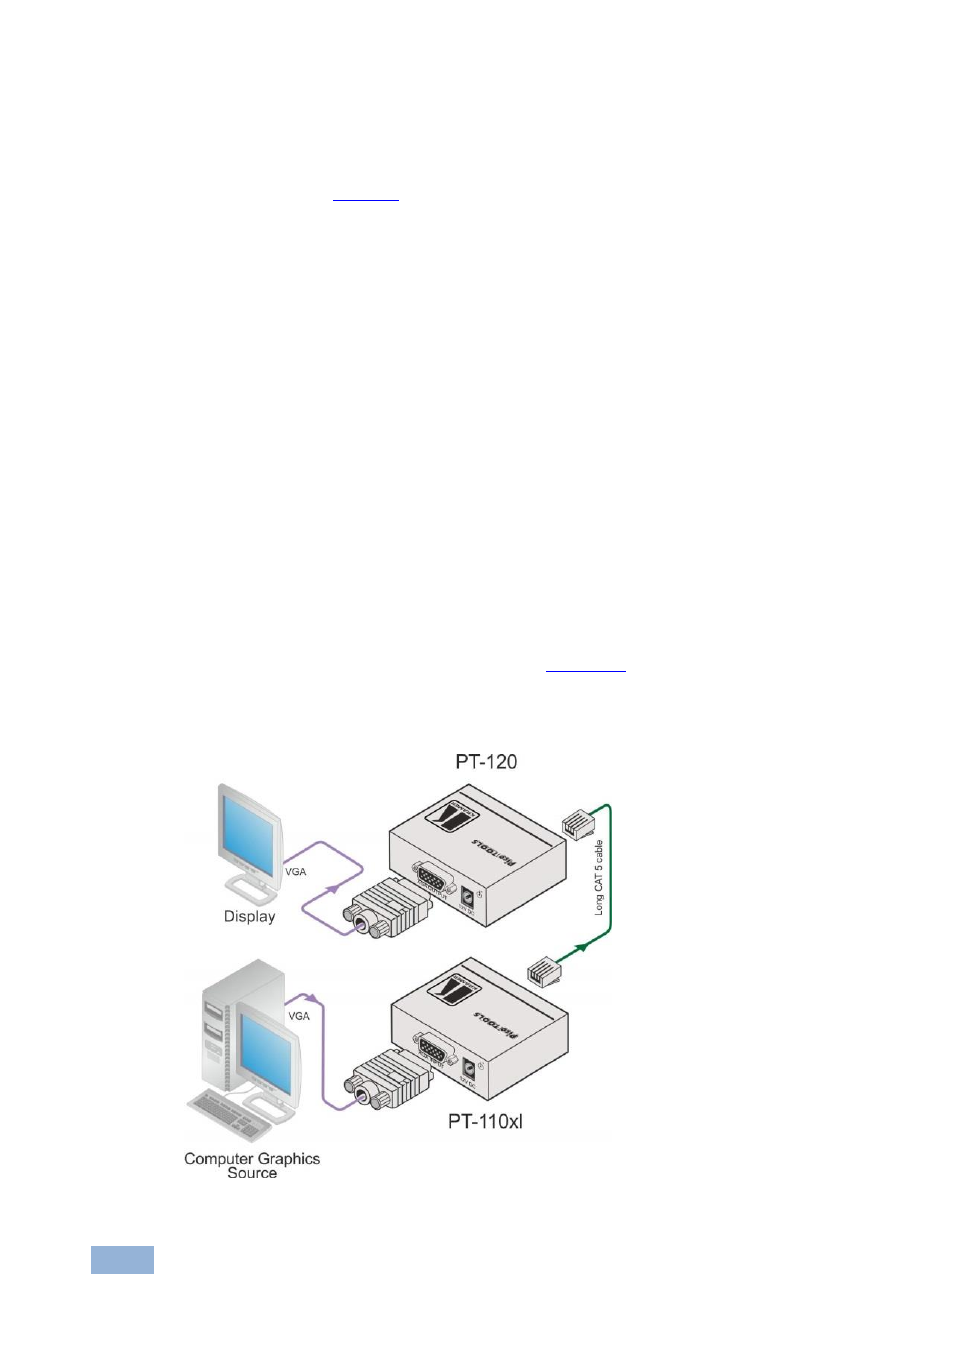
Connecting the PT-120 XGA Line Receiver
To connect the PT-110xl XGA Line Transmitter to the PT-120 XGA Line Receiver,
as the example in
illustrates, do the following:
1. On the PT-110xl, connect the XGA source (for example, the 15-pin HD
output from a computer’s graphics card) to the XGA INPUT 15-pin HD (F)
connector.
2. On the PT-120, connect the XGA OUT 15-pin HD (F) connector to the XGA
acceptor (for example, a monitor).
3. Connect the LINE OUTPUT RJ-45 connector on the PT-110xl to the LINE IN
RJ-45 connector on the PT -120, via UTP cabling (with a range of more than
300ft (>100m)).
4. On both the PT-110xl and the PT-120, connect the 12V DC power adapter to
the power socket and connect the adapter to the mains electricity.
The signal from the XGA source is transmitted via CAT 5 cable, decoded
and converted at the XGA OUT 15-pin HD (F) connector to the XGA
acceptor.
For details of the power connect feature see
Section
5. On the PT-120, using a screwdriver to carefully rotate the trimmer, adjust the
output signal level and/or cable compensation equalization level, if required.
Figure 6: Connecting the PT-110xl to a PT-120