5 installing the swm-1, 1 preparing for installation, Installing the swm-1 – Kramer Electronics SWM-1 User Manual
Page 8: Preparing for installation, 5installing the swm-1
6
SWM-1 - Installing the SWM-1
5
Installing the SWM-1
This section describes how to install the
SWM-1.
The following instructions refer to the installation of one unit.
5.1
Preparing for Installation
Before installing the loudspeakers, check that you have all the required tools:
•
Crosshead/Flathead screwdriver
•
Power drill
•
6mm (1/4") masonry bit or 3mm (1/8") wood bit
•
Pencil
•
Level and stud finder (optional)
5.2
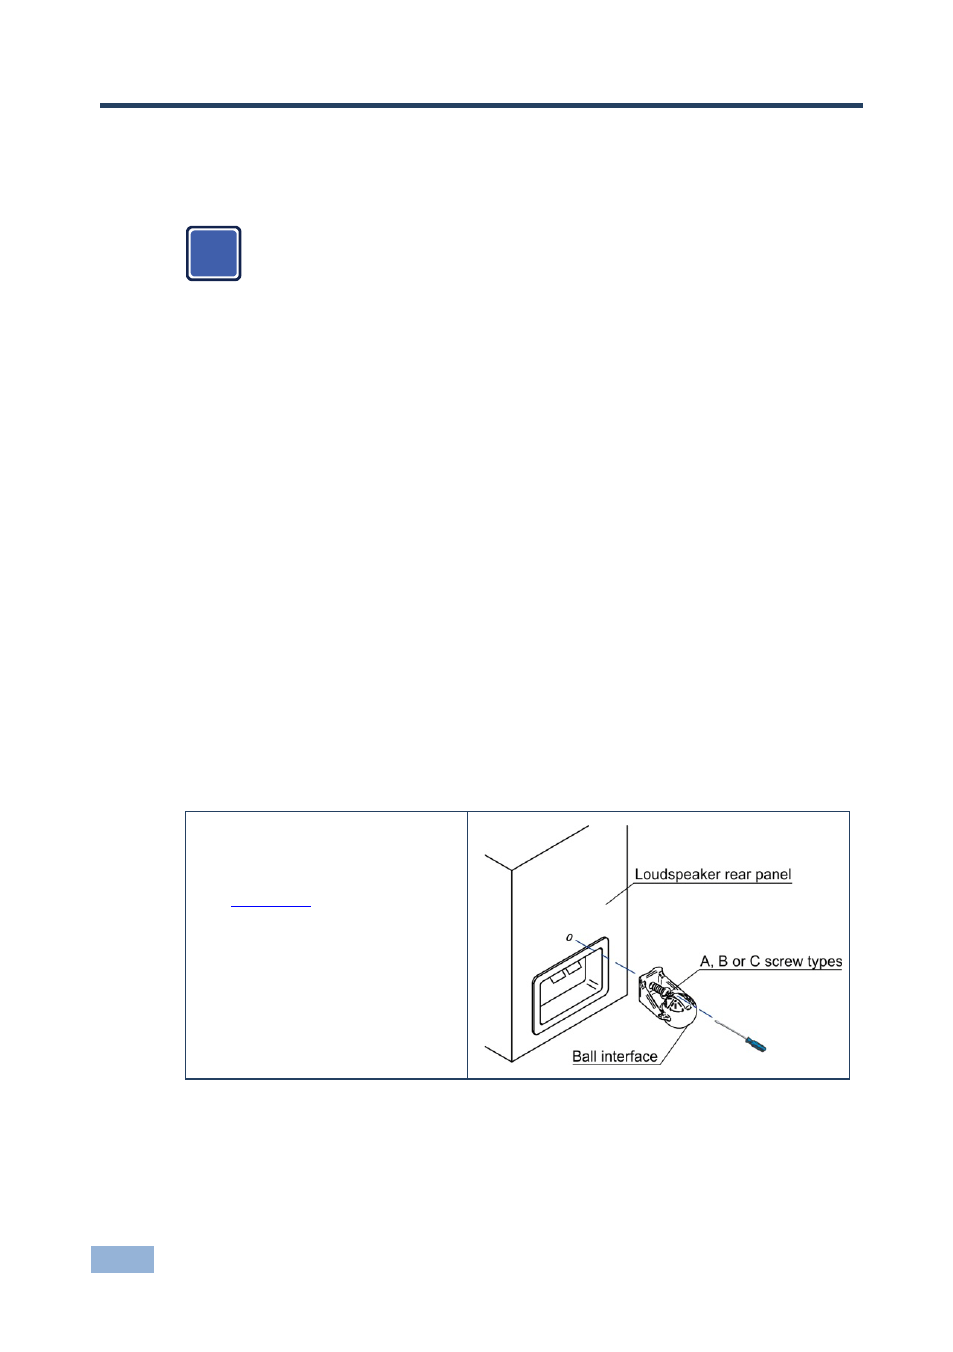
Attach the Ball Interface to the Loudspeaker Rear Panel
This section describes several methods in which you can attach the
SWM-1 Ball
Interface to the rear side of the loudspeaker. Choose the method that fits best to
your loudspeaker:
One Insert:
Connect the ball interface to the
single hole on the loudspeaker rear
panel using screw types A, B or C
(see
Section 4.2
).
i
- VM-114H (22 pages)
- VM-114H2C (25 pages)
- VM-114H4C (23 pages)
- VS-81ETH (27 pages)
- VS-81ETH (41 pages)
- VM-9T (13 pages)
- VP-12NHD (15 pages)
- VP-5R (20 pages)
- VP-6A (15 pages)
- PT-5R/T (13 pages)
- TP-102HD (13 pages)
- TP-104HD (33 pages)
- TP-112HD (13 pages)
- TP-114 (13 pages)
- TP-202 (15 pages)
- TP-205A (15 pages)
- TP-210 (14 pages)
- TP-210A (15 pages)
- tp-219hd (16 pages)
- TP-305A (15 pages)
- TP-310A (18 pages)
- TP-410 (34 pages)
- VM-1H4C (17 pages)
- VP-200xlT (31 pages)
- VP-300THD (12 pages)
- VPM-2 (42 pages)
- SI-1VGA (2 pages)
- SID-DP (2 pages)
- SID-DVI (2 pages)
- SID-H (2 pages)
- SID-VGA (2 pages)
- SID-X1 (2 pages)
- SID-X1 (23 pages)
- SID-X1N (23 pages)
- SID-X2N (31 pages)
- SID-X3N (22 pages)
- 622R (17 pages)
- VS-169TP (7 pages)
- VS-169TP (45 pages)
- WSI-1VGA (2 pages)
- TP-107AV (32 pages)
- RC-5B2 (137 pages)
- WP-500 (2 pages)
- SV-552 (22 pages)
- WP-501 (16 pages)