Figure 8: setting presets, On 4.2.1.1, N 4.2.1.2 – Kramer Electronics VP-790 User Manual
Page 11
VP-790 Warp Generator –
Warp Generator
9
4.2.1.1
19B
Warp Map Presets
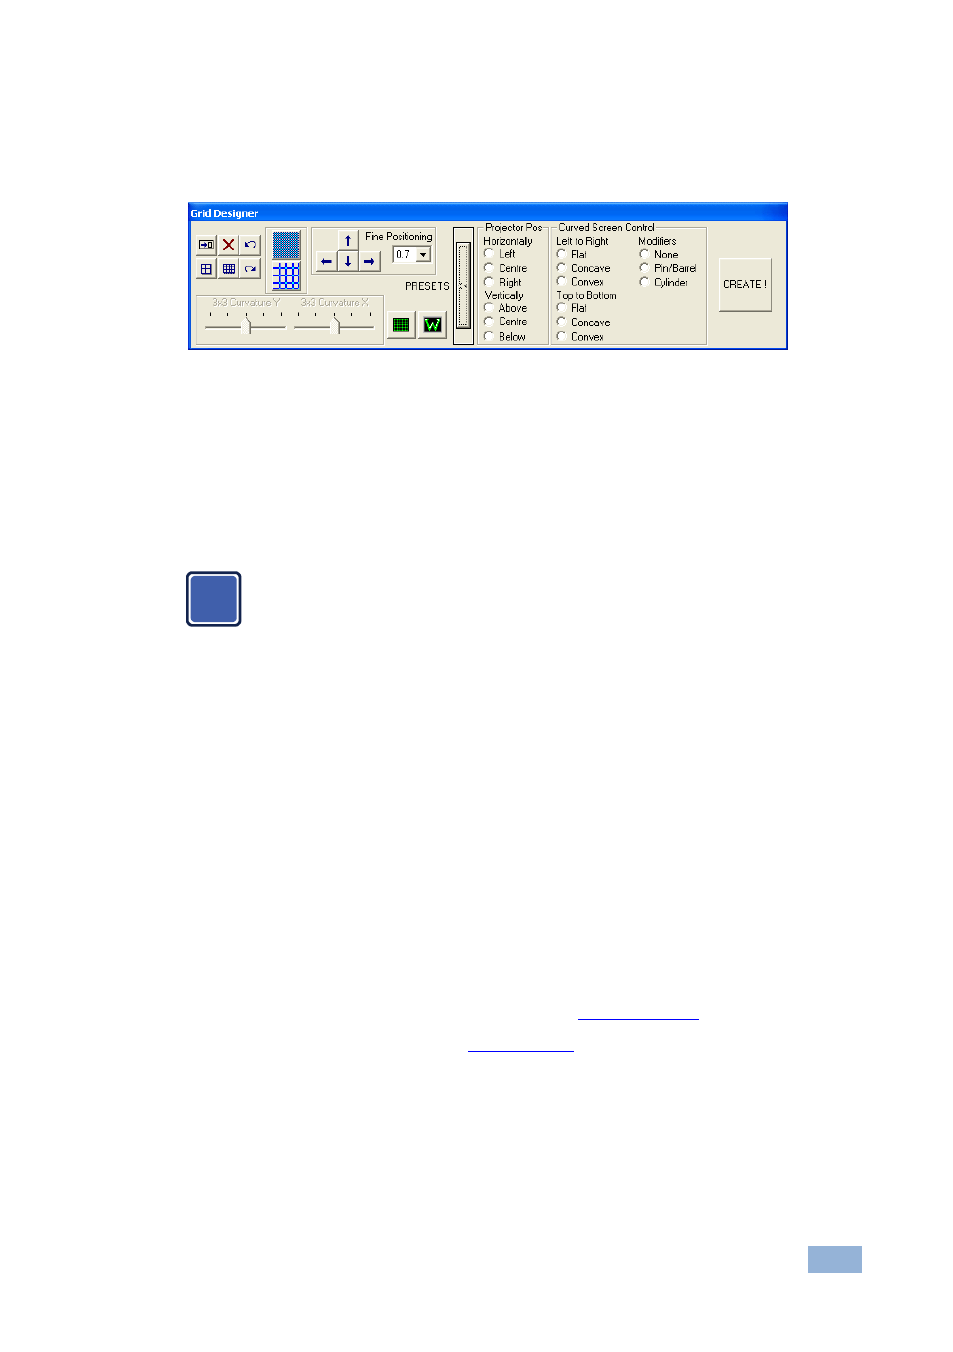
The presets area is used to create the general appearance of the warp map.
Figure 8: Setting Presets
The presets area lets you set an initial warp grid, which is based on the position of
the projector relative to the screen (to the left or right, above, below, or centered),
and the general shape of the screen (flat, concave or convex both ways, and pin,
barrel or cylindrical). Click the CREATE! button to apply it to the grid.
Note that by clicking the CREATE! button, any previous changes you
have made to the warp grid are reset.
Once the presets are defined, you can hide the presets part and continue designing
the warp grid, using the Grid designer window and the Evaluator Controls window
alternately.
4.2.1.2
20B
The Cue Lines
The cue lines appear as fine red lines that initially divide the grid evenly. The cue
lines are provided to help the user get a better ‘feel’ for how their grid point position
choices will affect the final warped result on the output of the
VP-790.
Cue lines appear only in 2x2 and 3x3 grids, as higher detailed grids already have
enough information to represent the final warp result. The cue lines can be
manipulated either via the PRESETS setup (see
U
Section 4.2.1.1
) or adjusted using
the Curvature X and Y sliders (see
U
Section 4.2.1
).
i