2 priority switching applications, Priority switching applications, Connecting the contact closure remote control pins – Kramer Electronics VS-311H User Manual
Page 12
VS-311H - Connecting the VS-311H
9
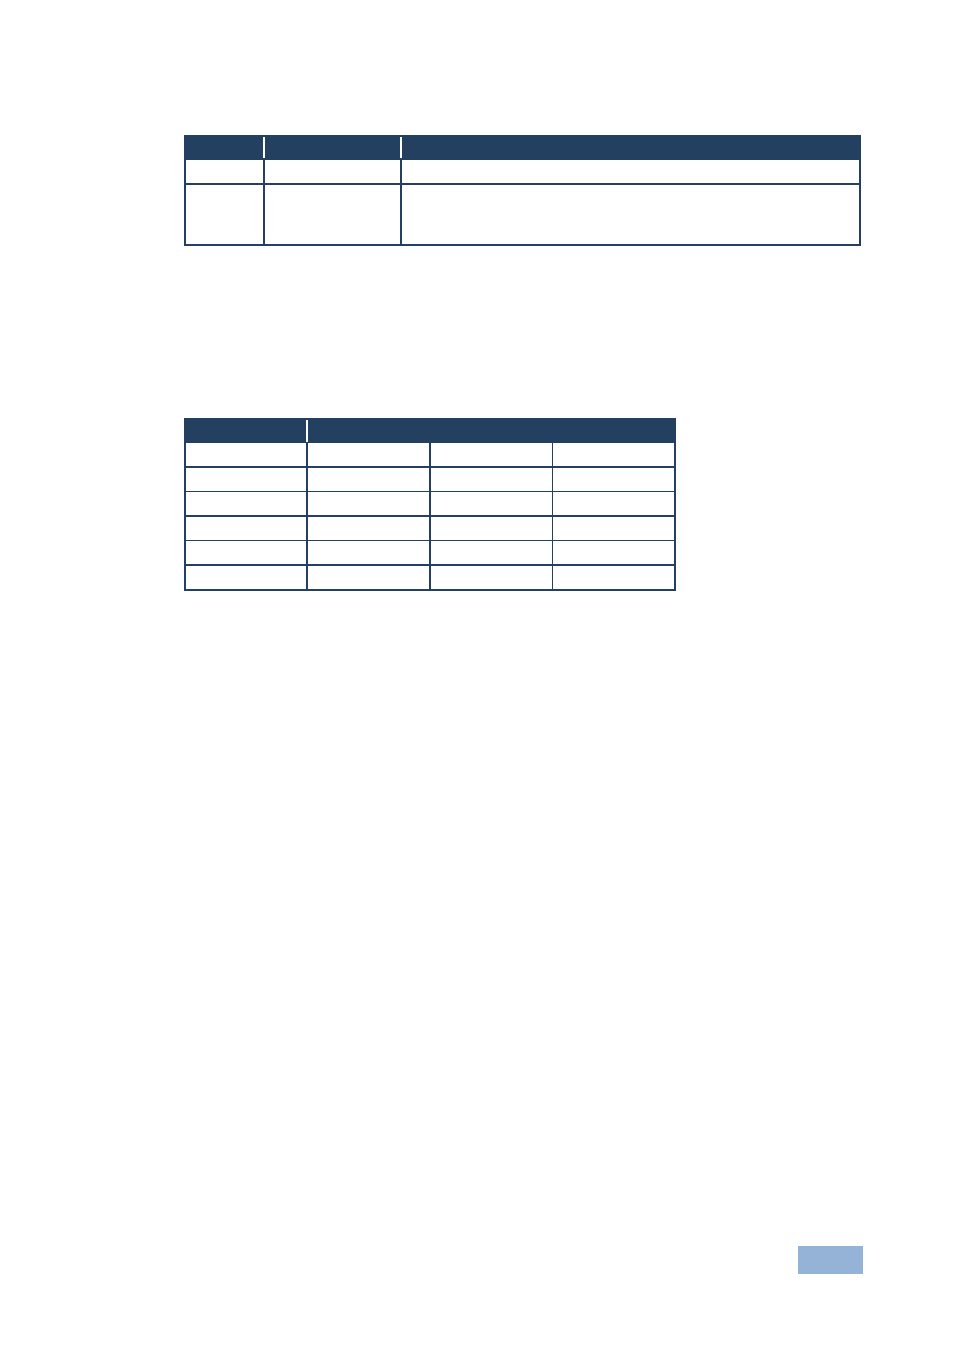
DIPS
Function
Description
1, 2, 3
Priority setup
Set the inputs priority
4
AUTO
OFF: manual mode, switch between channels manually;
ON: automatic mode, inputs switch automatically to the output
according to the priority setup
Inputs 1, 2 and 3 can be set in priority according to your needs. The VS-311H
switches to the secondary input upon loss of the primary input signal, and back to
the primary input when a signal is detected.
The following table describes the priority setup:
Priority
DIP Position
1, 2, 3
OFF
OFF
OFF
3, 2, 1
OFF
OFF
ON
2, 3, 1
OFF
ON
OFF
1, 3, 2
ON
OFF
OFF
3, 1, 2
ON
OFF
ON
2, 1, 3
ON
ON
OFF
4.2
Priority Switching Applications
In the following example, DIP-switches 1, 2, and 3 are set to OFF, OFF and OFF
respectively, meaning that the highest priority input is IN 1; IN 2 is the secondary
input; and IN 3 the third. DIP-switch 4 is set ON, enabling AUTO mode operation.
If all the inputs are connected, you can, for example, press the INPUT SELECTOR
2 button to switch IN 2 to OUT. The plasma display shows the IN 2 signal.
If the HDMI signal on IN 2 is cut off, the switcher automatically switches IN 1 to the
output, and if that fails too, IN 3 is automatically switched to the output. If, in the
meantime, the IN 2 signal is restored, IN 2 will take priority once again.
4.3
Connecting the Contact Closure Remote Control PINs
The contact closure remote control pins operate in a similar way to the input
buttons.
For example, you may override (equivalent to pressing a different input button) the
presently routed input by using the remote control contact closure. To do so,