Rivera Primo Single Tilt Forward 42 Mikuni Carburetor Kit User Manual
Page 3
SSSSS
S
IIIII
I
NNNNN
N
G
GGG
G
G
LLLLL
L
EEEEE
E
CCCCC
C
AAAAA
A
RRRRR
R
BBBBB
B
IIIII
I
NNNNN
N
SSSSS
S
TTTTT
T
RRRRR
R
UUUUU
U
CCCCC
C
TTTTT
T
IIIII
I
O
OOO
O
O
NNNNN
N
SSSSS
S
DISASSEMBLY
1. Disconnect the negative (-) battery terminal.
2. Turn the fuel petcock to the "OFF" position.
3. Remove the gas tank from the motorcycle, or
elevate the rear of the tank for better access to
the intake manifold.
4. Completely remove the OEM or existing air
cleaner assembly.
6. Disconnect the vacuum hoses and fuel hose
from the carburetor.
7. Remove the carburetor assembly (and choke
cable assembly) from the motorcycle. The throt-
tle cable adjusters must be slackened to allow the
cables to be disconnected from the carburetor.
The Rivera single-carb MIkuni kit is designed to
operate with standard 1990 & later Harley-
Davidson OEM throttle cables.
8. Remove the intake manifold and clamps; these
parts will not be reused.
INSTALLATION
1. INTAKE MANIFOLD
A. Attach the Rivera intake manifold using the
enclosed clamps and seals. The rear cylinder
clamp is marked with "R" and the front with "F".
Place the clamps and seals onto the manifold and
loosely attach the manifold to the cylinder heads
using the stock bolts.
B. Attach the Rivera manifold support bracket to
the cylinders in the appropriate method for your
type engine:
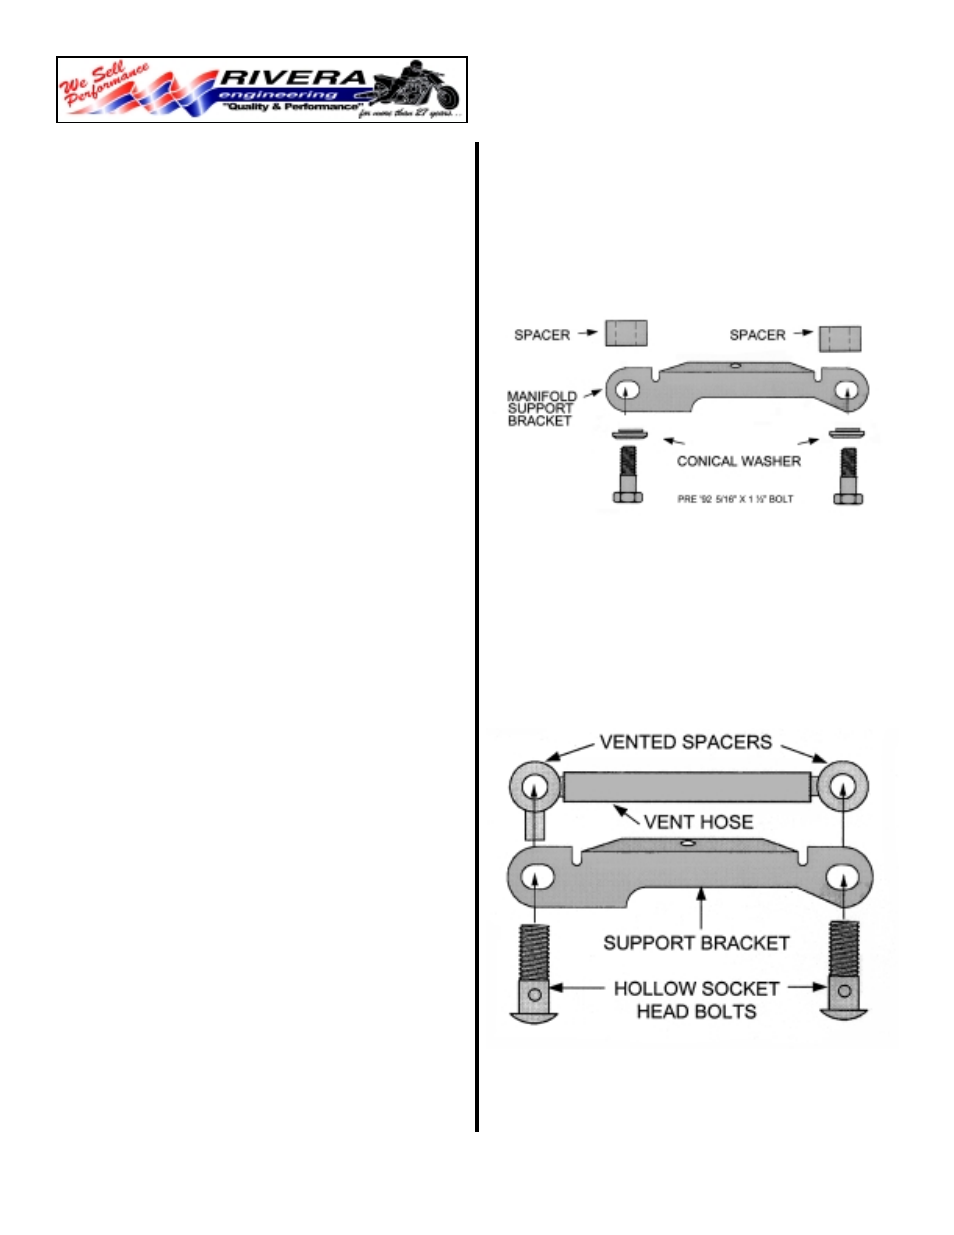
SUPPORT BRACKET ATTACHMENT
FOR PRE '92 MODELS
Pre '92 engines use 2ea. 5/16" X 11/2" bolts,
2ea. conical washer, & 2ea. 1/2" long spacers
with 5/16" holes from this kit.
SUPPORT BRACKET ATTACHMENT
FOR '92 & LATER MODELS
"92 & later engines; use 2ea.
1/2
" hollow socket
head bolts, and 2ea.
1/2
" long vented spacers.
Install the vented spacers as illustrated with the
enclosed
5/16
" ID hose. (Twin Cam uses 3/8” hol-
low bolts.)
3
TOP View