Operation – Mittler Bros Machine & Tool 400-VSUADJ User Manual
Page 7
- 7 -
OPERATION
WEAR SAFETY GLASSES
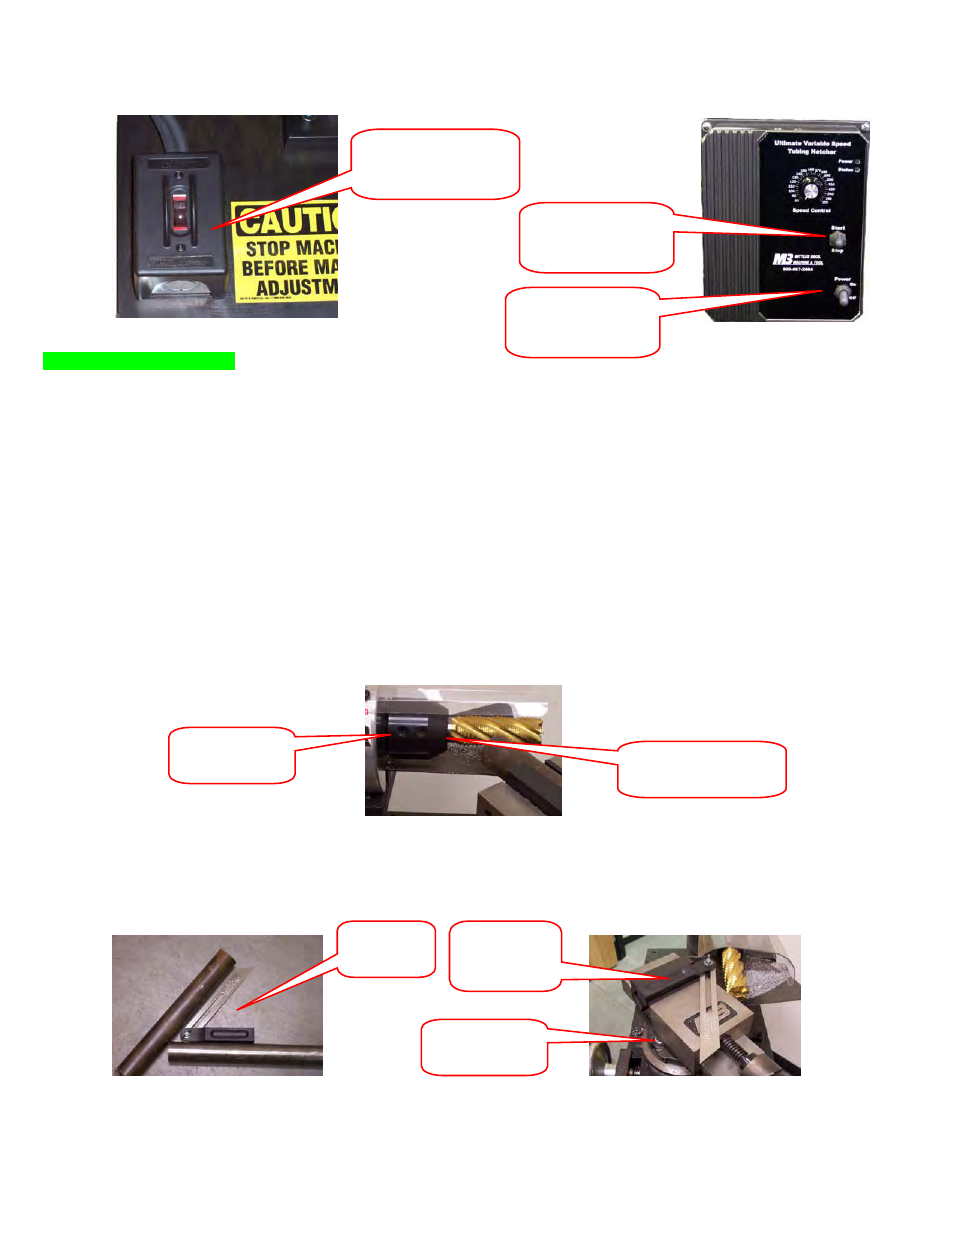
1. Be sure your machine is turned off and is plugged into the proper power source.
[Both the
Single Speed & Variable Speed machine operate on 110 Volt single (1) phase electric. Switch is on the left
side of the main base plate for single speed and on the control box as shown above.
Variable Speed: Use the MASTER on / off switch at bottom right of control box to turn ON the machine for the day or off at
the end of the day, or off for maintenance only.
Use the
RUN / STOP switch at the center right for normal on / off between notches.
Pull Up & HOLD the
RUN / STOP switch for a few seconds to start cutter rotating.
NOTE: Repeated use of the master switch for regular On/Off use can cause damage to the control unit.
2. Install a cutter into the spindle to match the size of tubing you are notching. If the
cutter is 1-1/8” OD or smaller the appropriate reducer bushing is required, see page
23. Align the flat surfaces on the cutter shank with the setscrews and Tighten the two
set screws with the supplied “T” handle wrench.
3. Calculate the angle of the notch. A sliding “T” Bevel, as shown, is one way of doing
this. If you already know the notch angle go to
step #5.
4. Set the vise to the correct angle required. Use the supplied ¾” Combination Wrench to
loosen the two vise swivel locknuts. Rotate the vise to the desired angle and lock
down by tightening the two lock nuts.
#1, Standard
Machine
ON / OFF
Switch
#1, Variable
Speed Machine
MASTER Switch
#1, Variable
Speed Machine
Run/Stop Switch
#2, Tighten
Set Screws
#2, Install Reducer
Bushing if needed
#3, Set to
Angle
#4, Tighten
Lock Nuts
#4, Match
Vise to
Angle