Caution, Grouting procedure – Goulds Pumps 3410 - IOM User Manual
Page 21
If the unit has a non-flexible coupling (e.g. Falk Gear
coupling), the coupling halves should be disconnected; this
is generally not necessary on flexible type couplings (e.g.
Wood’s Sure-Flex coupling).
Tighten up all pump and motor bolts to assure they have not
loosened or a “soft foot” has occurred due to base distortion in
shipment. A “soft foot” causes a change in the alignment when
unloosening one bolt.
If the driver is being field installed, it should be centered in its
bolt holes with shims added to bring the driver into rough
alignment with the pump. (The pump may have to be moved
also.)
$
!
CAUTION
Do not exceed six (6) shims, using as thick a shim as
possible, otherwise “sponginess” or “soft foot” will result.
Place thin shims in between thick shims.
Level and plumb the pump shaft, coupling faces and flanges by
adding or removing shims between the blocks and the bottom of
the base. Hand tighten the anchor bolt nuts at first. Being very
careful not to distort the base, snug down the nuts with a
wrench. The non-flexible coupling should not be reconnected
until the alignment operation has been completed.
NOTE: The baseplate does not have to be level.
After foundation bolts are lightly torqued, recheck
alignment requirements once more. Follow requirements
outlined at the beginning of this section. If alignment must
be corrected, add or remove shims or wedges under the
baseplate.
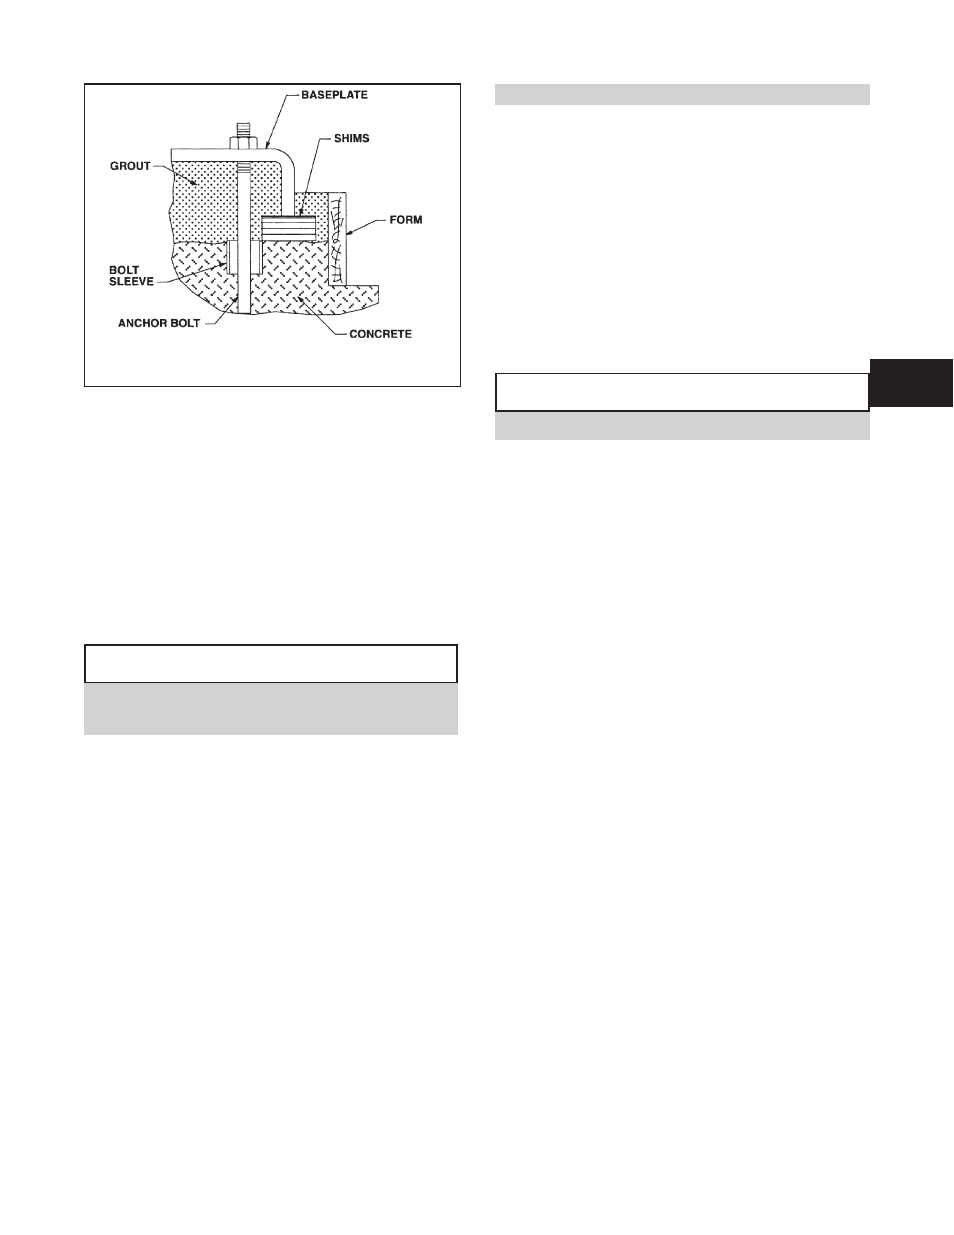
The unit can then be grouted. (See Fig. 10)
Grout compensates for the uneven foundation. Together
with the baseplate, it makes a very rigid interface between
the pump and the foundation distributing the weight over
the length of the base and preventing shifting.
Use an approved, non-shrinking grout such as Embeco 636
or 885 by Master Builders, Cleveland, Ohio or equivalent.
$
CAUTION
Do not grout until initial alignment is made.
GROUTING PROCEDURE
1.
Build a strong form around the foundation to contain
the grout.
2.
Soak the top of the foundation thoroughly, then
remove surface water.
3.
The baseplate should be completely filled with grout
and, if necessary, temporarily use air relief tubing or
drill vent holes to remove trapped air.
4.
After the grout has thoroughly hardened
(approximately 24 hours), tighten the foundation bolts
fully.
5.
Check the alignment after the foundation bolts are
tightened.
6.
Approximately fourteen (14) days after the grout has
been poured and the grout has thoroughly dried, apply an
oil base paint to the exposed edges of the grout to prevent
air and moisture from coming in contact with the grout.
3410 IOM 1/2010
19
3
Fig. 10