Hood handle and hood bracket assembly the handles, The hood mounting brackets – Magikitch'n CG User Manual
Page 4
2
L25-007 Rev.
2
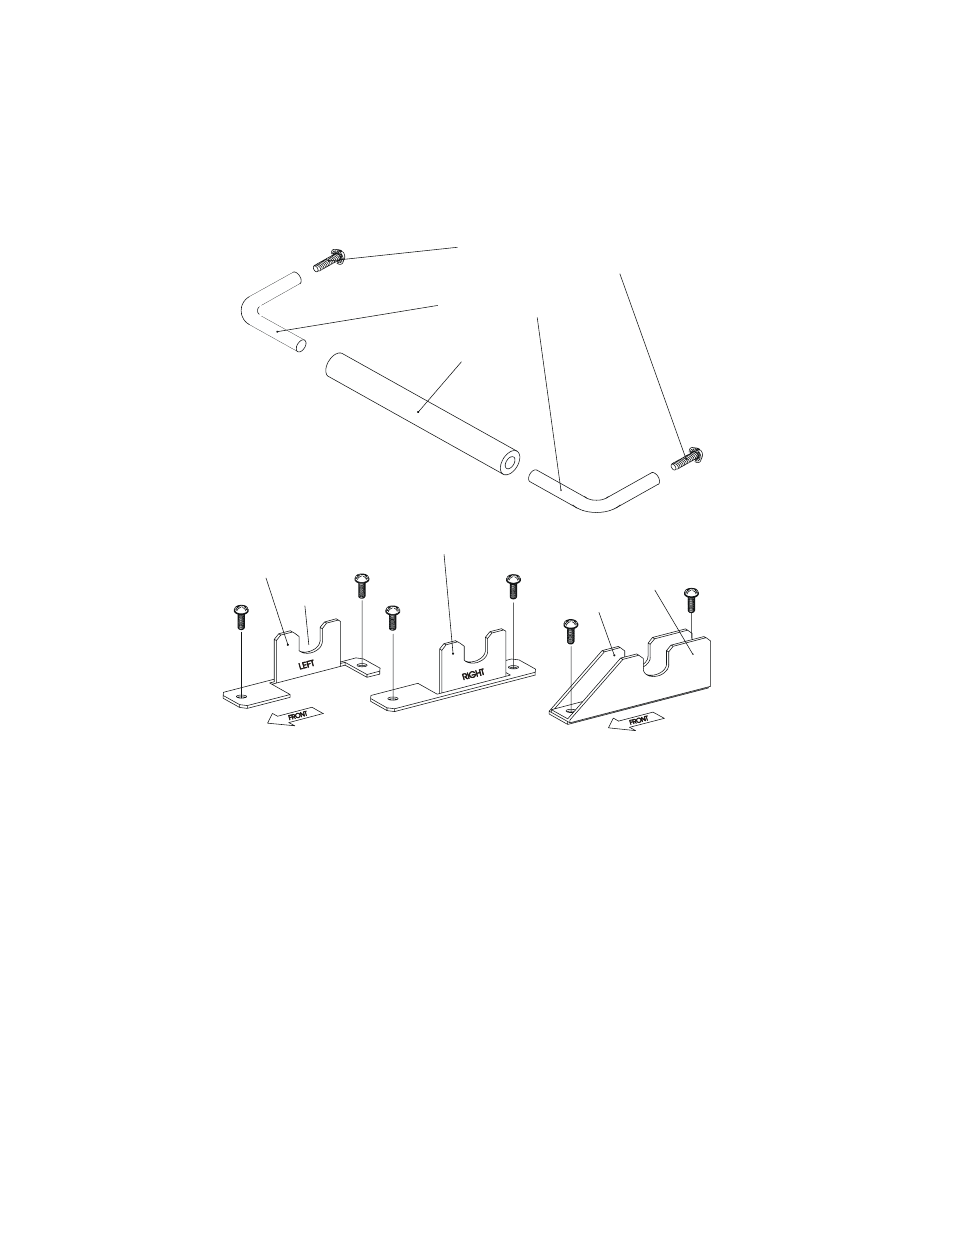
1. Hood Handle and Hood Bracket Assembly
The Handles
(top illustration)
Each handle has two support rods and a center tube. To assemble the handles more easily, open each hood up and turn it upside
down on a large table. The ¾” long bolts from the handle hardware kit go in from the inside of the hood and fasten to a
support rod; point the support in the right direction and snug it up finger tight. Place the tubular handle onto the first
support and slip the second support into place. Hold the second support in position and install the other ¾’ long bolt
through the back of the hood and into the threaded hole in the second support and tighten it. Align the tubular handle and
the support rods in a straight line and tighten the mounting bolts securely with a #3 Phillips screwdriver. Repeat this
procedure for each of the handle sets to be installed. It is important to install all the handles for the hood so it can be easily
removed if it is hot.
The Hood Mounting Brackets
(bottom illustration)
All single hoods require a pair of outer brackets. Units with twin hoods also require a pair of center brackets. Each type has a
left and right hand mate. All the brackets mount with ¾” long bolts that mate with threaded fasteners built into the frame
of the broiler grills. The instructions and illustrations for every combination of hood option can be found in this manual.
4001-0963400
SCREW, 1/4-20 x 3/4”, INT. LOCKWASHER
(PART OF 7299-1257300 HDWE KIT)
5602-1190600
HOOD, HANDLE SUPPORT ROD
5602-1190500
HOOD, HANDLE TUBULAR
5402-1187701
5402-1187702
HOOD, BRACKET CENTER LEFT/RIGHT
HOOD, BRACKET OUTER LEFT
HOOD, BRACKET OUTER RIGHT
5402-1188002, RIGHT
5402-1188001, LEFT
CRADLE
10545C2.DWG