Vaddio WallVIEW D80 and D90 User Manual
Page 7
WallVIEW D80 PTZ and WallVIEW D90 PTZ Manual
© 2012 Vaddio - All Rights Reserved. Document Number 342-0505 Rev A Page 7 of 12
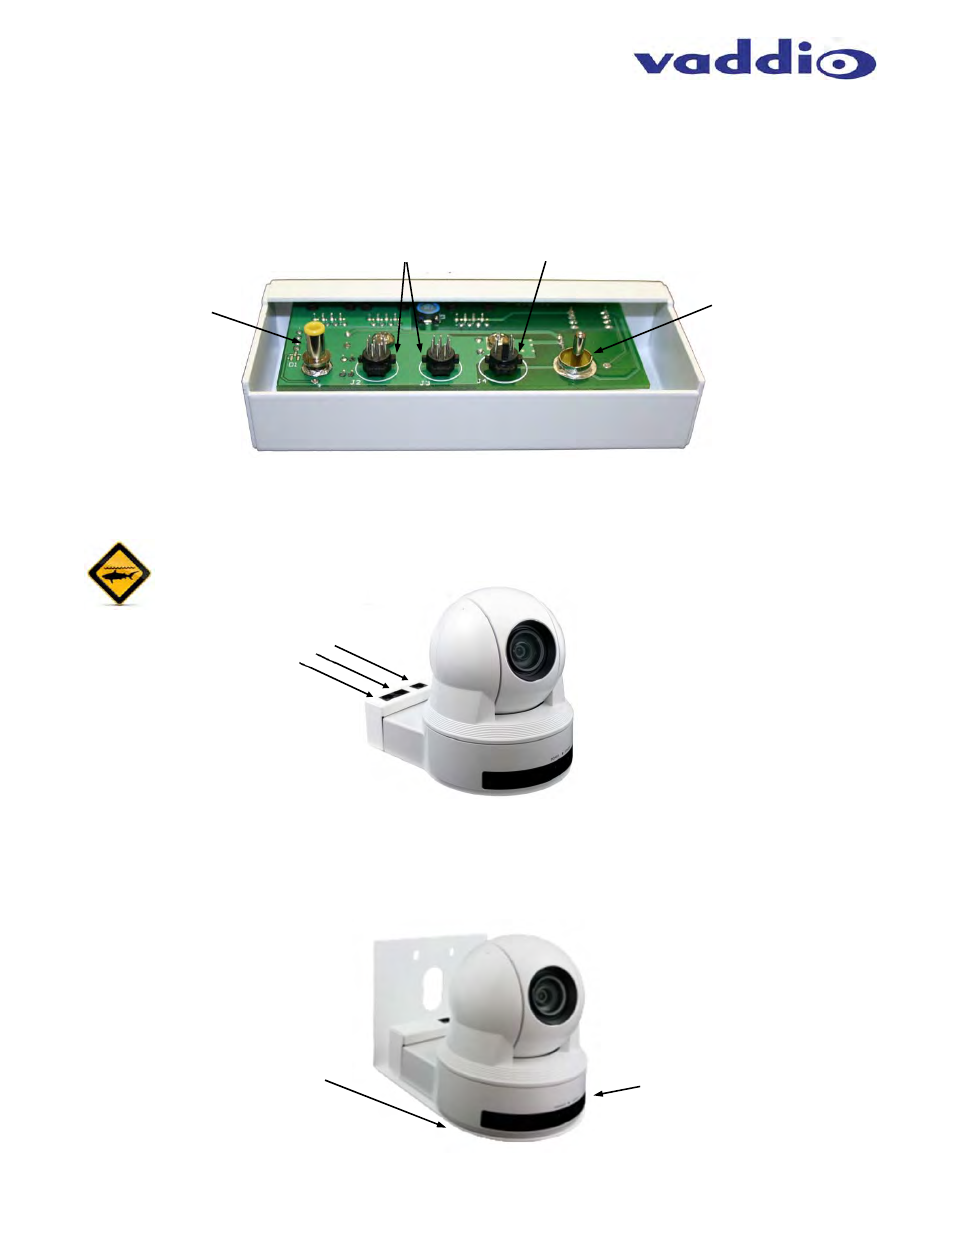
Step 3: Attach the Vaddio EZ Camera Shoe to the camera
Carefully attach the Vaddio EZCamera Shoe to the back connector plate of the camera using the Power pin and
the composite video RCA as guide pins.
Image: PCBA inside the Shoe
Pins from left to Right: Power (EIAJ-04), two (2) 8-pin Mini Din males, S-Video (4-pin Mini Din male) & Video RCA-M
.
Image: Attaching the Shoe
WallVIEW D80 PTZ - White shown with EZCamera Cable Shoe. Carefully slide the shoe into place taking care to
seat the male connections firmly into place.
Do not force the shoe onto the connectors. It should slide into place and make positive connection with
a minimum of effort.
Step 4: Attach the Camera and Shoe to the Wall Mount:
Place the camera onto the camera mount and plug in the Cat-5, RJ-45 connectors. Insert and loosely tighten the
supplied ¼”-20 screw through the wall mount slot and secure the camera to the mount. Gently push camera
toward the front of the mount and align with front curve of mount, then tighten bottom screw. Feed the excess
cable into the wall or wall box.
Image: Camera, Shoe and Mount
S-Video Pins
Control I/O Pins
Power Connector
Composite
Video RCA
Press into place,
Do Not Force the
Shoe onto the
camera
WallVIEW 80
PTZ and Shoe
Shown
WallVIEW 80
PTZ, Shoe &
Mount Shown
Insert the ¼”-20 mounting
screw through bottom slot
and tighten down the
camera loosely
Position camera on the mount
so it looks “sweet” and tighten
the mounting screw