Vaddio Quick-Connect PRO and WallVIEW PRO for AW HE120 User Manual
Page 8
Quick-Connect PRO and WallVIEW PRO for the AW-HE120 Camera
© 2012 Vaddio - All Rights Reserved. Document Number 342-0497 Rev A
Page 8 of 16
Step By Step Mounting Instructions:
Step 1:
After determining the optimum location of the camera system, mark locations for the four screw holes and cable
pass-thru (vertical oval). Install the drywall mounts and cut the hole for the cable pass-thru. At this point, do not
install the Wall Mount.
Image: Heavy Duty Wall Mount
The wall mount may be mounted directly to a 3-gang wall box or to drywall
with the appropriate wall anchors.
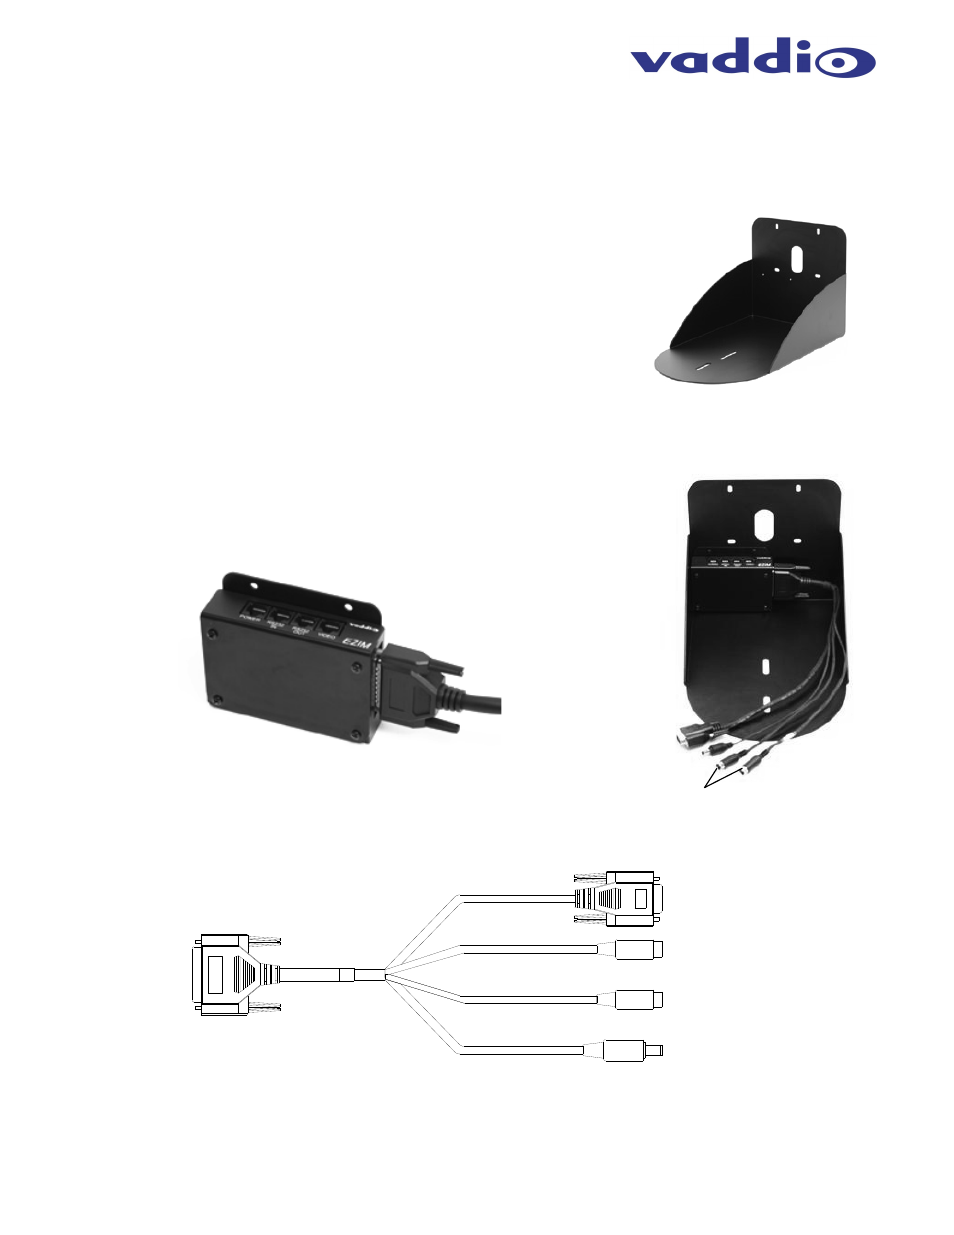
Step 2:
Connect the break out cable to the EZIM. Mount the EZIM and break out cable in the back of the wall mount,
using the supplied #6 screws and two tapped screw holes.
Image: EZIM Break out Cable and Wall Mount
Wall mount shown with EZIM CCU and HD break out cable attached to the
back of the mount with the supplied screws.
Drawing: High Definition Video & Power Break Out Cable
P/N 440-6705-120
DB-25-M
plugs into
EZIM
12 VDC Power
on 3mm Coax
8-pin Mini Din-M
NOT USED
YPbPr on
DE-15-M
8-pin Mini Din-M
NOT USED
YPbPr on DE-15-M
Power on 3mm ID Coax Plug
Not Used
EZIM with DB-25-m of
Breakout cable attached