Preparations 1. battery installation, Data scale set up, Time set up – CatEye AT-110 [Altimeter] User Manual
Page 4: Attaching wrist band, Attaching to your body
3
PREPARATIONS
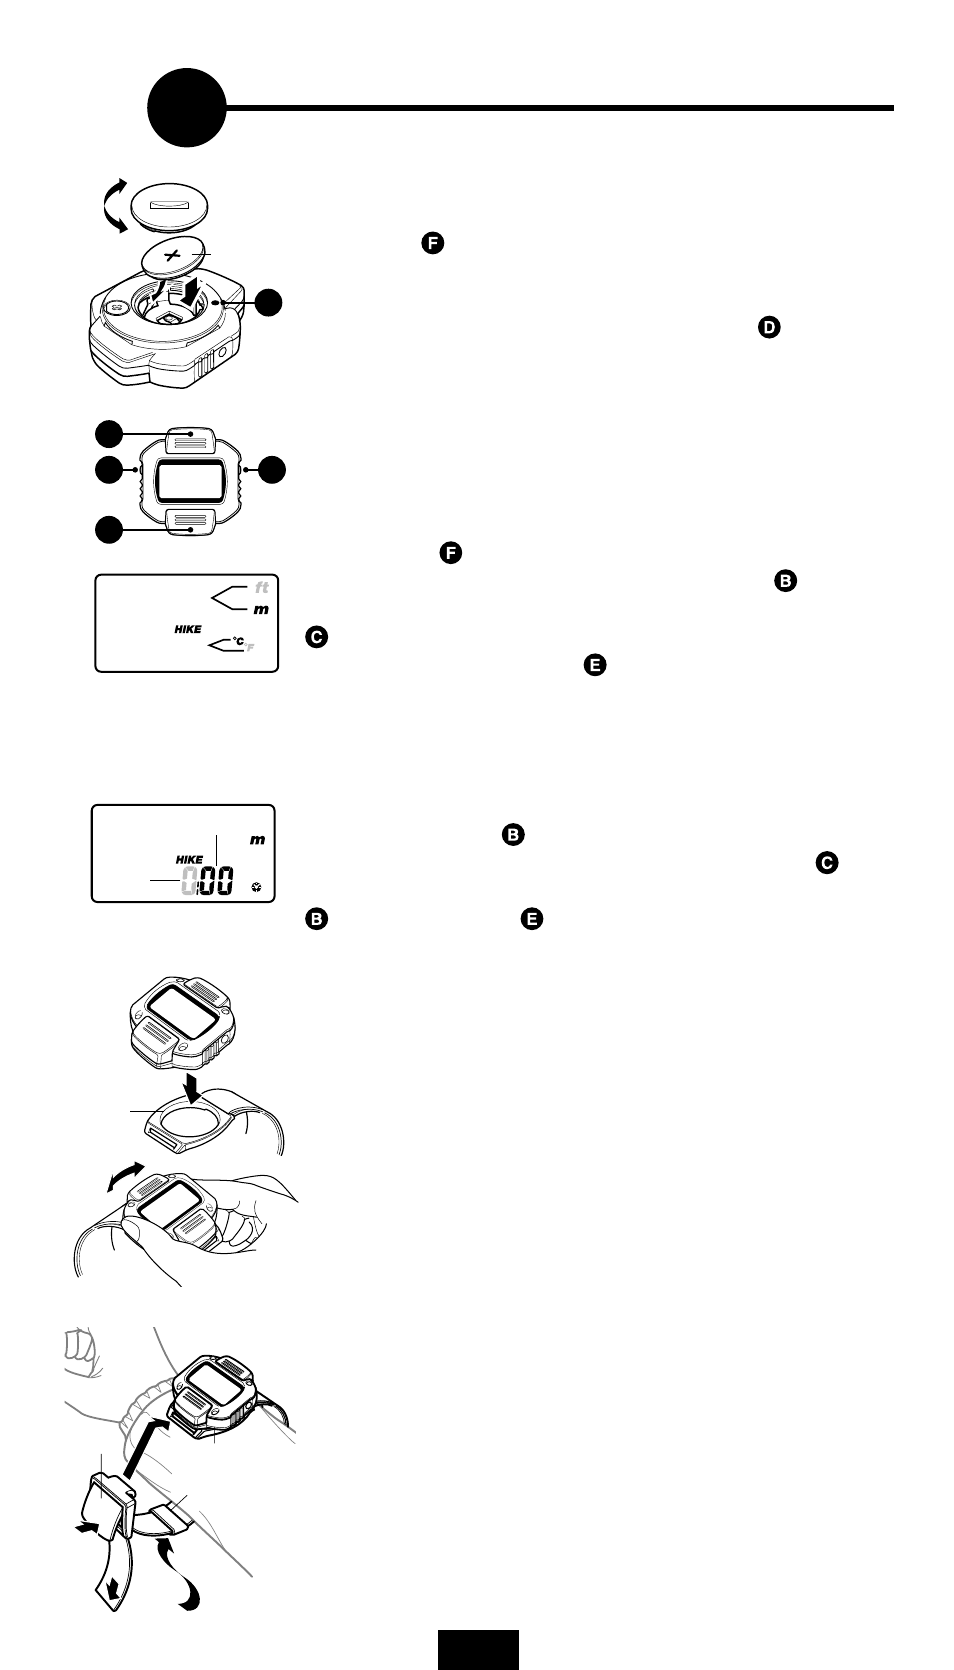
1. Battery Installation
1. Remove the battery cover on the back, with a coin.
2. Insert a new lithium battery (CR2032) with the (+) pole outward,
as illustrated. Close the cover securely.
3. Press the
AC (All Clear) button on the back.
*
Battery Life: approx. 4 months (average use of one hour per day;
varies depending on frequency of use)
Note: If the display disappears while press of the
Light button,
or often shows irregular altitude, replace the battery.
Caution: Dispose of old batteries properly. Keep batteries out of
reach of children. If swallowed, consult a physician immediately.
2. Data Scale Set Up
First, press the
AC (All Clear) button; the entire display will illumi-
nate and then “m” and “
°
C” symbols appear. Press the
S/S button
to chose between “
°
C” (celsius) and “
°
F” (fahrenheit). Press the
Mode button to chose between “m (meter)” and “ft (feet)”. Select
the desired scale and press the
Set button to fix the scale.
Note: If “
°
C” (celsius) scale is selected a 24-hour clock is dis-
played. If “
°
F” (fahrenheit) is selected a 12-hour clock is displayed.
3. Time Set Up
After the data scale is set, the display displays clock set up mode.
With each press of the
S/S button, the digits for hours increase by
one. (To increase rapidly, hold down the button.) Press the
Mode
button to select the minute digits. Adjust the minutes by pressing the
S/S button. Press the
Set button to set the time. After the clock
time is set, the AT-110 defaults to Hike mode.
4. Attaching Wrist Band
Press the main unit onto the ring of the wrist band. It can be mounted
perpendicularly or parallel to the belt. To remove the unit, twist it to
the left or the right.
5. Attaching to Your Body
By using a longer mounting belt (option), the unit can also be at-
tached on your leg, not only on your arm.
1. Adjust the belt length tentatively, according to the part to put the
unit on. (Make it a bit longer than it looks necessary.)
2. Roll the belt around the part to wear the unit, and hook the buckle
on the ring with the buckle lever lifted.
3. Pull the belt end to tighten, and lay down the buckle lever.
4. Pass the belt end through the belt loop.
5. To remove the unit, lift the buckle lever and detach the buckle
from the ring.
Note: Lift the buckle lever, when the buckle is attached to/de-
tached from the ring.
F
Close
Open
CR2032
1
2
3-1
3-2
4
Buckle
Belt loop
Ring
E
D
B
C
Alt. simbol
Temp. simbol
Ring
Hours
Minutes
Twist
Press