Connecting the camera to a computer, 123 wit, Importing images to a computer (windows) – Sony DSC-TX5 User Manual
Page 123
Ta
ble
of
Op
e
MENU/Settin
In
123
GB
Connecting the camera to a
computer
1 First, open the battery/memory card cover, then open the multi-connector
cover.
2 Insert a sufficiently charged battery pack into the camera, or connect the
camera to a wall outlet (wall socket) using the AC-LS5 AC Adaptor (sold
separately) and the USB/AV/DC IN Cable for multi-use terminal (sold
separately).
• Use a Type3-compliant USB/AV/DC IN Cable (sold separately).
3 Turn on the computer, then press
(Playback) button.
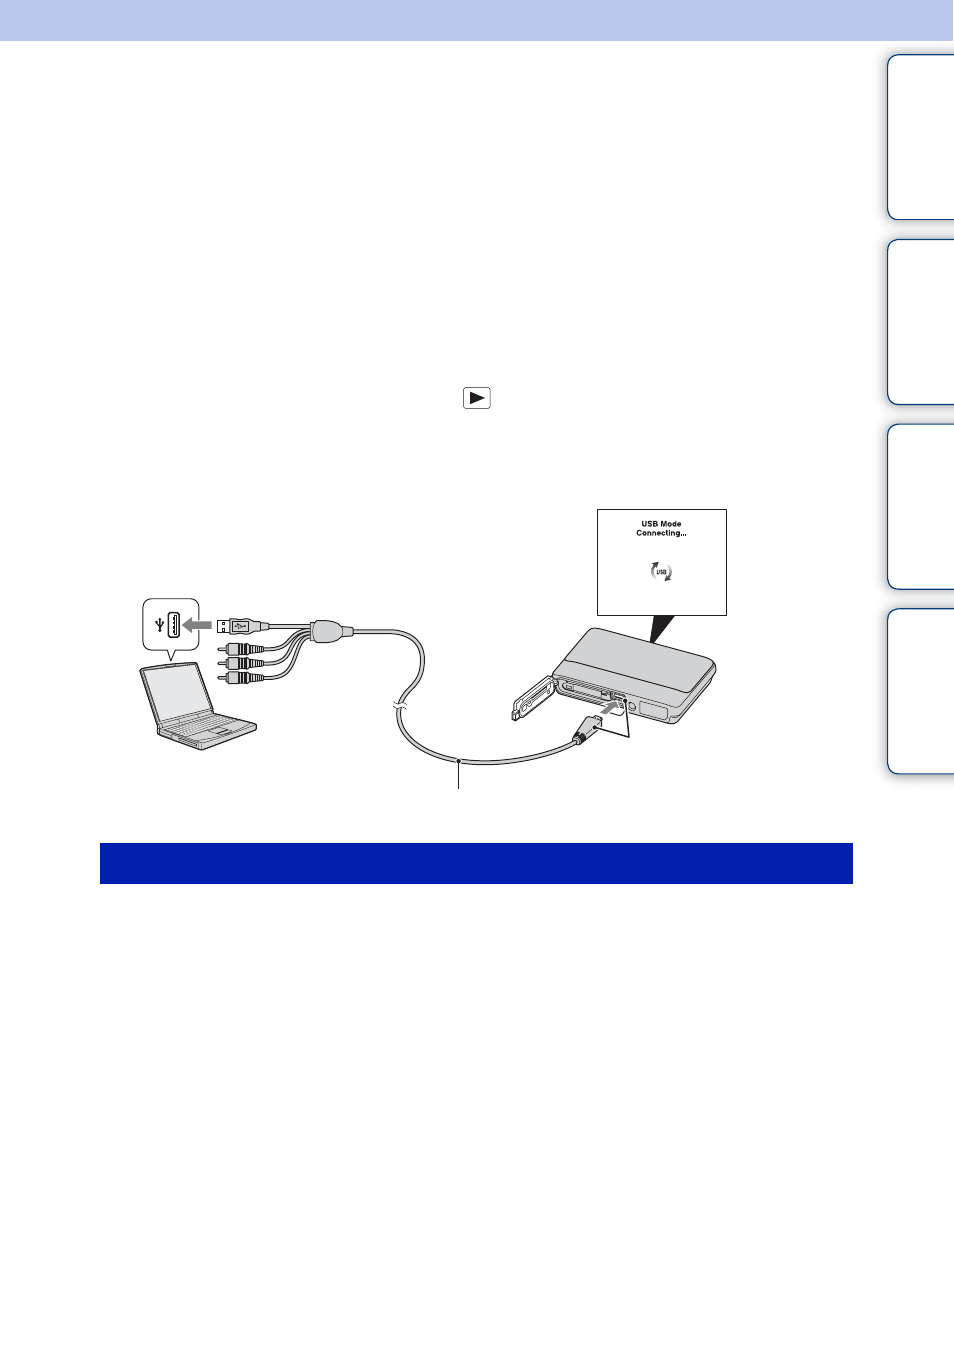
4 Connect the camera to your computer.
• When a USB connection is established for the first time, your computer automatically runs a program
to recognize the camera. Wait for a while.
“PMB” allows you to easily import images.
For details on “PMB” functions, see the “PMB Help”.
Importing images to a computer without using “PMB”
When the AutoPlay Wizard appears after making a USB connection between the camera and a
computer, click [Open folder to view files]
t
[OK]
t
[DCIM] or [MP_ROOT]
t
copy the
desired images to the computer.
Importing images to a computer (Windows)
1
To a USB jack of the computer
2
To the multi-connector
Cable for multi-use terminal