Installation, Setting the jumpers – AMX DAS-SIRIUS User Manual
Page 6
DAS-SIRIUS Tuner Module
2
DAS-SIRIUS Sirius Satellite Radio Tuner Module
Installation
Installing/removing Tuner Modules requires removing the cover from the Audio Controller, removing the
Tuner Option cover plate from the rear panel of the Controller, installing the Tuner Module, and setting
Jumpers on both the Tuner Module to specify each Tuner as either TUNER 1 or TUNER 2, and on the rear
board pin-bus of the Audio Controller to enable/disable Tuner 1 and 2.
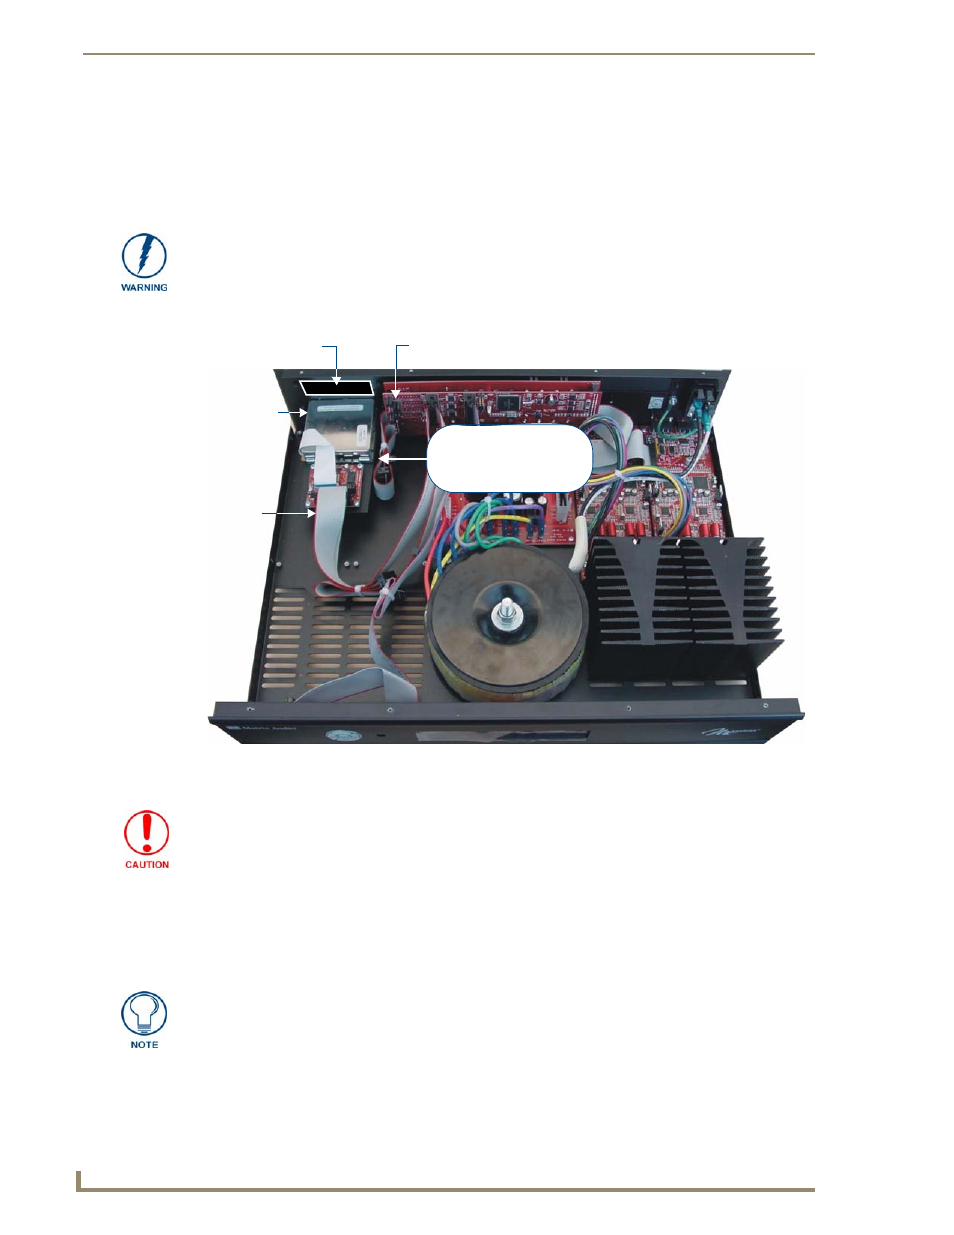
FIG. 2 provides orientation for the various internal components that must be accessed to install the Tuner and
set the Jumpers.
Setting the Jumpers
While Mi-Series and Tango Audio Controllers support 2 Tuner Modules in any combination, this document
describes installing the DAS-SIRIUS Tuner Module into Slot 1 (as TUNER 2), leaving the DAS-AMFM Tuner
Module in Slot 2 (as TUNER 1).
Disconnect all power sources before opening the chassis. Failure to disconnect
power before performing this installation may cause injury or death.
FIG. 2
Audio Controller - Internal view
front
Rear-Board Pin Bus
(Controller Jumpers)
rear
AMFM Tuner
Module
Tuner
Ribbon
Cable
(20-pin)
Slot 1
(with faceplate)
installed in
Slot 2
Tuner slots:
Top = Slot 1
Bottom = Slot 2
Discharge all static electricity from your body before touching any components of the
Tuner Modules or the Audio Controller. Failure to do so may lead to permanent
damage to the Tuner or Controller.
Because of the location of the Jumpers in the Controller and on the Tuner Module, it
may be easier to make all jumper settings before installing the Tuner Module in the
Controller.