Installation of compact flash upgrades – AMX NetLinx Integrated Controllers NI-3000 User Manual
Page 38
Installation and Upgrading
32
NetLinx Integrated Controllers
3.
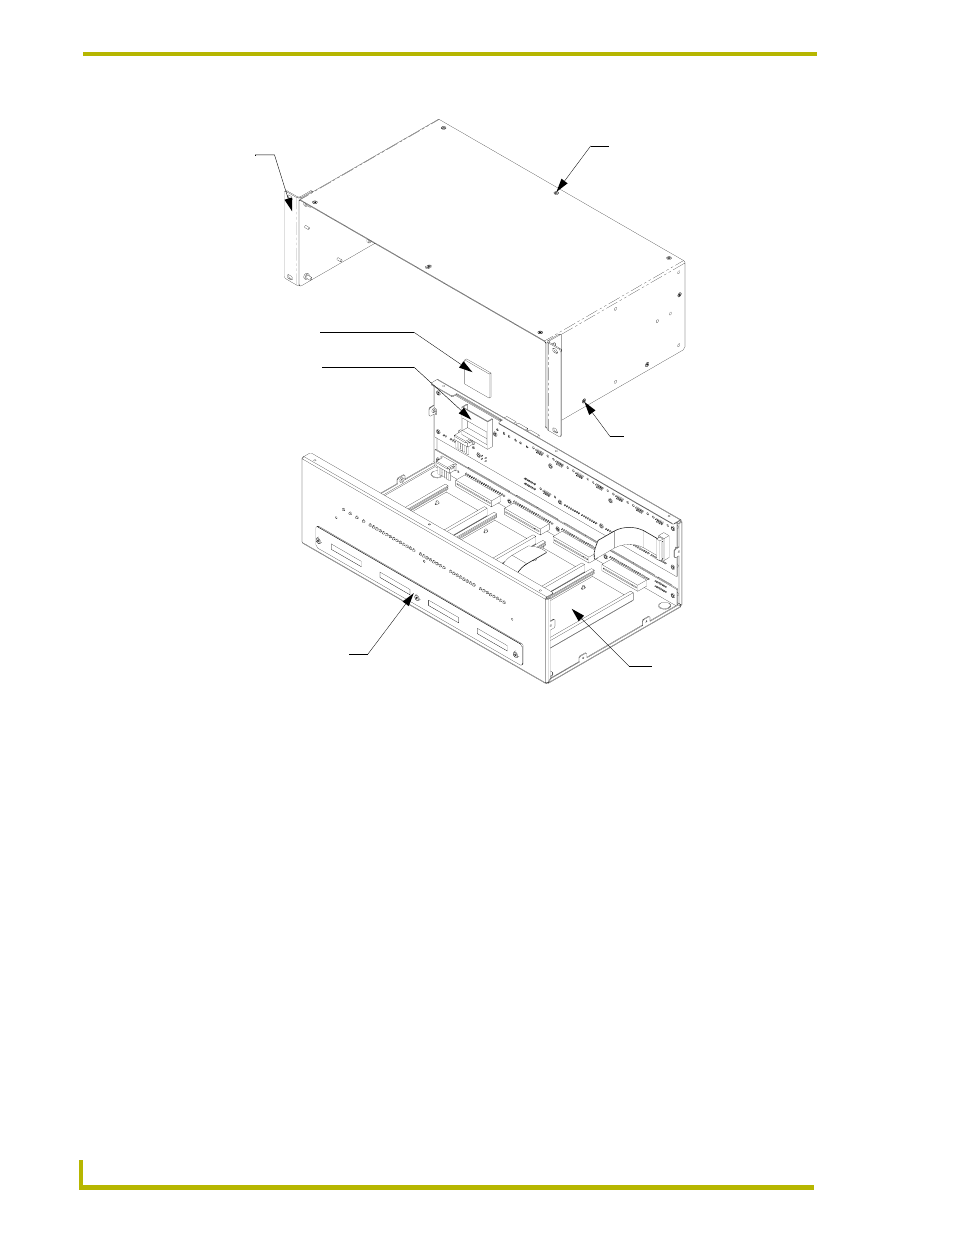
Carefully pull-up and remove the housing up and away from the Controller to expose the
internal circuit board (FIG. 20).
4.
Refer to the following Installation of Compact Flash upgrades for detailed replacement
information.
Installation of Compact Flash upgrades
1.
Discharge any static electricity from your body by touching a grounded metal object.
2.
Locate the 32 MB Compact Flash card on the main board. For more detailed information on
component locations, refer to FIG. 20.
3.
Insert a grounded flathead screwdriver into one of the Card Removal Grooves (located on
either side of the card), and gently pry the card up and off the connector pins. Repeat this
process on the opposite card removal groove. This alternating action causes the card to
"wiggle" away from the on-board connector pins.
4.
Slip your finger into the opening between the connector pins and the card, and push the card
out to remove it.
5.
Remove the upgrade card from it’s anti-static bag.
FIG. 20 Location of the Compact Flash within a sample Integrated Controller
Compact Flash
Mounting
Brackets
Compact Flash
insert location
NXC Card Slots
NXC Card Slot
faceplate
Chassis housing screws (top)
- 6 on top
- sides vary per model
Chassis housing screws (side)
- 4 on each side of the NI-4000
- 3 on each side of the
NI-3000/2000