Nikon L1 User Manual
Page 42
32
C
onnec
ting t
o
Televisions
, C
omput
ers
, and P
rint
ers
2
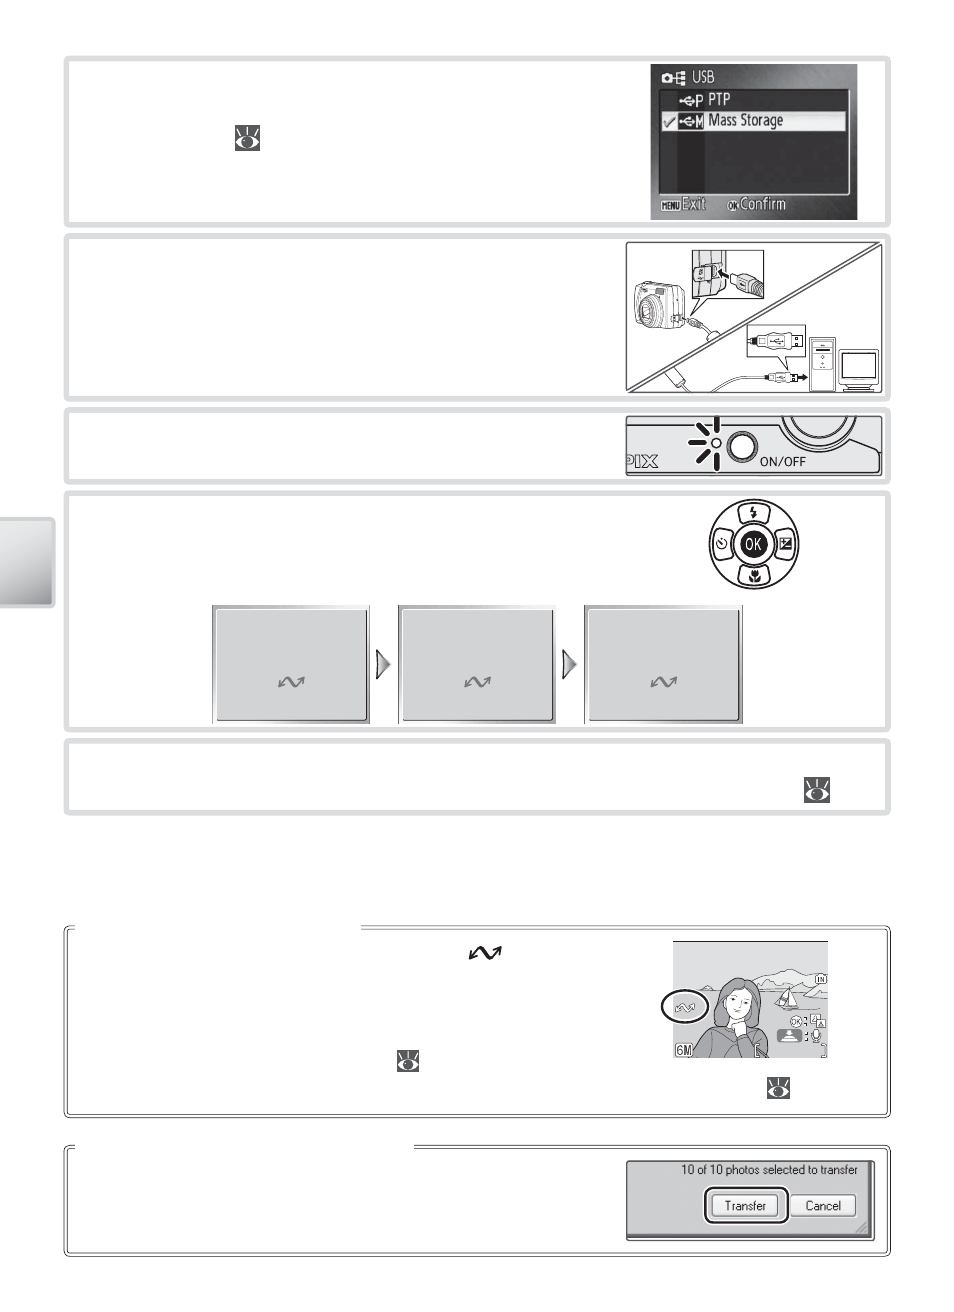
Choose an Interface > USB option as described
in “Choosing a USB Option for Connection to a
Computer” (
33).
4
Turn the camera on.
5
Press the center of the multi selector to copy all
marked pictures to the computer. The following
messages will be displayed:
PREPARING TO TRANSFER
PREPARING TO TRANSFER
PREPARING TO TRANSFER
TRANSFERING IMAGES TO
TRANSFERING IMAGES TO
COMPUTER
COMPUTER
TRANSFERING IMAGES TO
COMPUTER
TRANSFER COMPLETED
TRANSFER COMPLETED
TRANSFER COMPLETED
6
The pictures will be displayed in PictureProject when transfer is complete.
Disconnect the camera as described in “Disconnecting the Camera” (
33).
To copy both marked and unmarked pictures to the com-
puter, click the PictureProject Transfer button instead of
pressing the center of the multi selector in Step 5.
The PictureProject Transfer Button
Pictures marked for transfer are shown by a
icon during
playback. By default, all pictures are automatically marked
for transfer. Two options control transfer marking:
• Interface > Auto Transfer (setup menu): Choose On to
mark all new pictures for transfer (
46).
• Transfer Marking (playback menu): Change marking for existing pictures (
55).
Marking Pictures for Transfer
100NIKON
100NIKON
5
/
5
5
/
5
15:30
15:30
15:30
100NIKON
0005.JPG
0005.JPG
0005.JPG
10.10.2005
10.10.2005
10.10.2005
3
Turn the camera off and connect the USB cable as
shown at right.