Installing the switch – Allied Telesis AT-FS203 User Manual
Page 27
AT-FS200 Series Installation Guide
17
Installing the Switch
To install the switch, perform the following procedures:
1. Remove all equipment from the package and store the packaging in a safe
place.
2. If you are installing the switch as a standalone unit, attach the four rubber
feet to the base of the unit, placing one rubber foot in each corner. (For
rack-mount chassis installation, do not attach the feet.)
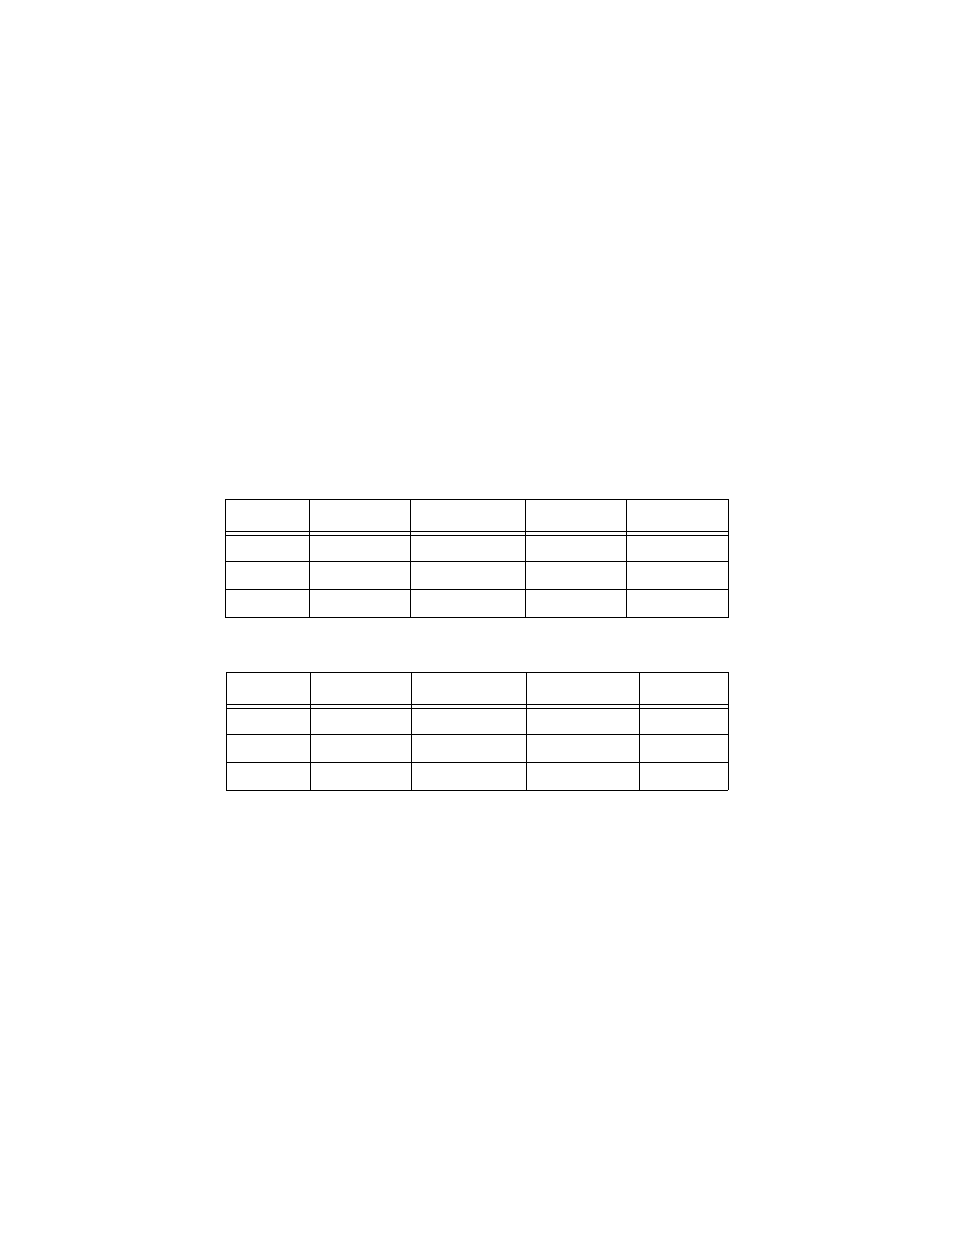
3. Configure the DIP switches on the rear panel of the unit. Refer to Figure
11 and Figure 12 for the location of the switches and Table 6 and Table 7
for the possible settings.
Table 6 DIP Switch Settings for the AT-FS201 and AT-FS202 Switches
Port
2
1 2
2
Speed (Mbps)
Duplex Mode
Auto-neg
Bytes
Up
10
Half
Off
1522
Down
100
Full
On
1518
Table 7 DIP Switch Settings for the AT-FS203 Switch
Port
1 2
1 2
1 2
Speed (Mbps)
Duplex Mode
Auto-neg (only)
Bytes
Up
10
Half
Off
1522
Down
100
Full
On
1518