Mounting the switch on a wall, Figure 5. attaching brackets for wall mounting – Allied Telesis AT-FS708/POE User Manual
Page 37
AT-FS708/POE Fast Ethernet Switch Installation Guide
37
Mounting the Switch on a Wall
You can mount the AT-FS708/POE Fast Ethernet switch on the wall in a
vertical position using the mounting brackets and plastic anchors that are
shipped with the switch.
Note
The plastic anchors used for wall mounting the switch are intended
for installation in walls made of sheet rock or concrete materials.
To mount the switch on a wall, perform the following procedure:
1. If attached, remove the rubber feet using a flat-head screwdriver.
2. Select a wall location for the switch.
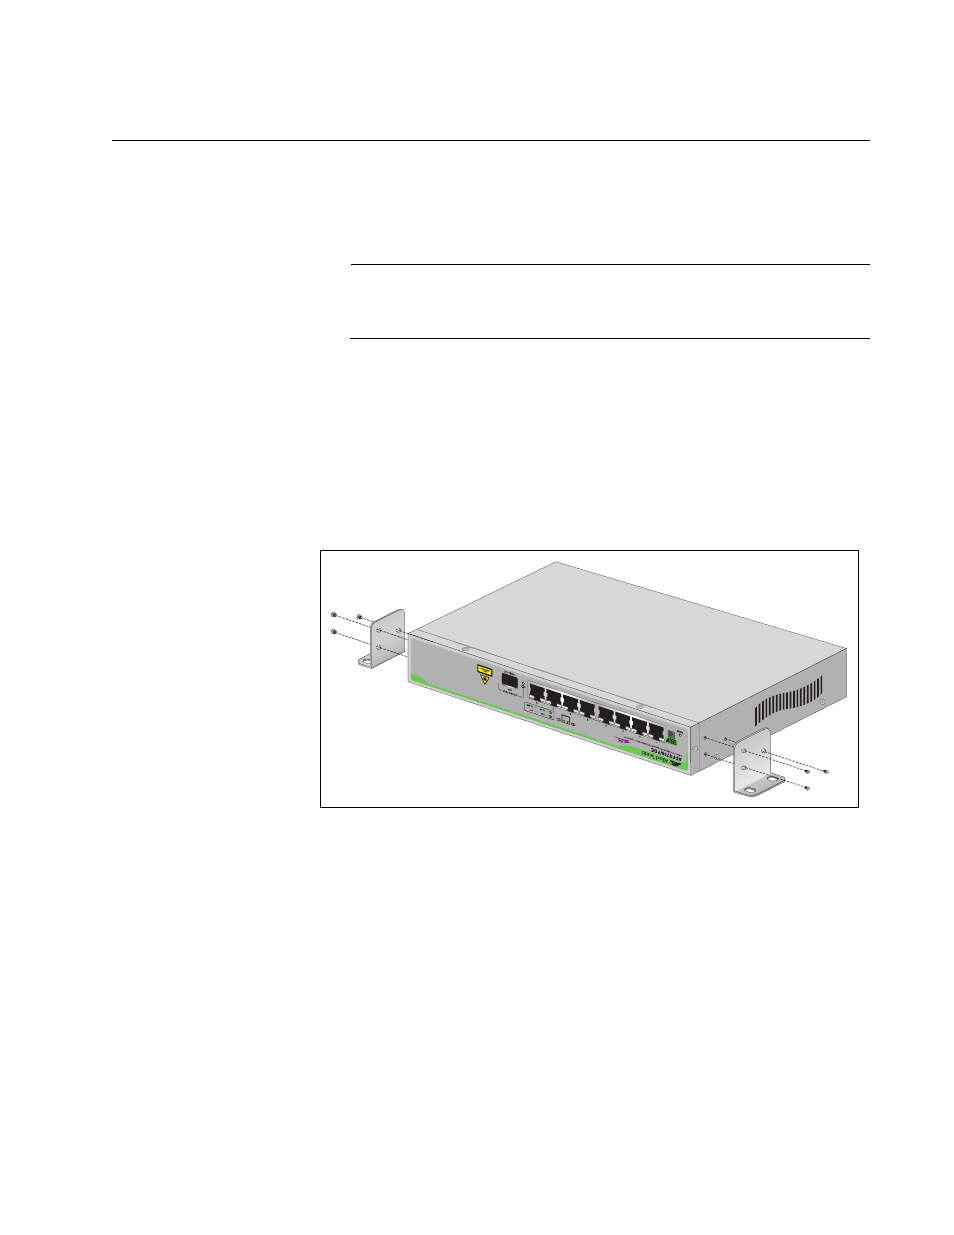
3. Turn the switch over and attach a mounting bracket to each side of the
switch using the bracket mounting screws, as shown Figure 5.
Figure 5. Attaching Brackets for Wall Mounting
4. Position the switch on the wall with the top of the switch against the
wall and the ports facing up. Make sure the switch is in a level position.
5. Mark the hole positions of the wall mounting bracket holes on the wall.
6. Drill four 0.635 cm (0.25 in) holes in the wall centered on the marks
made in step 5.
7. Insert the four plastic anchors into the holes.
8. Mount the switch on the wall using the self-tapping phillips-head
screws, as shown in Figure 6.
777
1604