Axis Communications Video Encoder Blade AXIS Q7406 User Manual
Page 9
AXIS Q7406 Installation Guide
Page 9
ENG
LISH
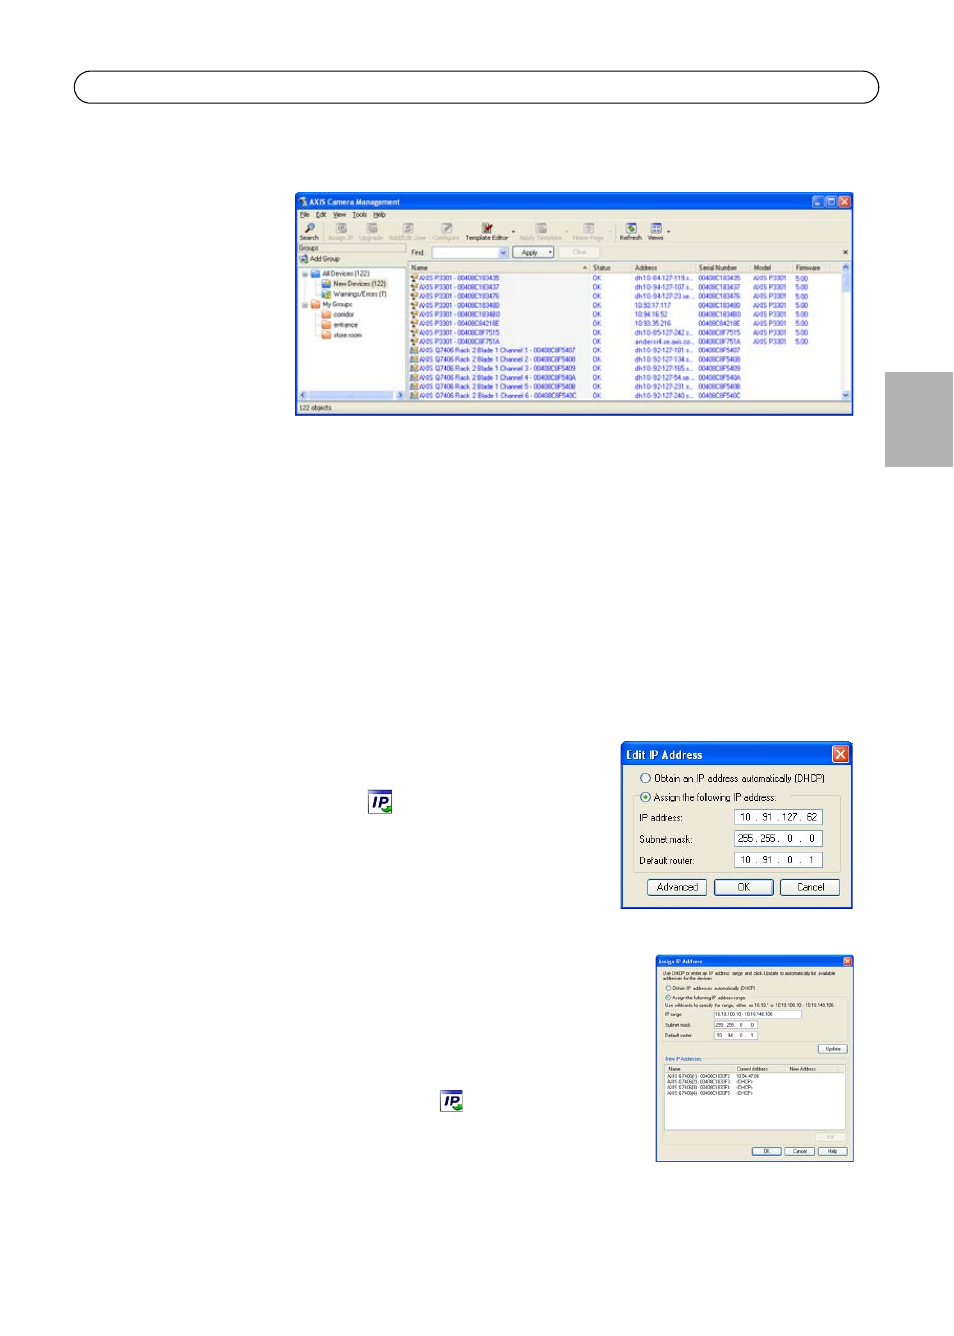
AXIS Camera Management - multiple cameras/large installations
AXIS Camera
Management can
automatically find and
set IP addresses, show
connection status, and
manage firmware
upgrades for multiple
Axis video products.
Automatic discov-
ery
1. Check that the AXIS Q7406 is connected to the network and that power has been applied.
2. Start AXIS Camera Management.
3. When the AXIS Q7406 appears in the window, right-click the link and select
Live View Home
Page:
• If the AXIS Q7406 is installed in an AXIS 291 1U, the AXIS Q7406 appears in the win-
dow with one entry for each of its six video inputs (e.g., AXIS Q7406(1)).
• If the AXIS Q7406 is installed in an AXIS Q7900, the AXIS Q7406 appears in the win-
dow with one entry for each of its six video inputs (e.g. AXIS Q7406 Rack 2 Blade 1
Channel 6)
4. See page 10 for instructions on how to assign the password.
Assign an IP address in a single device
1. Select one of the AXIS Q7406s in AXIS Camera Management
and click the
Assign IP button.
2. Select
Assign the following IP address and enter the IP
address, the subnet mask and default router the device will
use.
3. Click the
OK button.
Assign IP addresses in multiple devices
AXIS Camera Management speeds up the process of assigning IP
addresses to multiple devices, by suggesting IP addresses from a
specified range.
1. Select the devices you wish to configure (different models can be
selected) and click the
Assign IP button.
2. Select
Assign the following IP address range and enter the range of
IP addresses, the subnet mask and default router the devices will
use.
3. Click the
OK button.