3 installing the housing, 1 sunshield mounting (if equipped), 4 changing the germanium glass – Videotec NTM User Manual
Page 8: 5 limits to use, 7 maintaining and cleaning, 1 window cleaning, 4 changing the germanium glass 6.1.5 limits to use
EN - English - I
nstruc
tions manual
6
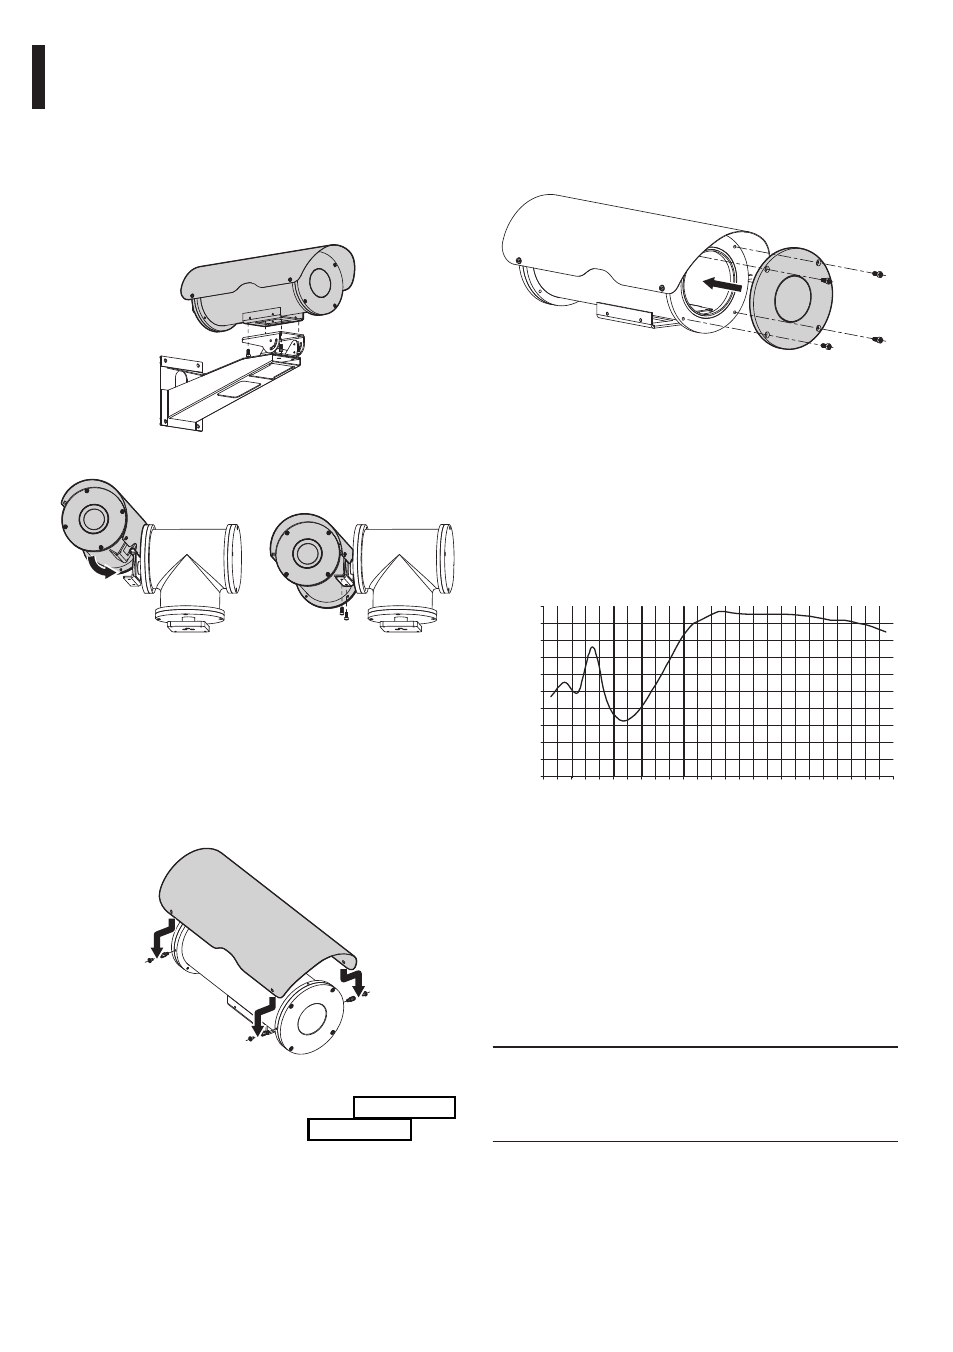
6.1.4 Changing the germanium glass
Germanium glass has two colours. Inside the housing
there is an anti-reflection coating that changes
colour (depending on the direction of vision). On the
outside, on the other hand, there is a scratchproof
coating to make the glass dark grey in colour.
Fig. 09
6.1.5 Limits to use
The housing can be installed with 2 kind of flange:
• With window Ø 55mm and glass 2mm thick.
• With window Ø 70mm and glass 2mm thick.
The graph shows the visible spectrum for the
window.
0
10
20
30
40
50
60
70
80
90
100
2,5
3
4
5
6
7
8
9 10 11 12 13 14
Ge AR 2 sides - 2mm Thick
Wavelength (µm)
Tr
ansmittanc
e (%)
Fig. 10
Field of application from 7.5 to 14 µm.
7 Maintaining and cleaning
7.1 Window cleaning
We suggest to use neutral soap diluted with water
or specific products for lens cleaning applied with a
soft cloth.
g
h
Avoid ethyl alcohol, solvents, hydrogenated
hydrocarbide, strong acid and alkali. Such
products may irreparably damage the
surface.
6.1.3 Installing the housing
This section describes how to install the housing on
the wall bracket or on the Pan & Tilt head.
Be sure to have rightly fitted the internal slide of the
housing according to the installation required. The
housing base must be fitted under the housing in
case of wall bracket mounting and on the housing
side in case of Pan & Tilt head mounting.
Fig. 06
Wall bracket.
Fig. 07
Pan & tilt.
6.1.3.1 Sunshield mounting (if equipped)
Screw the equipped exagonal mounting spacers
on the side-flanges of the housing in diametrically
opposite position and according to the mounting
required, in order to mount the sunshield above the
housing. Fit the sunshield on the housing and fix it
with the equipped screw on the spacers.
Fig. 08
Mount the housing on the wall bracket (Fig. 06, page 6)
or on the Pan & Tilt head bracket (Fig. 07, page 6).