Instructions – Texsport 14260 Padre Islan Hammock User Manual
Page 2
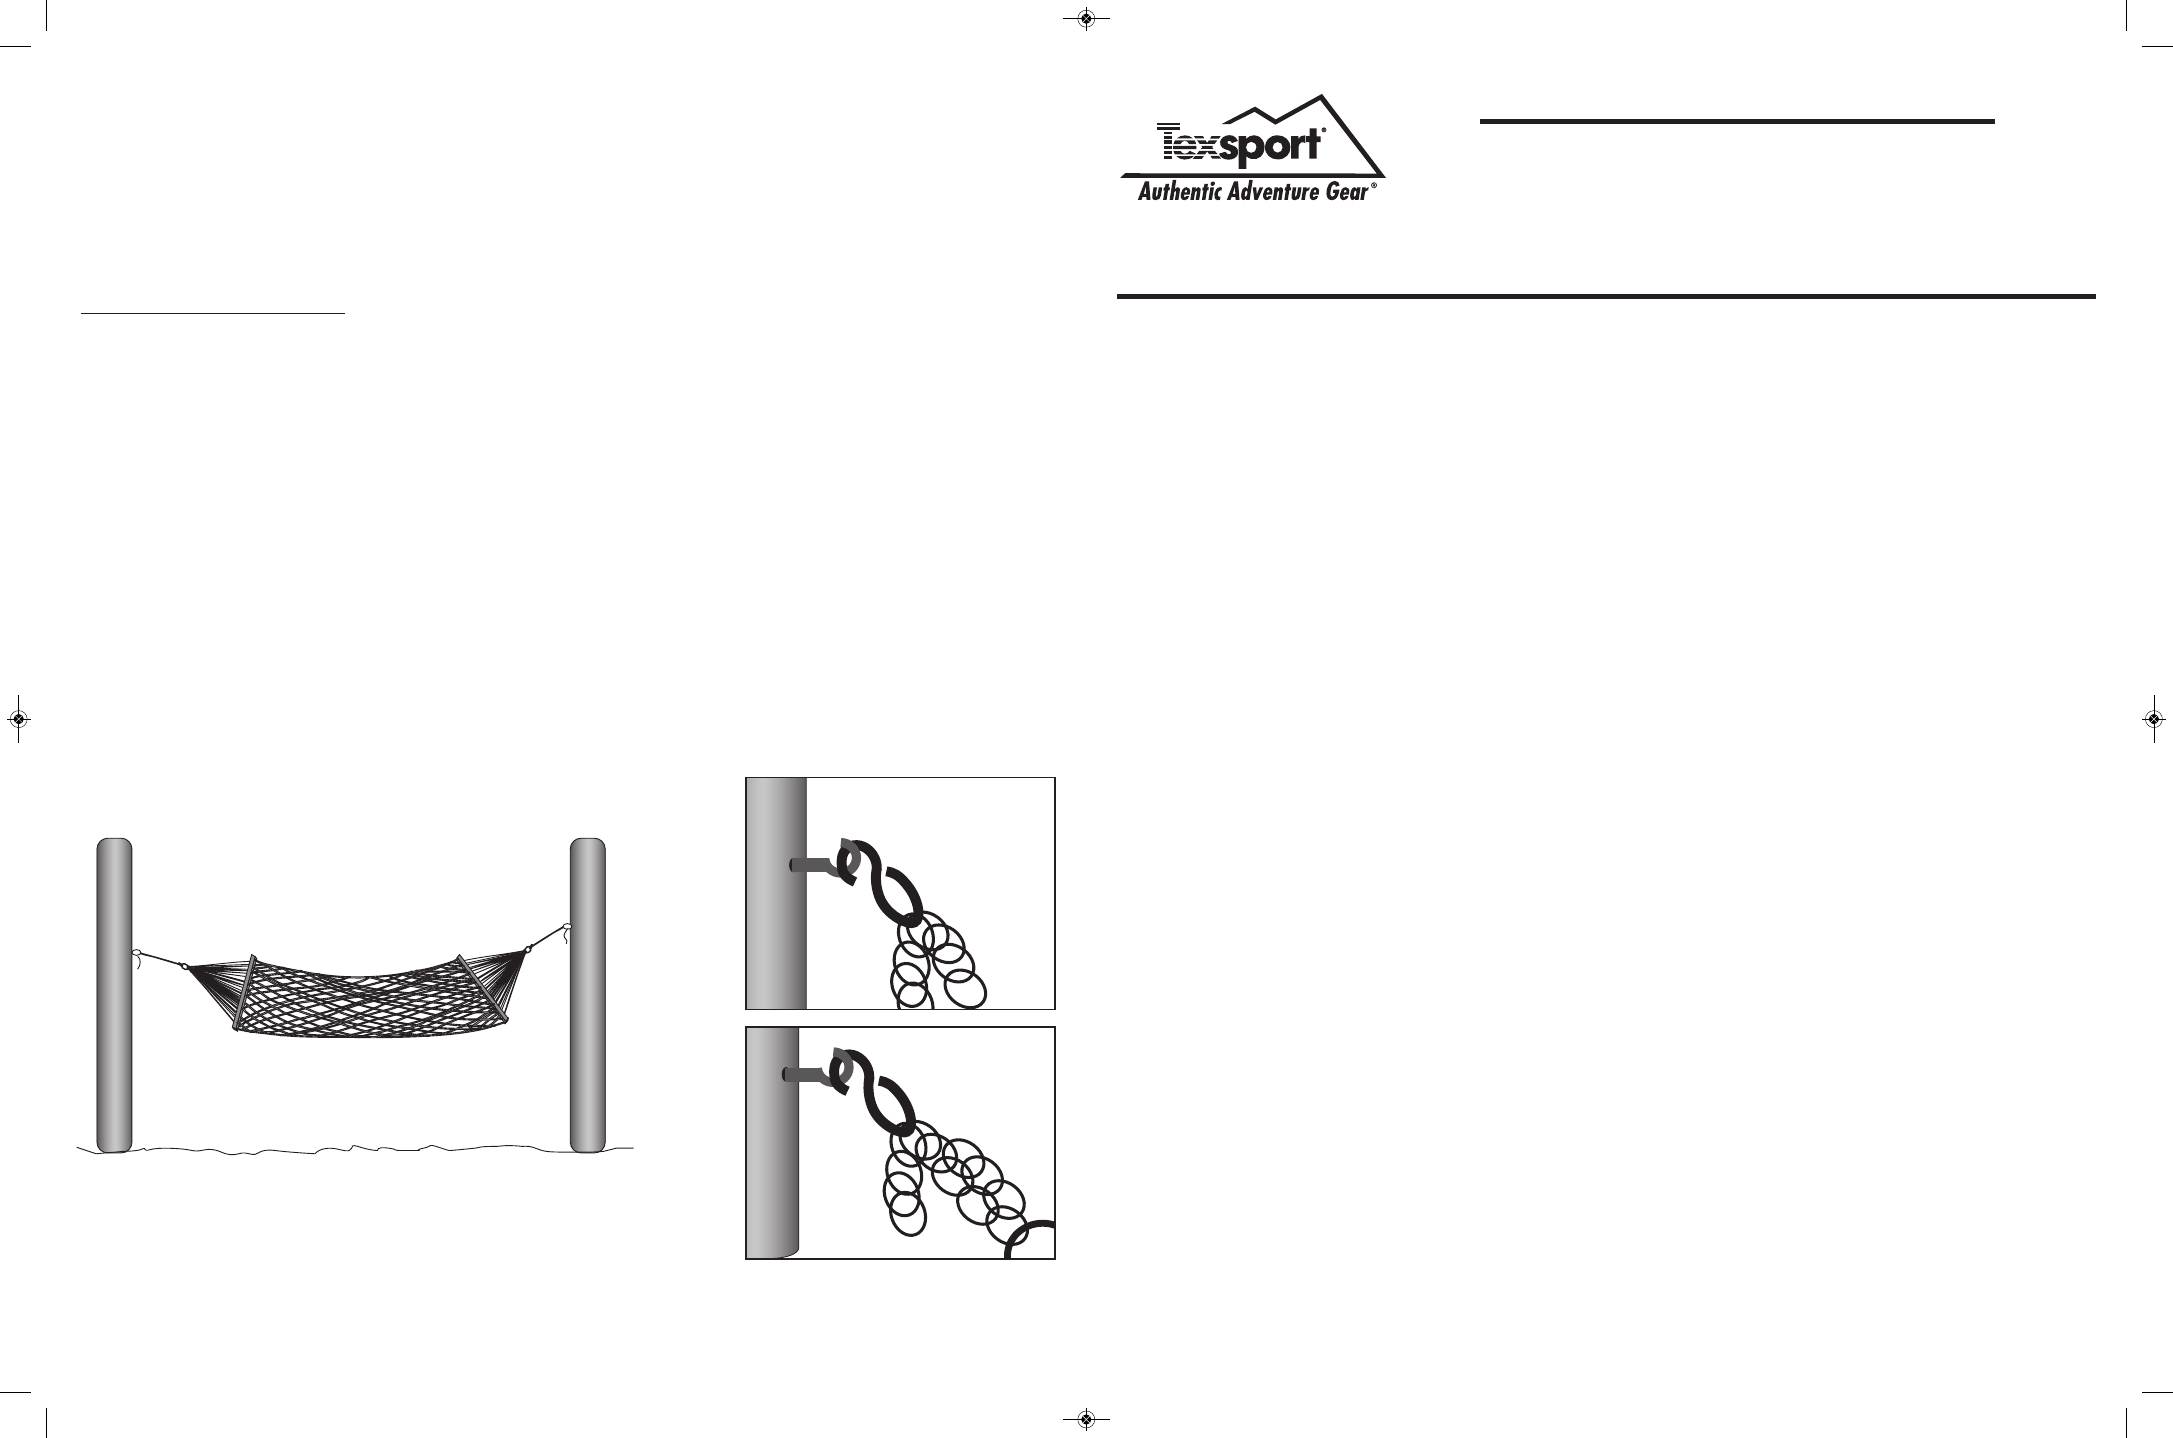
d. ..Tie the rope to the hook as shown in the upper part of Figure B. You may adjust this later
depending on how high you wish to hang the hammock and as the ropes stretch to their
maximum length. DO NOT WRAP THE ROPE AROUND THE HOOK. ALSO BE CERTAIN THE
ROPE IS NOT TWISTED. Either of these may cause the rope to fray and break.
e. ..Once you have used your hammock, it may hang lower due to stretching of the ropes. This
is to be expected. To have the hammock hanging at the height originally chosen, simply
reitie the rope using a shorter distance to thehook. Make certain you follow the precau-
tions regarding hanging and straightening of the rope.
INSTALLATION OF THE POSTS:
STEP 1 ..If you choose to hang your hammock using a post (or between two posts), please observe the
following:
a. ..Materials: Each post used should be 6” x 6” x 9’ tall minimum for rectangular posts, or
6” diameter X 9’ tall for round posts. Use 160 lbs. of premixed concrete for each post.
b. ..Dig two holes about 10” in diameter and 3’ deep. They should be spaced at least 18”
greater than the length of the hammock.
c. ..Place the posts in the holes and be sure that no more than 6’ of each post extends out of
the ground.
d. ..Prepare the concrete according to the package directions. Pour 160 lbs of mixed concrete
in each hole until the concrete reaches the level of the ground surface. Be certain to pack
the concrete around the posts and the hole and remove air pockets in the concrete.
e. ..While the cement is still wet, angle the posts slightly away from the side on which the
hammock will be hung. If you are using rectangular posts, be certain that the 6” side of
the posts face toward the hammock. Allow concrete to harden for at least 24 hours.
f. ..When you have completed installation of the post (or posts), mount hammock as explained
in steps 2a through 2f.
5
’
to
6
’
Fig. A
Fig. B
QUESTIONS:
If you should have any questions, problems or comments, please call our Customer
Service Department at 1-800-231-1402 or e-mail [email protected]. This
Department is open M–F from 8 a.m.–5 p.m. CST.
Fig. C
INSTRUCTIONS
#14260 • Hamaca con Soga de Algodón Padre Island
®
(no incluye herramientas)
Muchas gracias por comprar esta hamaca Texsport. Por favor, lea y comprenda cada paso de las instrucciones de armado.
Esperamos que disfrute su nueva hamaca y que le ofrezca muchos años de placer al aire libre.
Precaución: No salte en la hamaca. No la use como hamaca de plaza. Los niños tienden a usar las hamacas
como trampolín o intentan colgarse de los ganchos. Esto es peligroso y no es el uso pretendido de la
hamaca. Además, causará un desgaste excesivo y un desgarro de la hamaca y de las piezas de montaje.
El límite de peso máximo de seguridad para esta hamaca es de 159 kg. Por favor, tenga en cuenta y
cumpla con este límite.
MANTENIMIENTO:
Si cumple con las siguientes sugerencias, su hamaca le proporcionará muchas horas de placer de descanso:
• Guarde su hamaca en un lugar fresco y seco. Asegúrese de que no esté mojada ni húmeda cuando la enrolle y guarde; de lo
contrario la soga podrá llenarse de moho o pudrirse. Si la hamaca se humedece, déjela secar completamente antes de guardar-
la.
• Aunque esta hamaca está prevista para ser utilizada en el exterior, la exposición a las condiciones climáticas como por ejemplo a
los rayos ultravioleta o a la nieve alterará el aspecto y reducirá el período de vida útil de la hamaca. Por lo tanto, por favor,
maneje su hamaca con cuidado para poder disfrutarla al máximo.
• No cuelgue ni guarde su hamaca en un lugar donde pueda tener acceso la vida silvestre. Evite guardarla cerca de productos
químicos y pesticidas que si se derraman podrían afectar la fuerza o integridad de las fibras utilizadas en esta hamaca.
• Lave su hamaca a mano o en el CICLO SUAVE de su lavarropas utilizando un detergente suave. Enjuague bien. Use el programa
más bajo del secarropas durante sólo 8 a 10 minutos o cuelgue para secar. Déjela secar completamente antes de utilizarla o
guardarla. No utilice ningún producto con lavandina o productos químicos fuertes.
INSTALACIÓN DE LA HAMACA:
PASO 1 .Primero determine dónde desea colgar la hamaca. Podrá ser colgada entre dos postes, en nuestra
base especialmente diseñado para hamacas, en su pórtico, o simplemente en cualquier lugar que usted pre-
fiera. Lo ideal sería que el espacio en el que tenga planeado colgar su hamaca sea 46 cm. mayor que el
largo total de su hamaca. SIEMPRE PRUEBE CUIDADOSAMENTE SU HAMACA ANTES DE CADA USO PARA ASE-
GURARSE DE QUE ESTÉ BIEN COLGADA Y EN CONDICIONES SEGURAS.
PASO 2 .Si está instalando la hamaca donde una superficie de madera sostendrá un gancho, como por
ejemplo entre árboles, postes o en travesaños, observe lo siguiente:
a. ASEGÚRESE DE QUE EL OBJETO DE MADERA TENGA POR LO MENOS 15 CM. DE DIÁMETRO Y QUE LA
MADERA SEA APROPIADA PARA SOSTENER EL GANCHO. ALGUNAS MADERAS SON MUY BLANDAS, COMO
POR EJEMPLO EL SAUCE, LA PALMERA O EL HAYA Y ES POSIBLE QUE NO PUEDAN SOSTENER LA HAMACA
CUANDO SE ENCUENTRE EN USO.
b. Perfore un orificio piloto de 8 cm a una profundidad de 2,5 cm. en cada punto de instalación
aproximadamente 1,5 m. / 1,8 m. sobre el nivel del suelo. La altura exacta dependerá de la distancia que
haya entre los dos puntos de instalación de la altura a la que desea colgar la hamaca. (Observe la Figura A
– reverso).
c.
Atornille un gancho en cada uno de los orificios piloto perforados. Utilice un destornillador parcial-
mente introducido en el ojo del gancho para nivelar mientras atornilla el gancho en su lugar. ASEGÚRESE DE
ATORNILLAR EL GANCHO COMPLETAMENTE EN LA MADERA HASTA QUE EL OJO SE AJUSTE EN SU UBICACIÓN
DE MONTAJE. SI LA HAMACA SE MONTA UTILIZANDO UN TRAVESAÑO, ASEGÚRESE DE QUE EL GANCHO SE
ENCUENTRE DIRECTAMENTE EN EL CENTRO DEL TRAVESAÑO Y ESTÉ ATORNILLADO DE FORMA SEGURA.
PRECAUCIÓN: NO CONTINÚE AJUSTANDO EL TORNILLO UNA VEZ QUE ESTÉ COMPLETAMENTE INCRUSTADO.
d.
Enganche una cadena al gancho como se muestra en la parte superior de la Figura B. Podrá ajustarla
más tarde, dependiendo de la altura a la que desee colgar la hamaca y a medida que las sogas se vayan
estirando a su máxima longitud. NO ENROSQUE LA CADENA ALREDEDOR DEL GANCHO. TAMBIÉN
ASEGÚRESE DE QUE LA CADENA NO ESTÁ RETORCIDA. Cualquiera de estas cosas podrá hacer que los
14260 Instructions 9-13_14260 Instructions 2-04.qxd 9/27/13 2:52 PM Page 2