Texsport 02855 Wyoming Arbor User Manual
Page 2
SOME ADDITIONAL INFORMATION:
Make sure you stake the arbor (with the arbors stakes included) in windy weather, or if you anticipate afternoon winds coming up
while you are away from your campsite. Stake one corner, then stake each consecutive corner in a clockwise rotation. Make sure the
arbor remains tight. Always place your arbor a safe distance from your campfire - unstaked arbors placed upwind of the fire can be
blown into the fire. Arbors placed downwind of the fire are often showered with tiny sparks that can burn holes into the lightweight
fabrics of your arbor. The frame system on this arbor was designed to collapse during high winds. By collapsing in the wind, the
frame will not break; thus offering you years of continued use. We recommend that you practice setting up your arbor at home
before taking it out into the wilderness.
WATERPROOFING YOUR ARBOR:
Texsport arbors are made from coated water-repellent fabrics. However, the sewing process, necessary in all arbor fabrication, can
cause water leakage where the sewing needles have perforated the fabric in the seams. Without treatment the arbor will leak. Every
new arbor needs to be seam sealed to make it water tight. We recommend using Texsport Spray Waterproofing/Seam Sealer which
may be found at your local outdoor outfitter or camping store.
STEP 4 - Assemble the 2 long
roof arch poles. Push 1 pole
through the roof sleeves and
insert it into the top center hole
of the joint. Repeat this step for
the remaining pole.
STEP 5 - Tie the poles to the
arbor skin on the roof to secure.
STEP 6 - This is what your arbor
should like now.
STEP 7 - Assemble 2 sections of
the 3 section steel leg pole. Insert
the top of the assembled pole
section into the remaining bot-
tom hole of the molded joint.
Repeat this step with the remain-
ing 3 corners.
STEP 8 - Snap on the speed clips
to the steel legs to secure arbor
to frame.
STEP 9 - Connect the last section
of the leg poles to raise arbor to
full height. This is what your
arbor should like now.
STEP 10 - Stake down your arbor
in through the rings at all 4 cor-
ners. NOTE - IN HIGH WINDS, IT
IS NECESSARY TO GUY ROPE
YOUR ARBOR SO IT DOES NOT
FLY AWAY. PLEASE FOLLOW THESE
INSTRUCTIONS TO GUY ROPE
YOUR SHELTER.
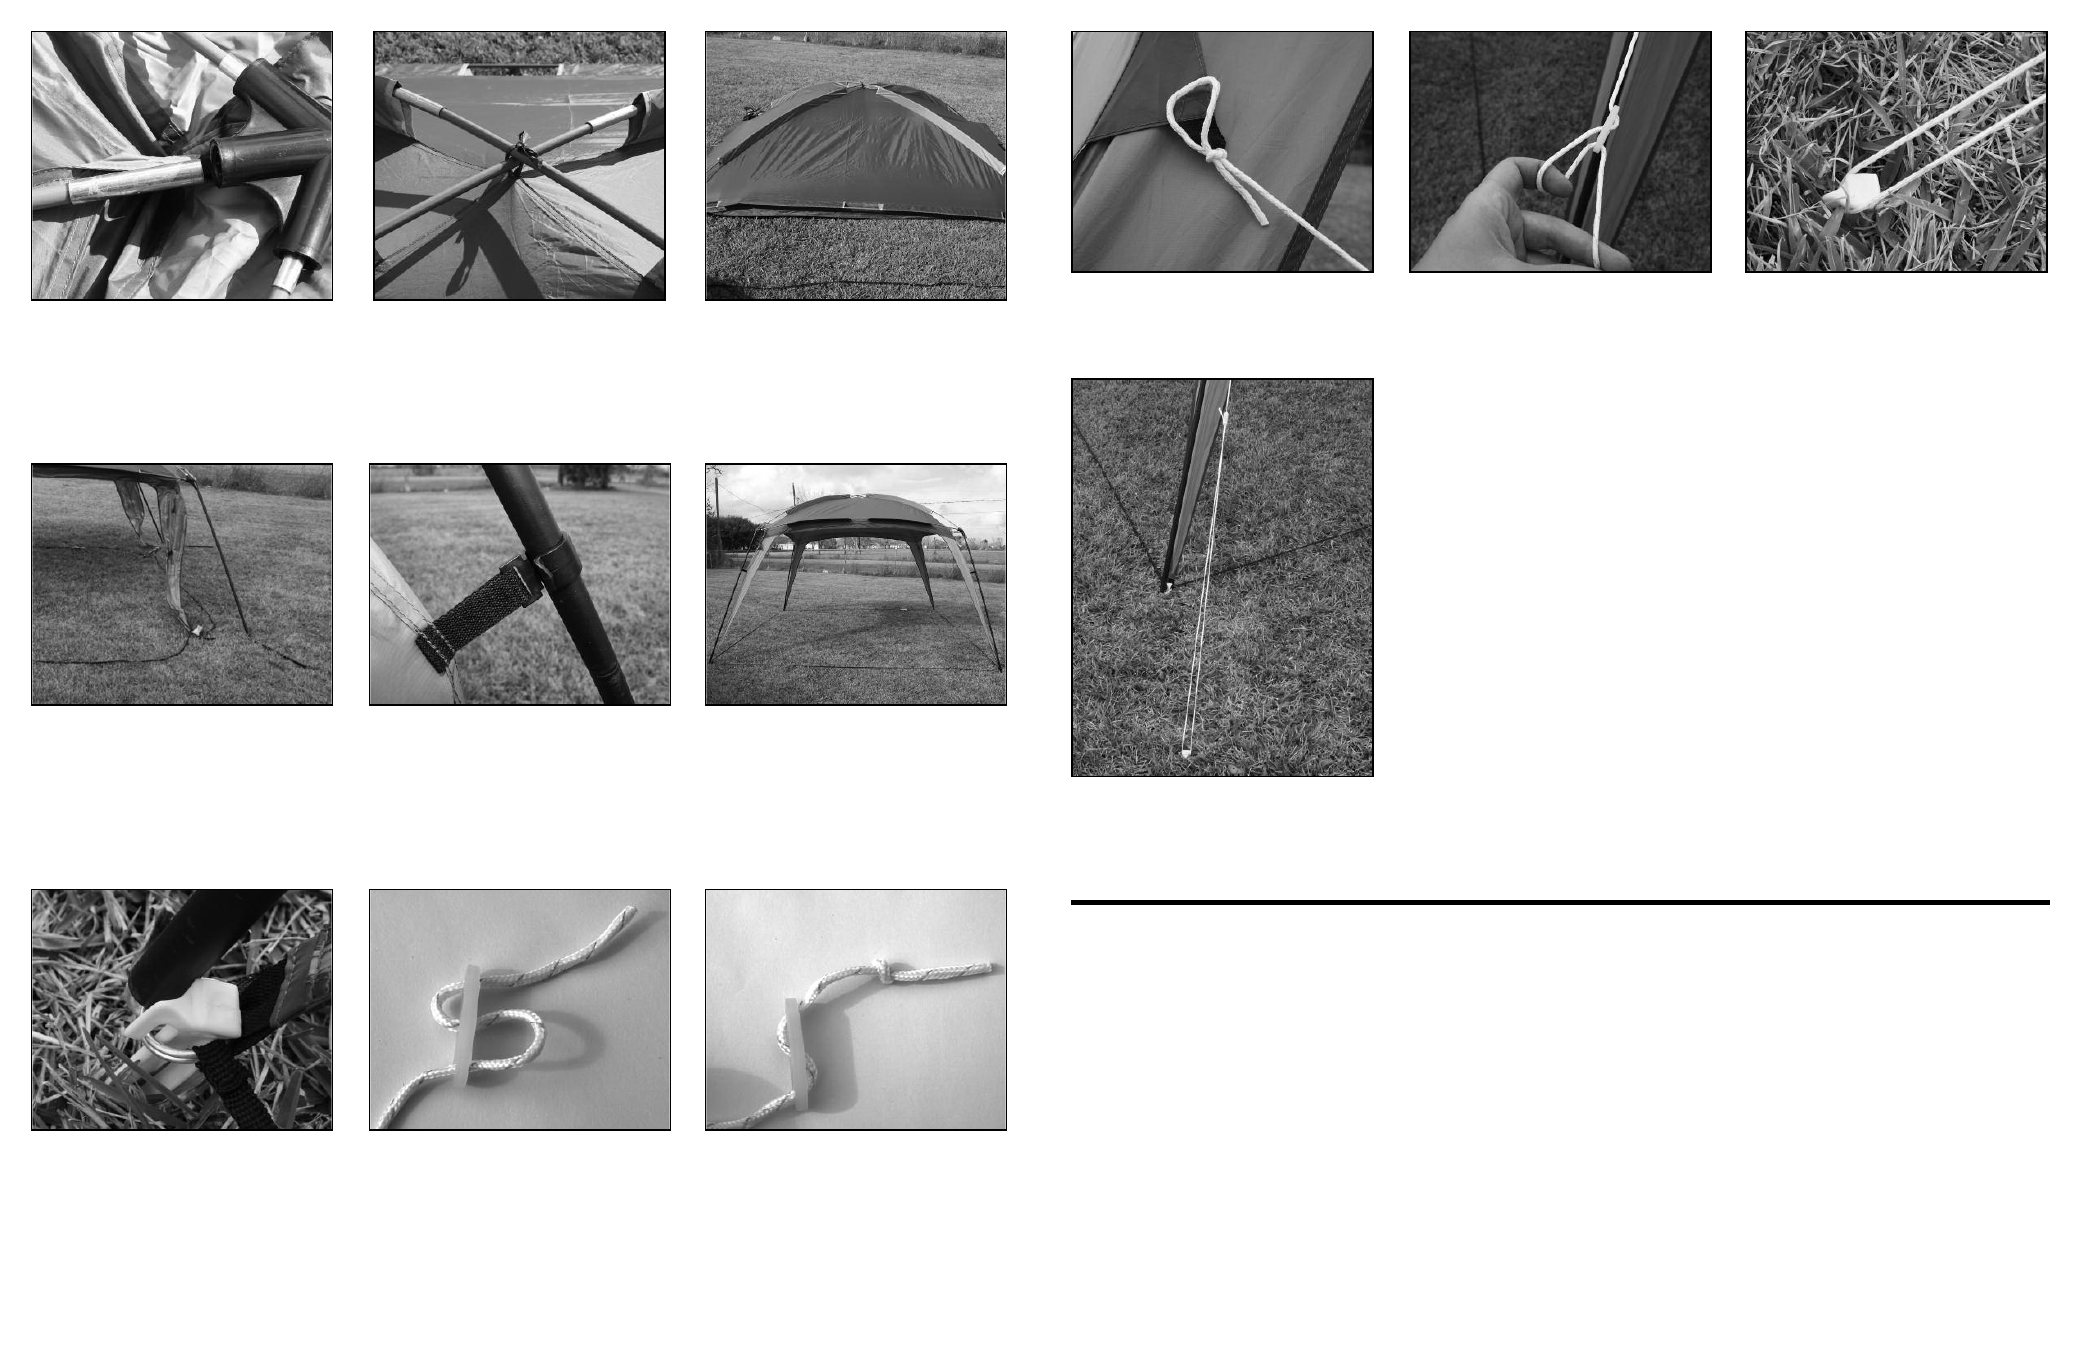
STEP 11 - Insert the guy rope into
the clew in this order pictured
above. Through the top of the
bottom hole. Up through the
back of the middle hole. Back
down through the top top hole.
STEP 12 - Tie a knot at the end
so the rope does not slip out.
STEP 13 - Tie the other end of the
guy rope to the shelter.
STEP 16 - To adjust the tension,
slide the clew up or down along
the guy rope.
STEP 14 - Pull the bottom section
looped in the clew out. The knot
will not let the rope slip out.
STEP 15 - Loop this around the
stake’s head and push into the
ground.