Texsport 01323 Sequoia Pass Tent User Manual
Page 2
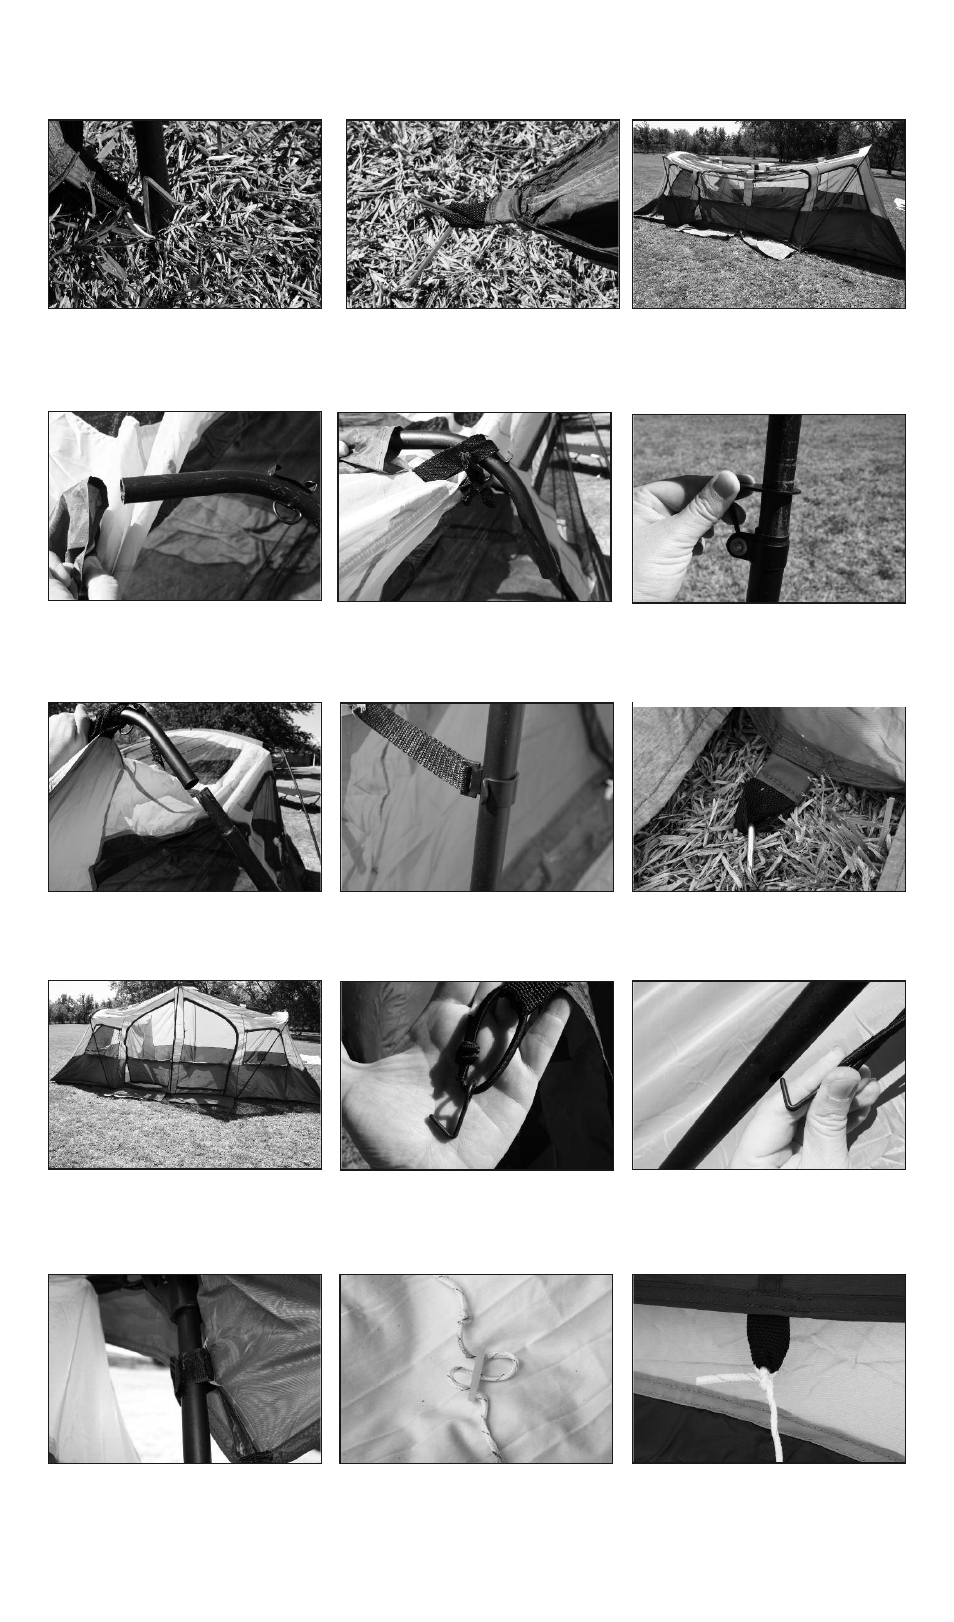
STEP 7 - Stake down at the pin and
ring. Repeat steps 2 - 6 for the other
tent eave.
STEP 9 - This is what your tent should
like at this point.
STEP 8 - Stake down the tabs at the
side doors.
STEP 13 - Insert the assembled leg
pole into the center roof pole. Now
adjust the center pole to make the tent
tight.
STEP 14 - Attach speed clips to center
leg poles.
STEP 15 - Stake down all the other
tabs around the tent and mud mats.
STEP 10 - Assemble the curved chain-
corded roof poles (G) and (F) and
insert it through the roof sleeve.
STEP 11 -
Loop the web straps to the
poles and tie to secure as shown
above.
STEP 12 - Assemble the long chain-
corded center leg poles (D) and insert
into the long adjustable base pole.
Extend only half way.
STEP 16 - This is what your tent should
look like.
STEP 17 - To attach the rainfly, locate
the attached hooks.
STEP 18 - Lower center leg poles and
drape the rainfly over the tent and in-
sert the hooks into the small holes of
the side legs.
STEP 19 - Raise center leg poles so tent
is tight again, and secure the rainfly
with attached velcro to side legs.
STEP 20 - It is recommended in windy
weather to secure your tent with guy
ropes. Insert the guy rope into clew as
shown above.
STEP 21 - Tie the other end of the guy
rope to the tabs on the fly.