Dake Model Zip 28 User Manual
Page 4
4
1. Installing machine to base:
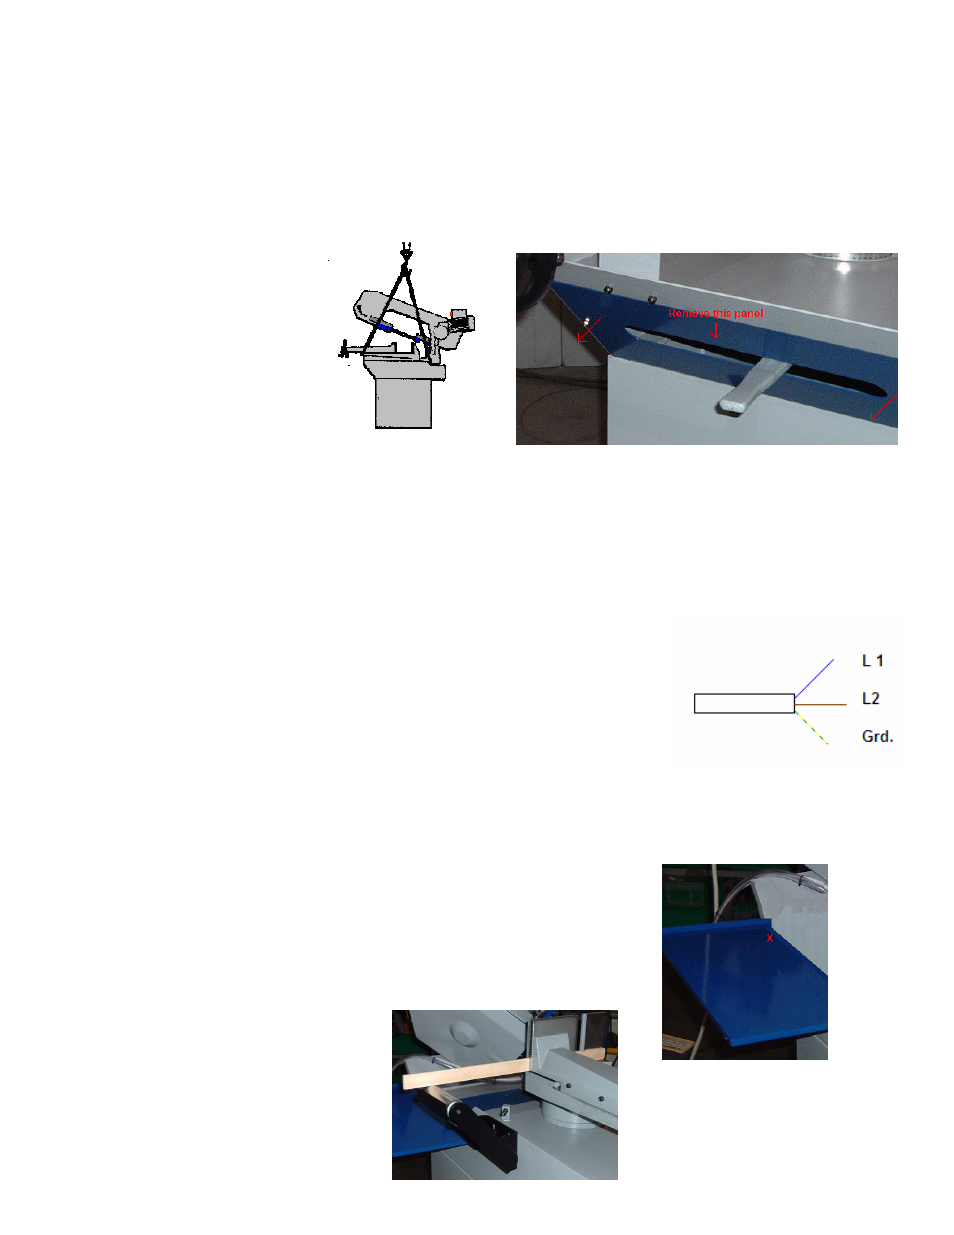
1.4 Carefully strap the saw as shown in drawing figure 3. Lift the saw and set carefully onto the
base that is anchored to the floor. With straps still on the saw remove the front blue access panel.
(Figure 4) With the panel removed and using the 4 supplied bolts, bolt the machine onto the base and
tighten bolts securely.
Replace the access panel.
Figure 3 figure 4
1. Power connections:
NOTE: before connecting power make sure main power is OFF and make sure there are no
damaged parts on the machine, and that all components move freely and are not rubbing,
binding etc.!
1.5
Connection of power to this machine must be done by a qualified electrician.
Machine
is supplied with a power cord that can have a plug (20 amp) installed or can be hardwired into a
suitable power source. Minimum 20 amp service is recommended for this machine.
1. Accessory installation:
1.6 Installation of the drip tray, roller support and stock stop can be done at this time.
1. The drip tray is mounted to the left rear of the saw to prevent coolant from dripping onto the
floor while cutting miters. On the back left hand side of the saw (Approx. by the red X see figure
5) is a bolt, remove this bolt. Fit the tray with the folded lip over the saw edge and align the hole
in the lip of the tray with the bolt hole. Install bolt and snug up.
2. Roller assembly is mounted just in front of the drip tray on the
Left hand side of the machine. This roller is bolted to the machine using
The bolts and washers supplied and that are screwed in the saw at the
Mounting point. Remove the bolts and install the roller only figure
tightening the bolts. Using a straight piece of material clamped in the
Vise flat on the table, adjust the roller up to this material and tighten
Bolts. (See figure 6) Check the
Level of the roller both rear and
Front. Both must be at the same
Height.
Figure 5
Figure 6