ARI Armaturen CONA S PN40 EN User Manual
Page 10
Page 10
Rev. 0040805002 1404
Operating and installation instructions
CONA
®
S - Ball float steam traps
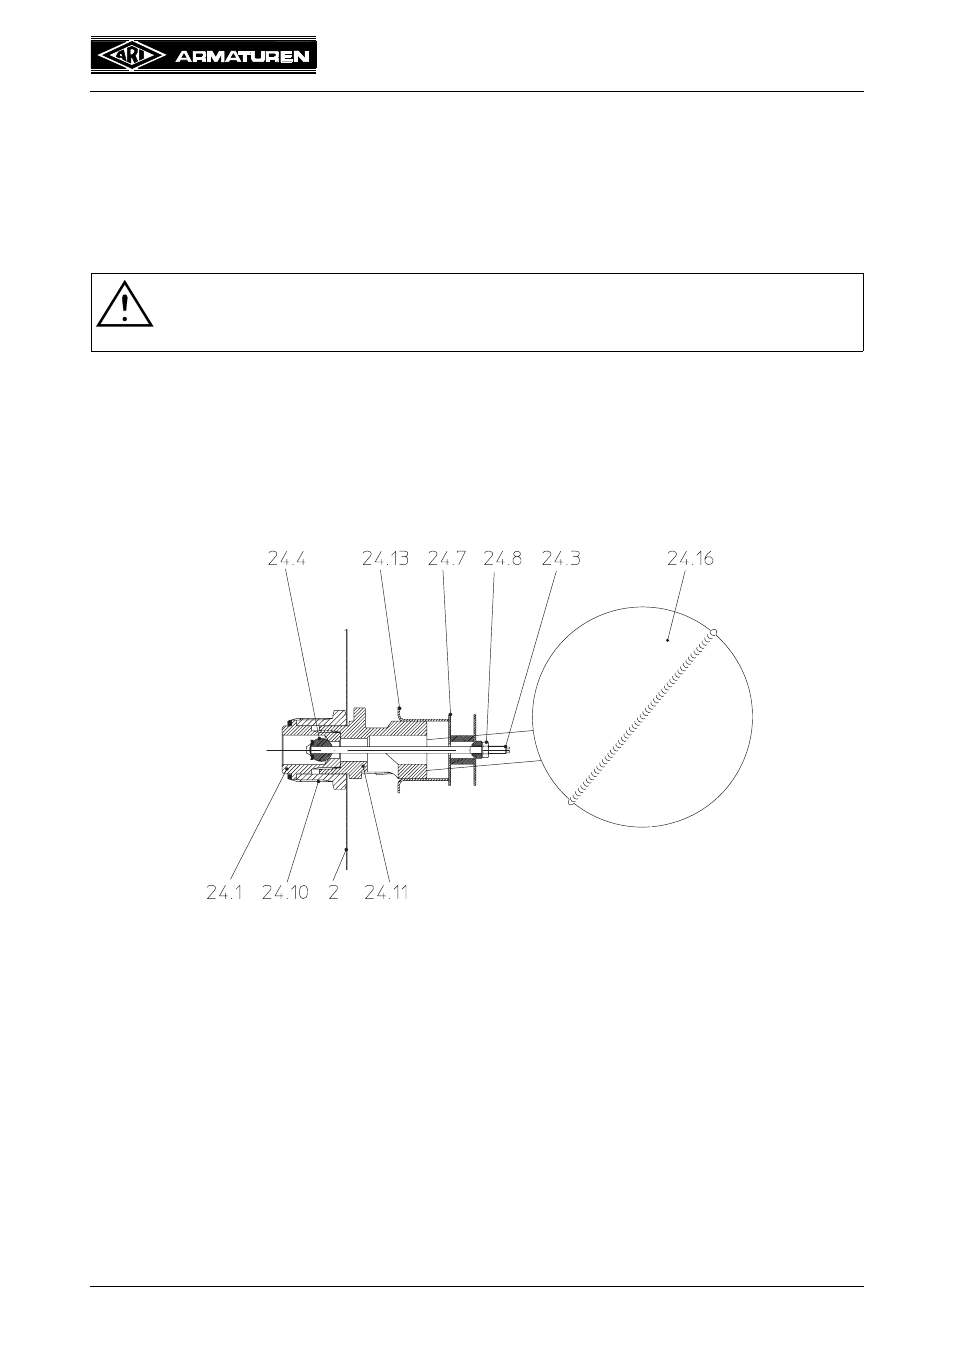
7.2 Changing the installation position
(see Fig. 1- Fig. 2 page 4 and Fig. 3 page 7)
- Position body (Pos. 1) as desired, bearing in mind the direction of flow.
- Remove hood (Pos 16), then slacken hollow-core screw (Pos. 24.10) approximately 1/2
turn.
- Rotate controller (Pos. 24) 90º in the direction required.
- Tighten hollow-core screw (Pos. 24.10) by holding against nozzle part (Pos. 24.11).
- Inspect and if necessary replace body seal (Pos. 17).
- Put on hood (Pos. 16) with the drain plug (Pos. 50) pointing diagonally down.
- Fit hexagonal nuts (Pos. 28) (see 7.5) and tighten crosswise.
- Reconnect pressure compensation pipe to the union for the pressure compensation line
(Pos. 52).
ATTENTION !
The union for the pressure compensation line (Pos. 52) at the hood
(Pos. 16) must point up!
Fig. 5: Controller, cpl.